
Create Print Job Manually
Select Printing from the navigation menu on the left.
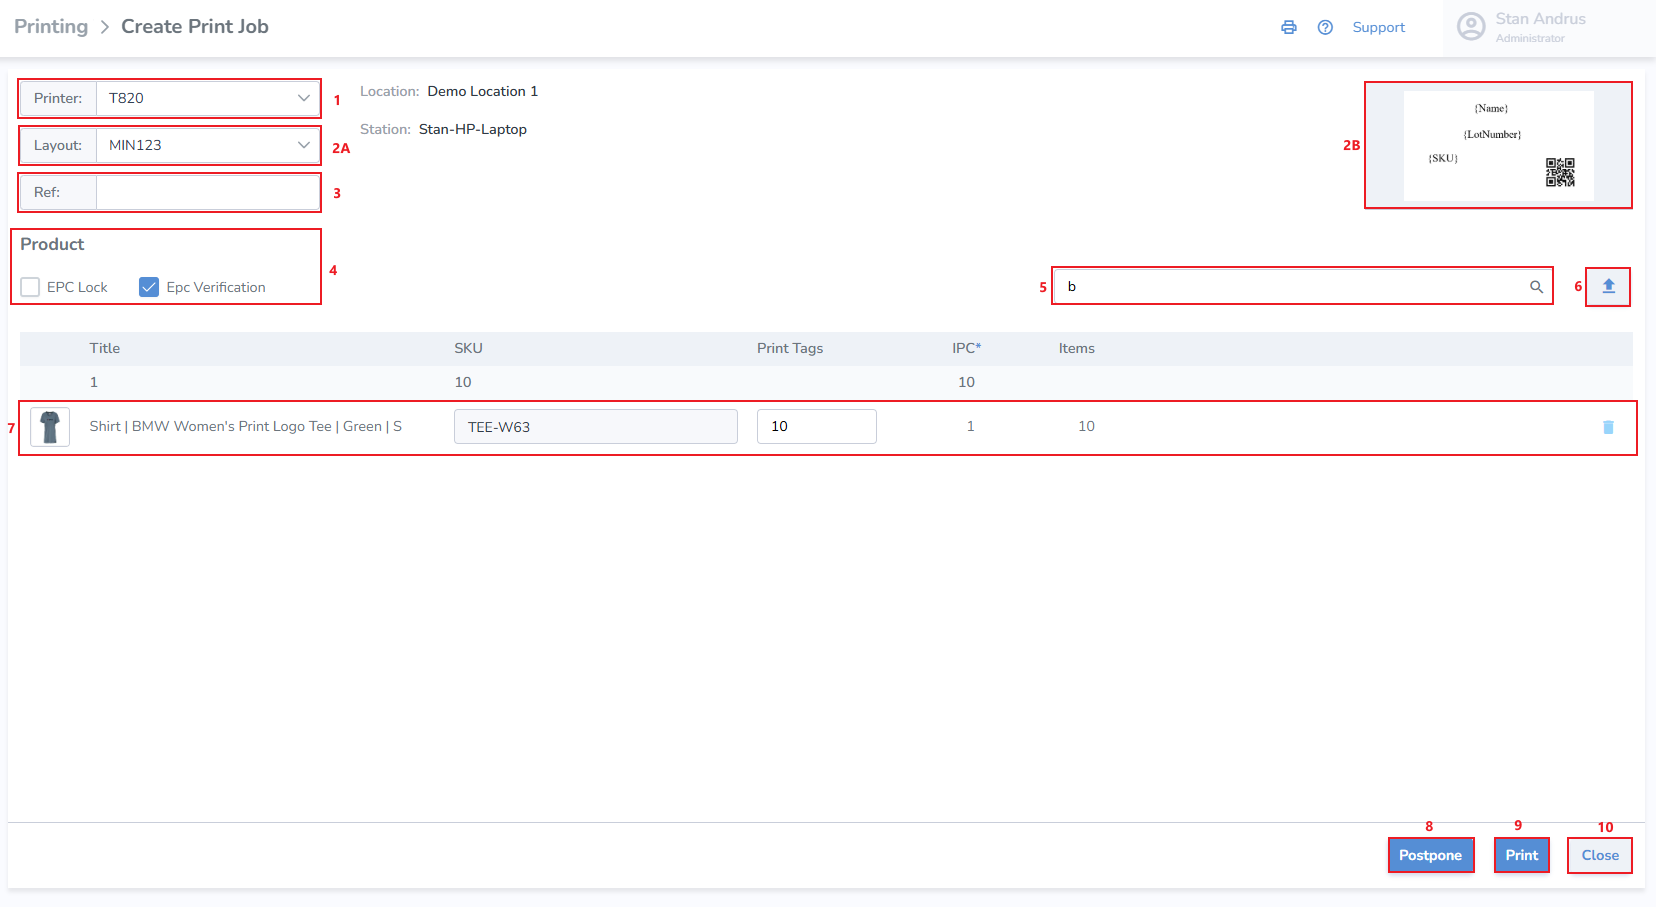
- Select the printer you wish to print to
- A. Select the desired layout. B. A preview of the label appears to the right
- Ref provides a window to enter a related reference field
- Print Job settings to enable EPC lock and/or enable EPC Verification for the job. These settings can be permanently enabled from the Printer Profile page.
- Search and add the item(s) you wish to print from the search bar on the right.
- Uploader to to upload print job details
- Once added, you can change the quantity of tags you'd like to print for the item.
- Print - When ready, click 'Print' at the bottom right of the page to print immediately.
- Postpone - If you would like to print the labels at a later time, click 'Postpone' and start printing later.
- Close - If you would like to cancel the print job altogether, click 'Close' and no information will be saved.
From this point, you can add optional tag-specific information such as born date, expiration date, sell by date, lot number, serial number, or cost. None of it is required, but if you do not change anything, the tag’s default born date will be the day it is printed. To add this information, click on the name of the item once and the details panel will pop up on the right