Zebra ZD621R: Setup Wireless Connection (WiFi)
This setup guide ensures your printer is properly configured for network printing with secure WiFi connectivity.
Prerequisites
Before starting the setup, please make sure that your station has the "Show network printers" option set in your Print Station settings. Contact your Manager if you need assistance.
Connection Setup Steps
1. Launch Wizards
On the printer home screen, tap Wizards.
2. Select Connection
Tap Connection and then Start Connection.
3. Configure Network Settings
Wi-Fi Configuration
- Select Wi-Fi > Tap ✓
- Set IP Port to
6101 - Set IP Alternate Port to
9100> Tap ✓ - Set Wired IP Protocol to
All> Tap ✓
Wireless Network Settings
- Set the country > Tap ✓
- Select WPA PSK > Tap ✓
- In Pre-shared Key, enter your WiFi password > Tap ✓
- Tap Set All > Tap ✓
Network Name and Protocol
- In ESSID, set your WiFi name > Tap ✓
Note: Case sensitive - must match exactly as shown in other devices' WiFi lists.
Example: Wifi_Network_Name12345
- Set WiFi IP Protocol to
All> Tap ✓
Bluetooth Configuration
- Set Bluetooth On/Off to
Off> Tap ✓ - Set Bluetooth Discovery to
Off> Tap ✓
Security Settings
- In Friendly Name, Tap ✓
- In Security, set value to
3> Tap ✓ - In Authentication PIN, > Tap ✓
- In Bluetooth Bonding, set to
Off
4. Complete Setup
Tap End Wizard.
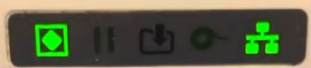
Verification
You should see the message: "Connection Wizard Complete"
After completion, observe the network indicator (right side of screen):
- Will display red for approximately 1 second
- Will then turn green (indicating successful connection)
- Printer should appear as Online in Simple RFID Website