
Calibrate your printer
Calibrate from the web portal
Make sure the printer is unpaused before calibrating: Unpause your printer
You can calibrate your printer from the web portal. This can be done from three places:
Option 1: From the Menu Bar

- Access the Available Printers icon at the top-right of the page.

Locate the desired print station and click the Calibrate icon to the right.

Finally, click Calibrate to start the calibration process.

- Accepting this prompt will then send both the media and ribbon and RFID calibrations to the printer, which will proceed automatically with the following steps:
- Media and Ribbon.
- Then a pause for roughly 10 seconds.
- And then the RF calibration, which will take longer; the labels will periodically inch out of the printer for approximately one minute. At the end of the process it will feed out 2 or 3 labels before stopping completely.
- After the calibration has completed:
- Open the printer and roll back the labels so the blank tags may be used—precision is not necessary
- Un-pause the printer
- Now you are ready to print.
If the printer continues to VOID labels, repeat the process. If the issue persists, perform a calibration directly from the printer itself.
Option 2: From the printer's Printer Profile page
The printer profile page contains details for each connected printer. Users can navigate to this page from the Available Printers pop-out menu, or the Station Settings
Printer Profile Details
- Location the printer is connected to
- 'Station' (Host PC) the printer is connected to
- Serial Number of the Printer
- Firmware Version of the Printer
- Date the printer was setup
- Printer DPI: 203, 300, or 600
- Connection Method: USB or Ethernet
- Print Station connectivity indicator
- Printer connectivity indicator
- Notes section
- Calibrate Printer button
- Save button to save changes
- Close button to exit the page
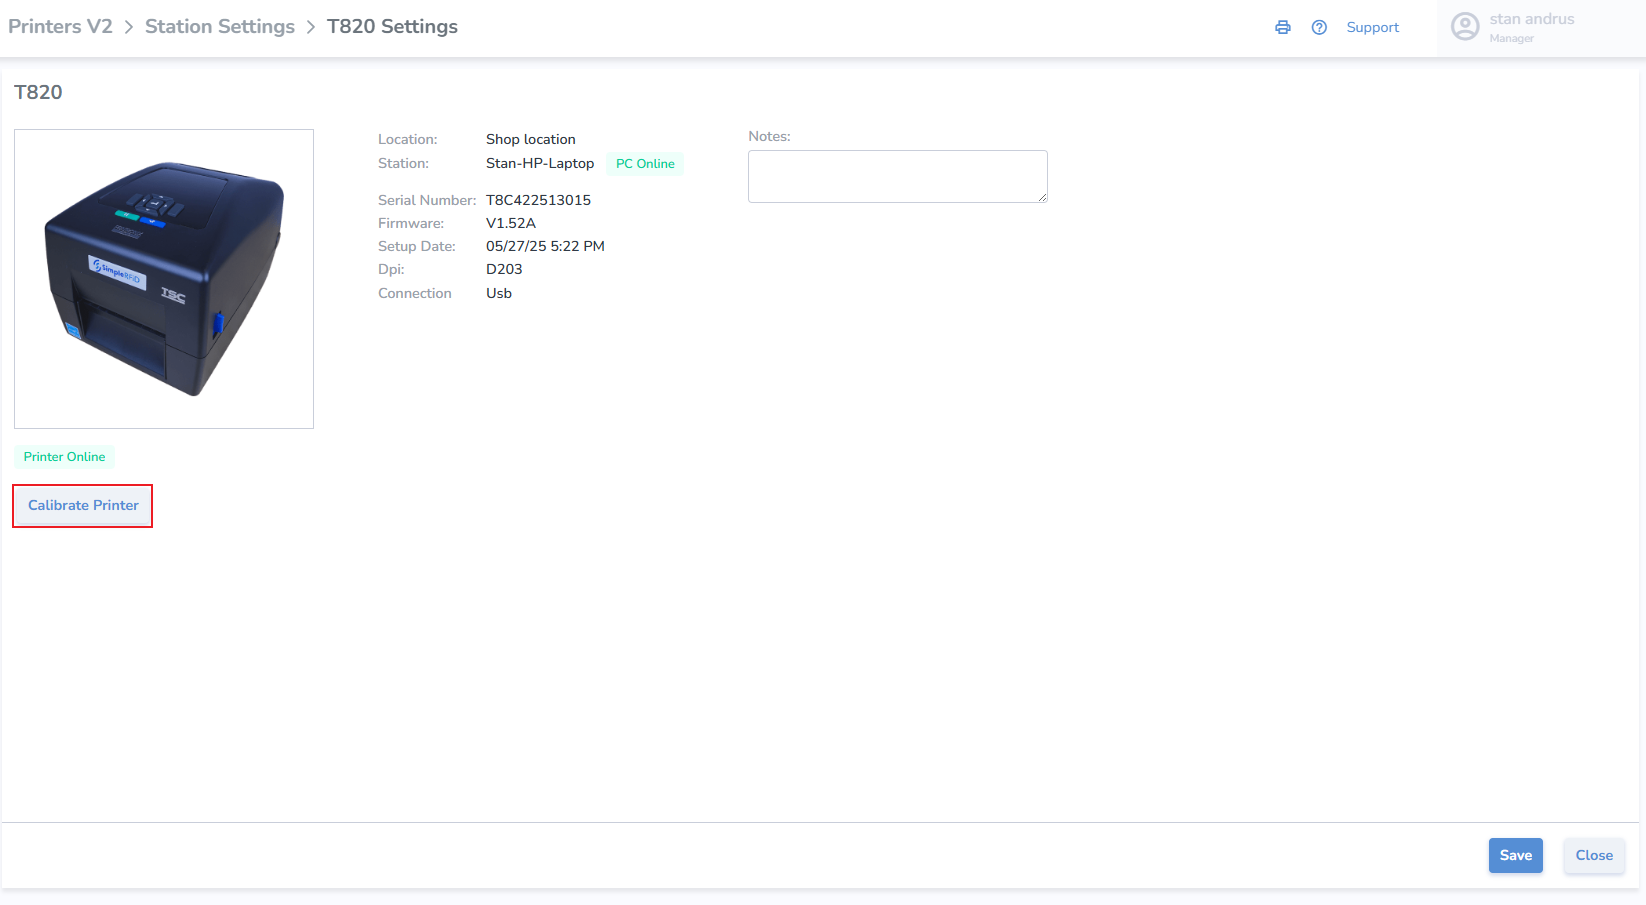
Calibrate Printer from Printer Profile
- Calibrate click the button
- Click 'Calibrate' on pop-up
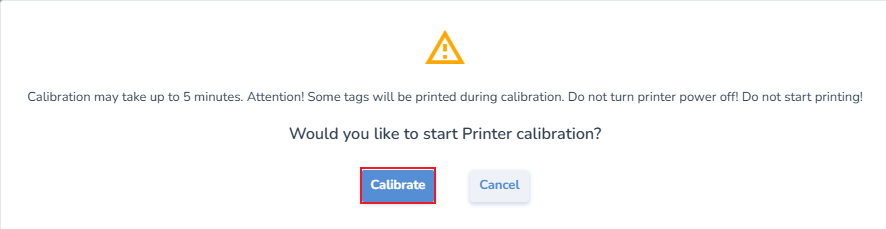
- Accepting this prompt will then send both the media and ribbon and RFID calibrations to the printer, which will proceed automatically with the following steps:
- Media and Ribbon.
- Then a pause for roughly 10 seconds.
- And then the RF calibration, which will take longer; the labels will periodically inch out of the printer for approximately one minute. At the end of the process it will feed out 2 or 3 labels before stopping completely.
- After the calibration has completed:
- Open the printer and roll back the labels so the blank tags may be used—precision is not necessary
- Un-pause the printer
- Now you are ready to print.
If the printer continues to VOID labels, repeat the process. If the issue persists, perform a calibration directly from the printer itself.
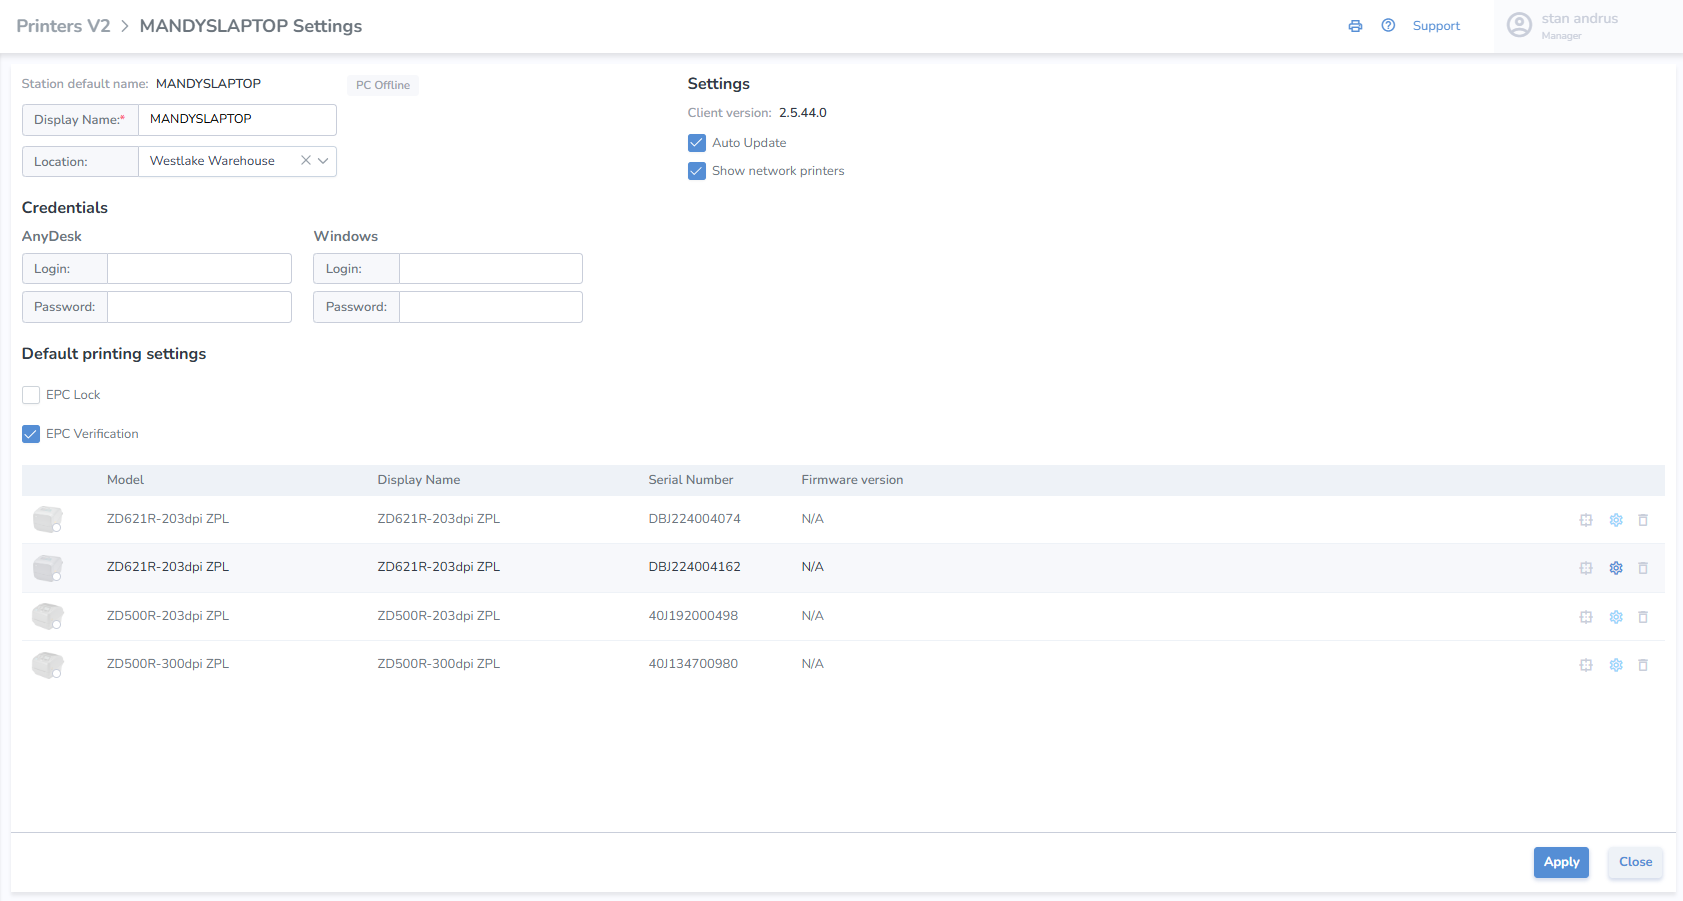
Option 3: From the Printer Station Settings
This page allows for the assignment and view of all printers including settings.
Calibrate from the printer
Step 1.
Identify the model of your printer
Step 2.
Select the article for your corresponding printer
Step 3.
Open the related "Calibrate from the Printer's Interface" article (e.g. Printronix T800, T4000, T6000)
Note:
Each printer has its own approach of calibrating it.
If you encounter any issues or have any questions, feel free to email us at support@simplerfid.com !