
Print Labels One-by-one
This section will teach you how to print tags from the web portal manually without using spreadsheets.
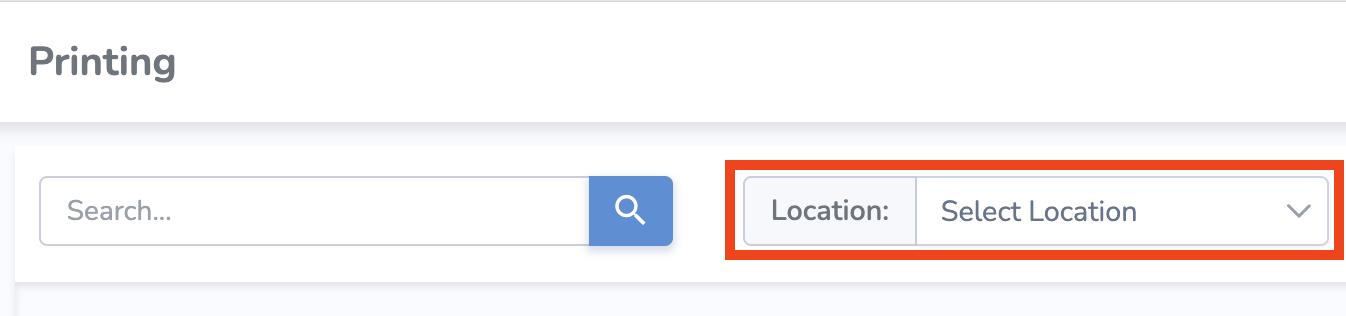
Navigate to Create Print Job
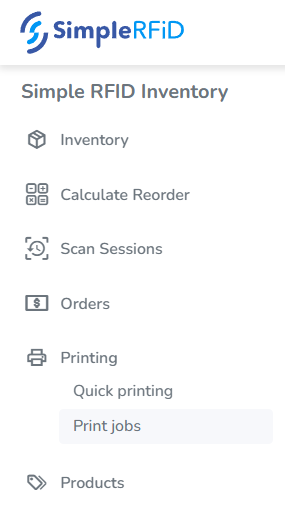
- Select
SelectPrint jobsPrintingfrom the navigation menu

- From the
printingPrint Jobs page, click Select Printer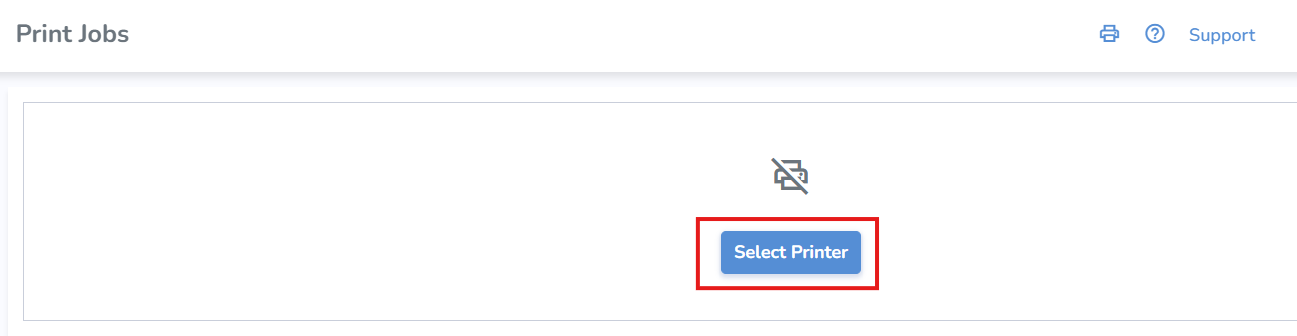
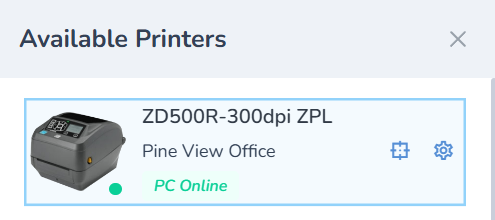
- Then click the printer tile to select the desired printer from the right Available Printer menu

- Click X to close the
printer’s location.
- menu
- Then click the
“"+”" button located in the top right corner of thescreenjobs list


Create Print Job
- Ensure that the correct layout is selected. The last used layout will be selected by default
- Search and add the item(s) you wish to print from the search bar on the right
- Once added, you can change
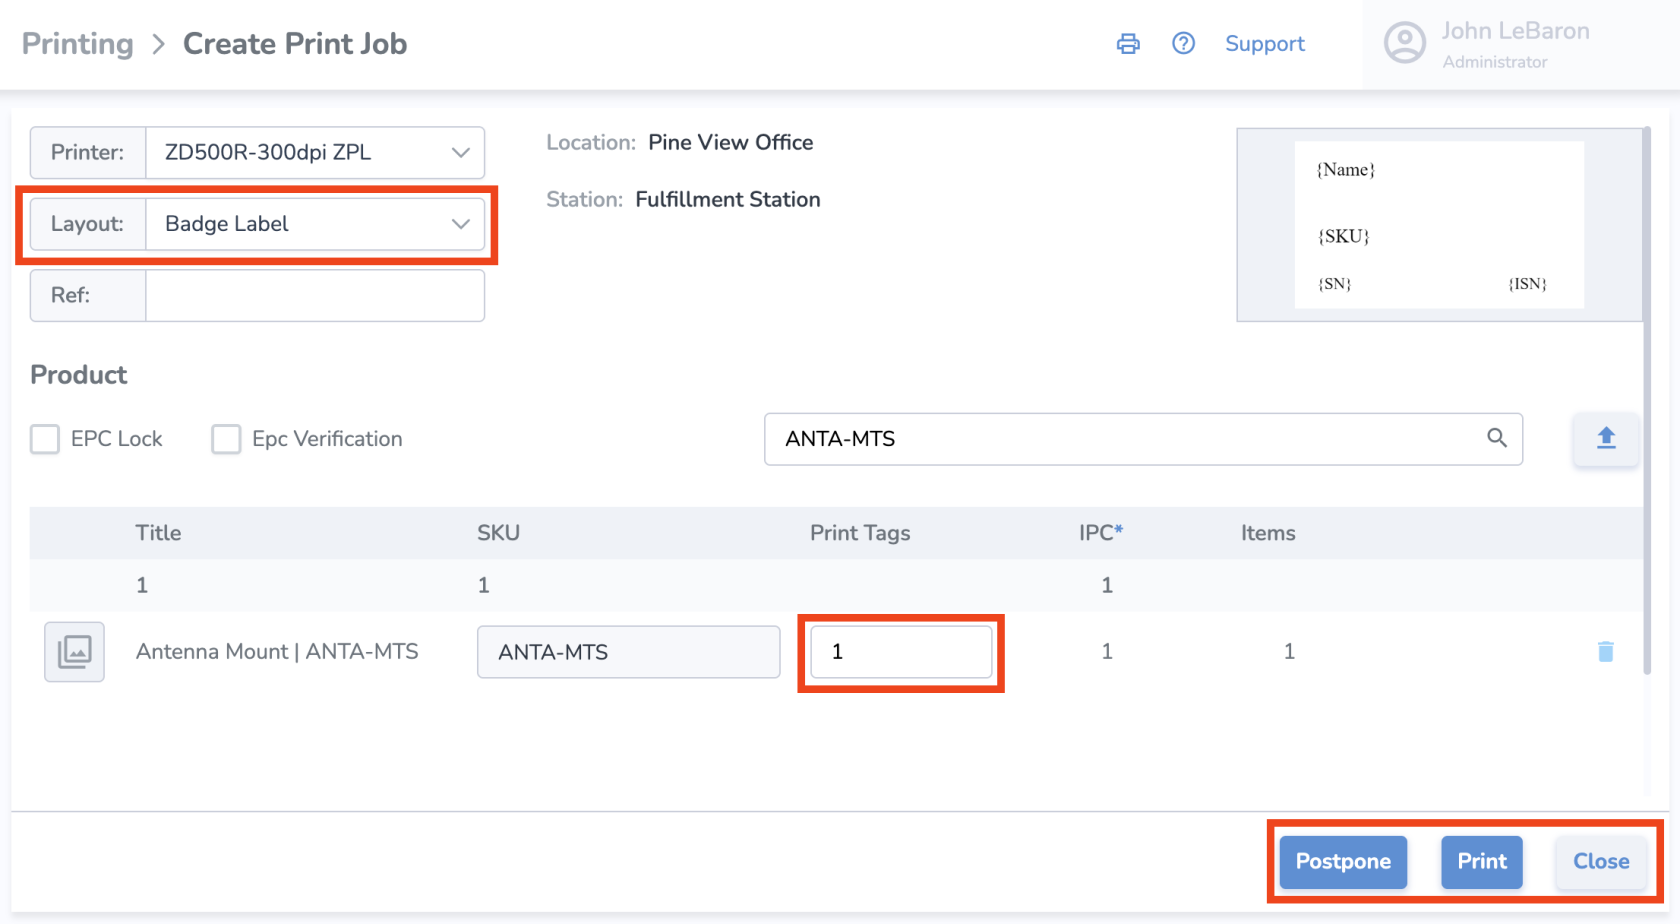

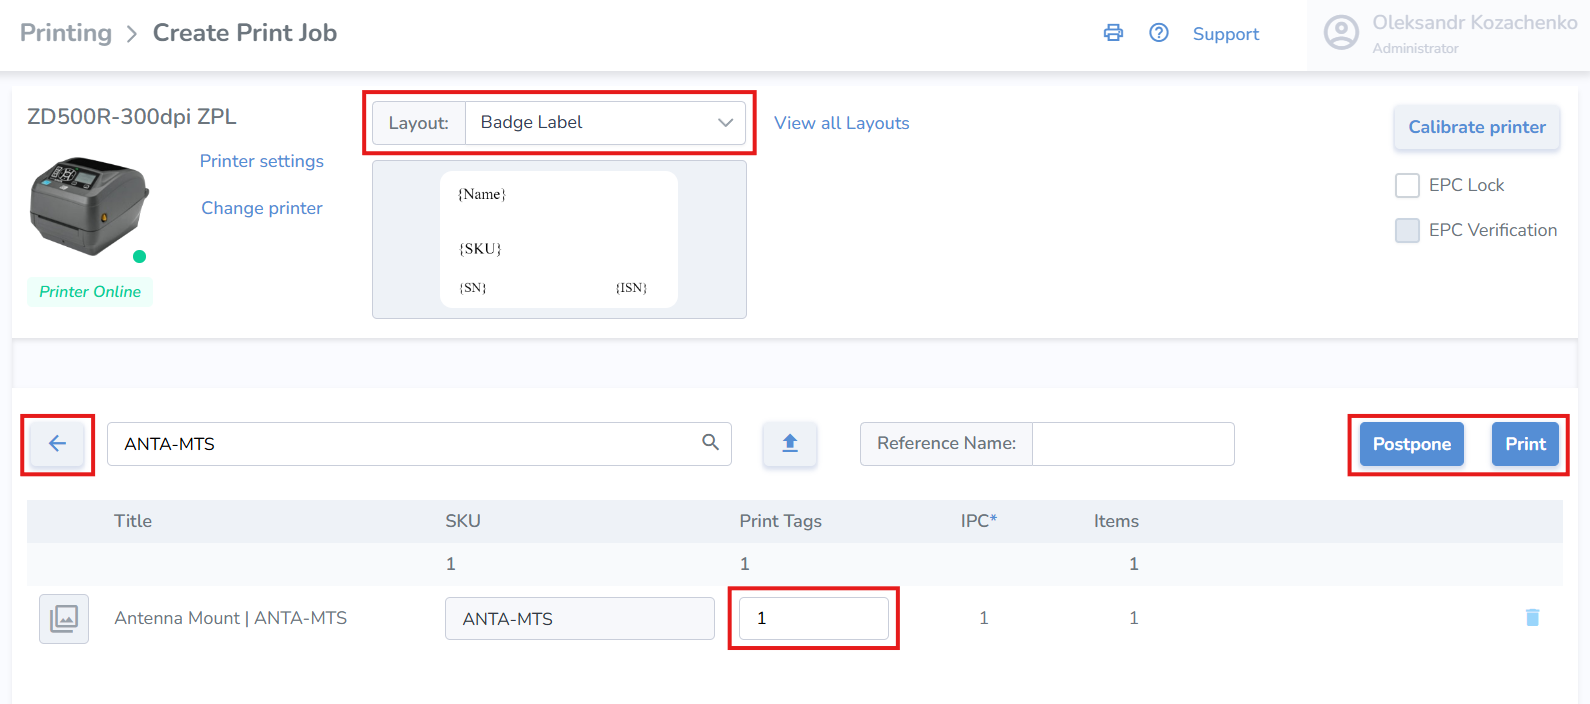
From this point, you can add optional tag-specific information such as born date, expiration date, sell by date, lot number, serial number, or cost. None of it is required, but if you do not change anything, the tag’s default born date will be the day it is printed.
• To add this information, click on the name of the item once and the screen will pop up on the right.
Print, Postpone, or CloseNavigate Back from the print job
Print
Print-— When ready, click 'Print' at the bottom right of the page to print immediatelyPostpone
-— If you would like to print the labels at a later time, click 'Postpone' and start printing laterClose
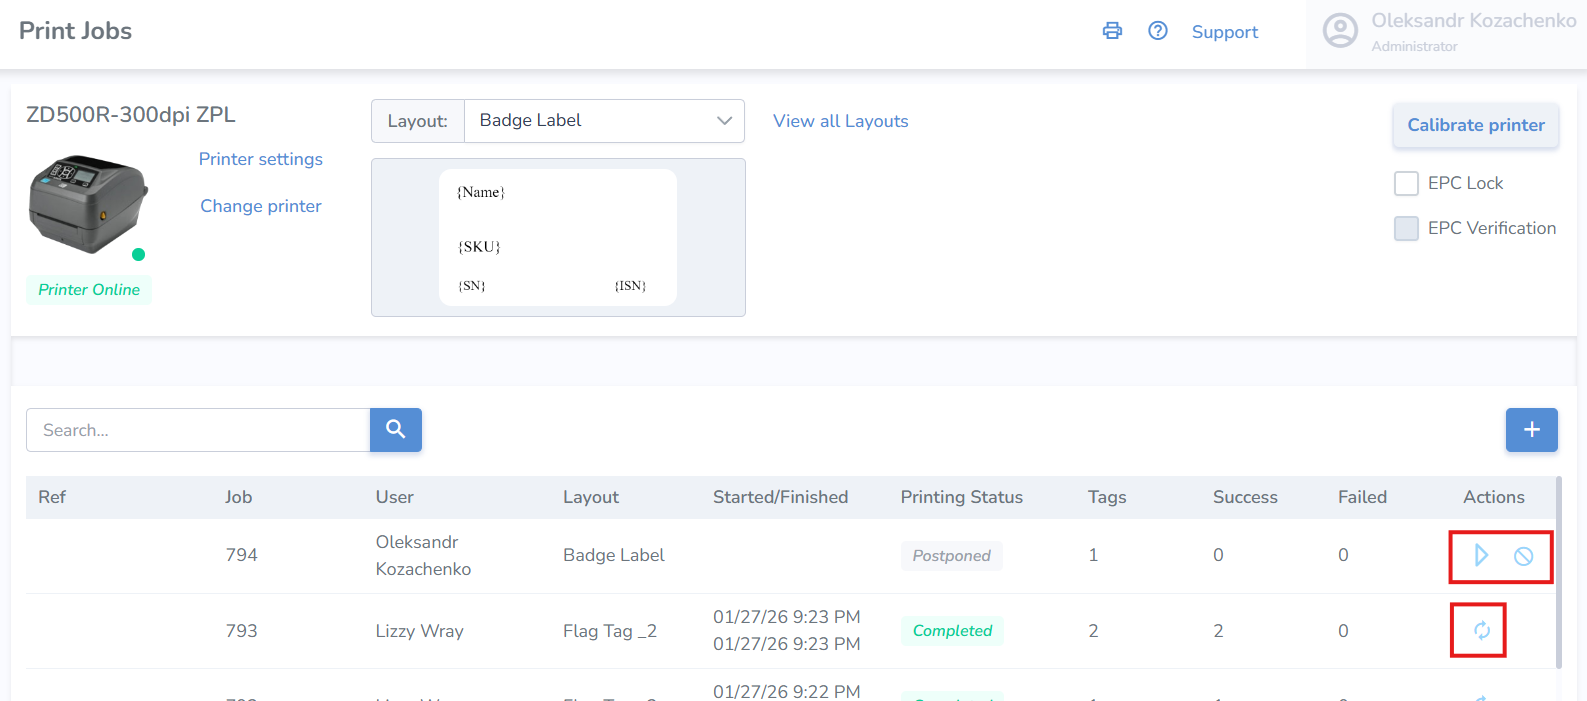
CompletingPrint aJob Postponed print jobActions
- On the
mainPrintPrintingJobs page, you can see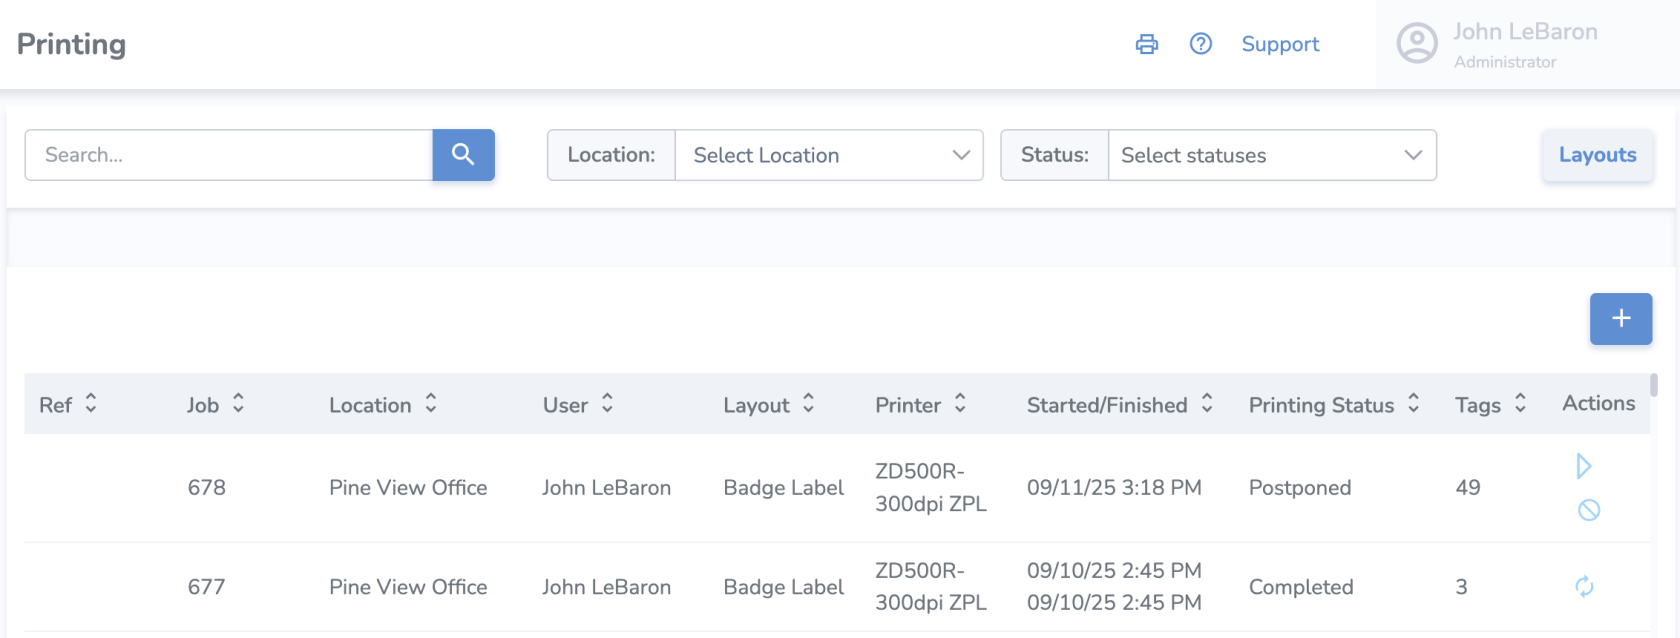

- To start the print job, click
- To cancel the job, click the strike-through circle icon
A good practice is to scan the labels and upload them to a temporary location to verify that all tags have been printed correctly.
When you have successfully printed a few out, learn how to Scan and Upload Tags.
However, if the printer isn't working correctly, take a look at Printers or Printing Issues