
Compare Scan
This article describes the process of scanning inventory with a live comparison of your current inventory
For information on the different settings on the scan page, please read here
Starting a Compare Scan
There are multiple places where you can perform a Compare Scan. These include:
It's important to note that the Compare Scan has the same function in both places you perform it: You want to compare an inventory is matched with your current physical inventory in real time.
On the Scan page, there are two values for each product that you will want to keep track of
- Scanned: The number of tags that have been scanned this session
- Expected: The inventory count currently in the inventory
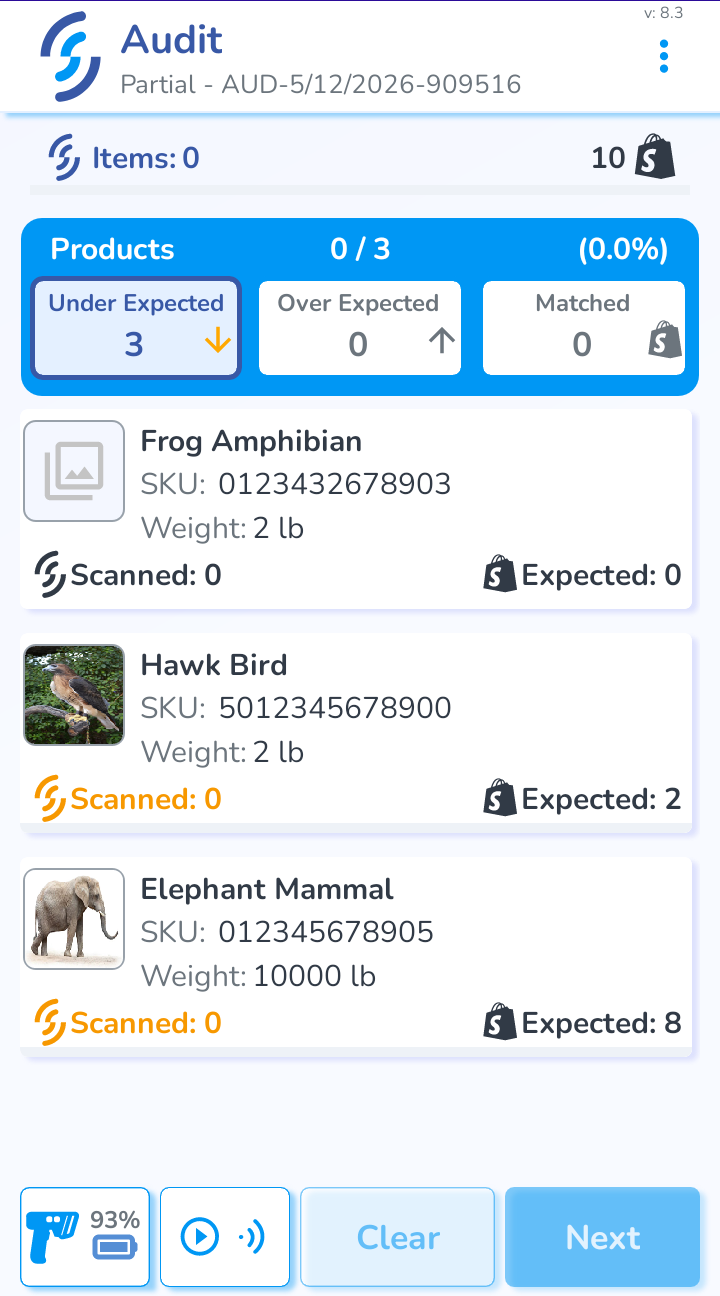
There are three possible states that a product can have:
- Under Expected: The Scanned amount is less than the Expected amount
- Over Expected: The Scanned about is more than the Expected amount
- Matched: The Scanned amount is equal to the Expected amount
Every product will be in the Under Expected section, because the Scanned amount starts at 0
Scanning Process
As you scan products, they will be put into the three sections explained previously. You can click on a section to view all of the products in that section.
While the scanner is active, there will be a loading screen in the product area. To view the counts for your products, stop scanning.
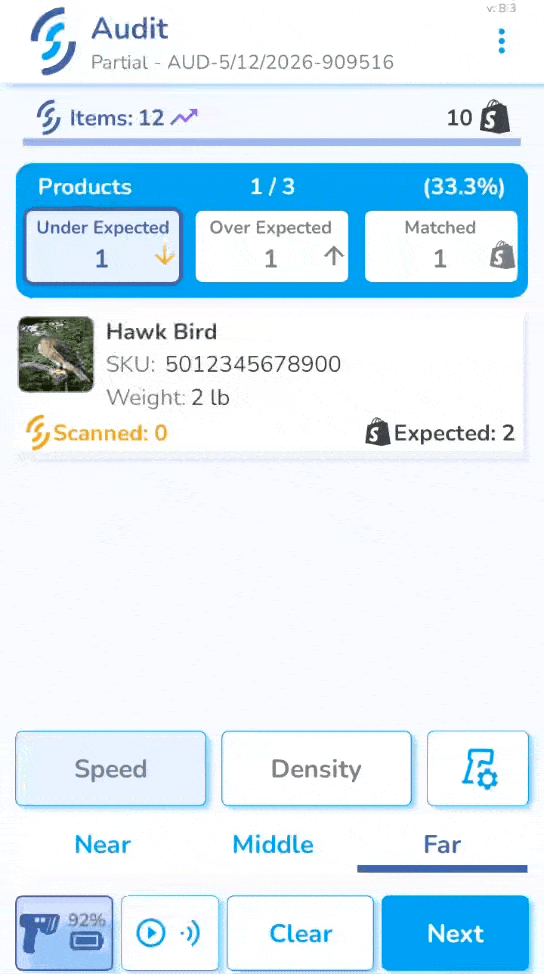
Once you feel confident that you have picked up everything, press Next. This will take you to the Summary Page.
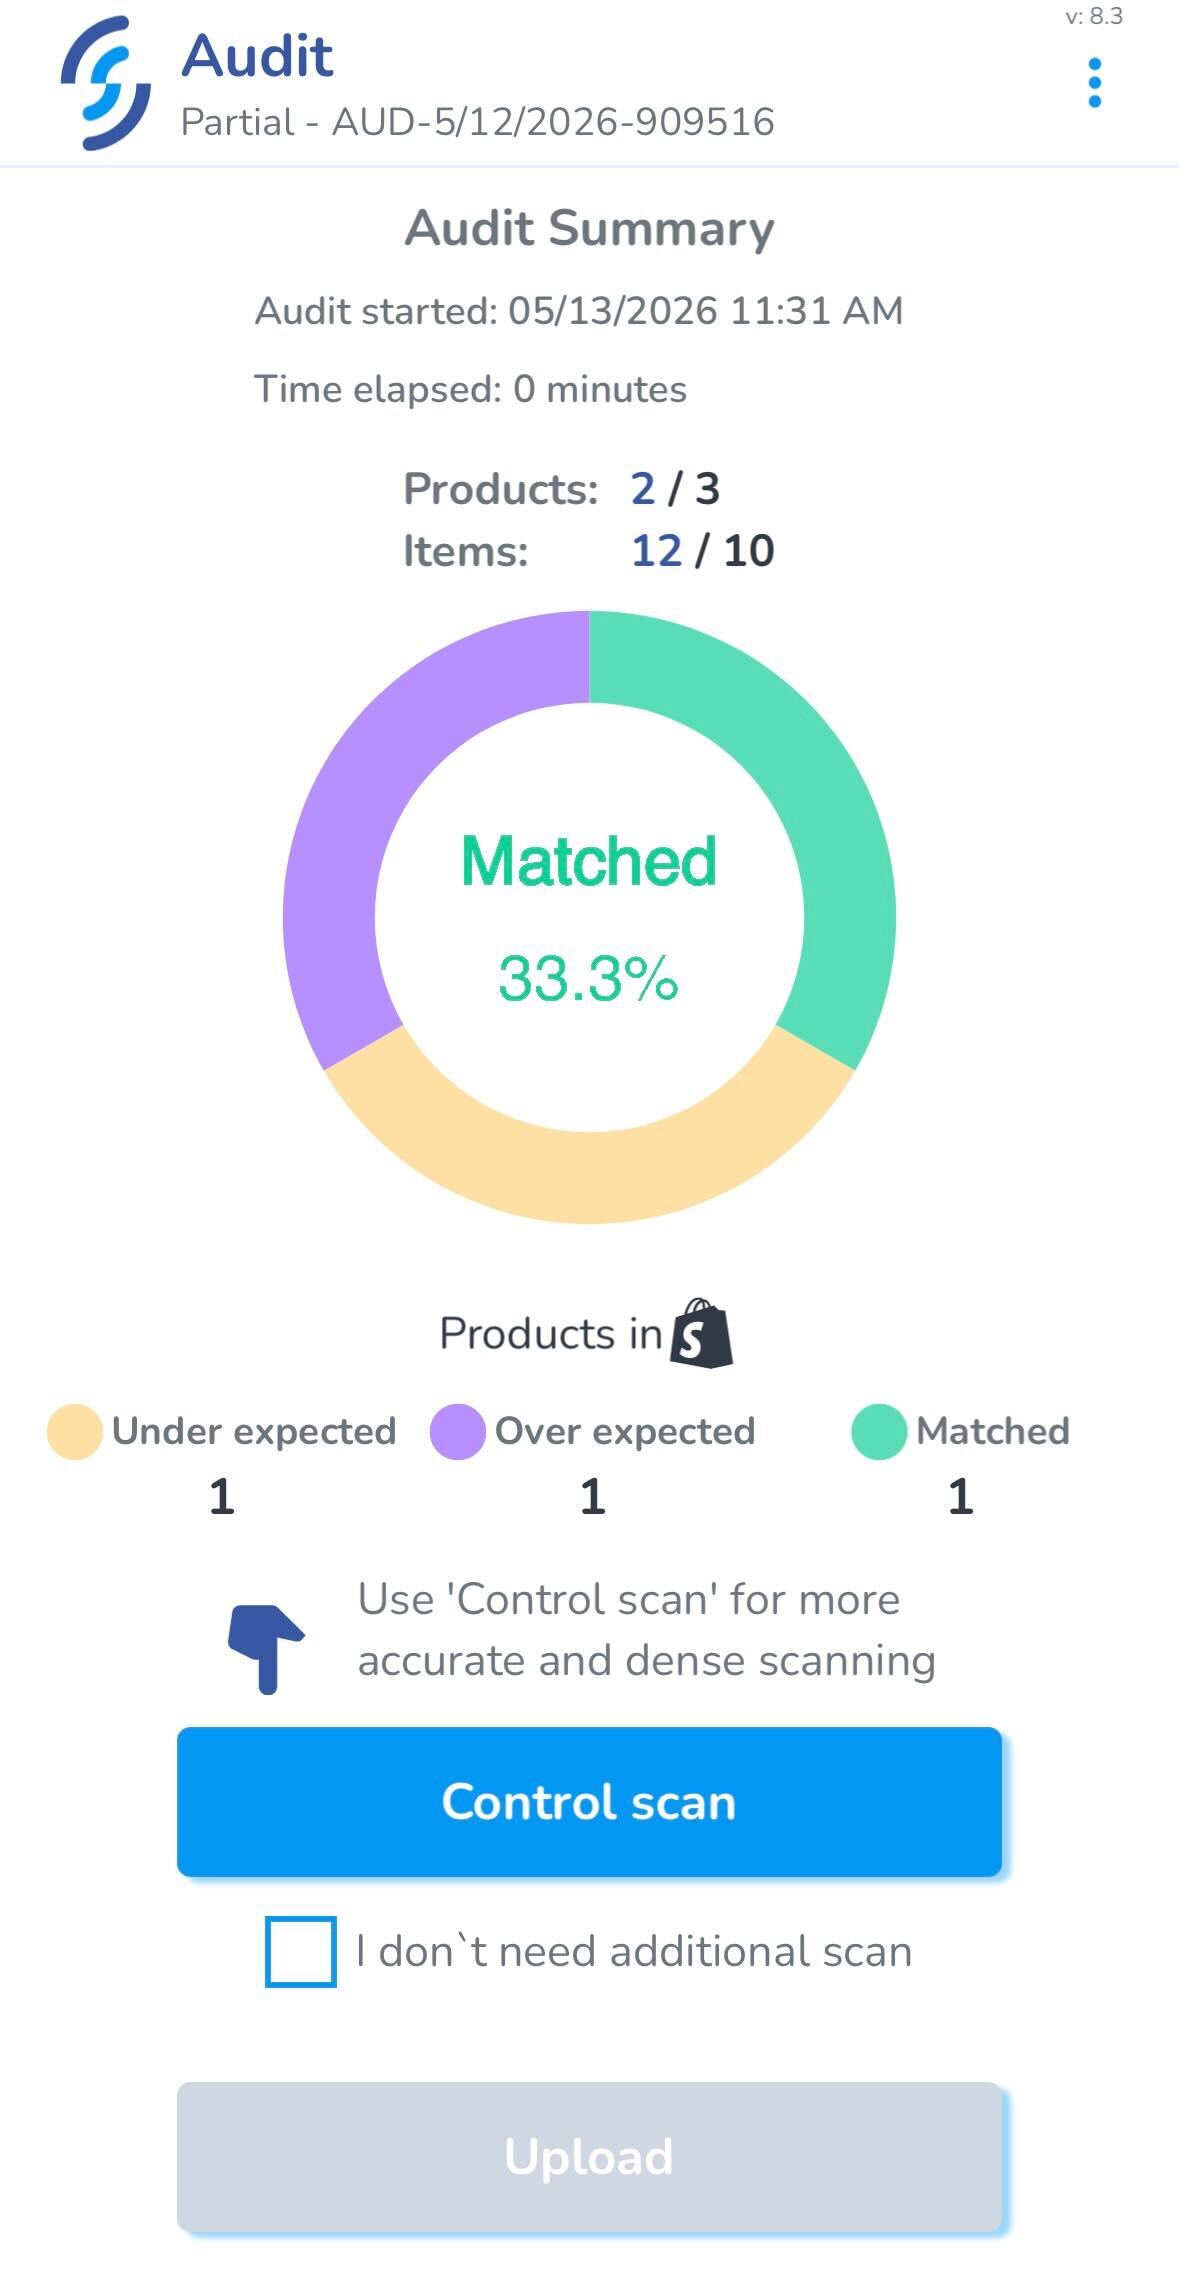
From here, you can see how many products are in each section, and how many items you picked up.
There are two options on this page:
- Control Scan: Perform another scan on Density mode to pick up any tags you may have missed
- Upload: Upload the scan to an Audit, or inventory
A Control Scan is recommended for greater accuracy, but you can click the checkbox below to go straight to an Upload