Installing VCP Drivers - Windows for ARM
TSL readers' USB connection uses a Virtual COM port, which requires an extra driver installationinstallations on Windows for ARM. These are the steps to install the drivers.
Step 1: Install the bus layer driver
First, plug the reader into your PC using the supplied USB cable.
Download the ZIP file containing the drivers and extract the files to any location.
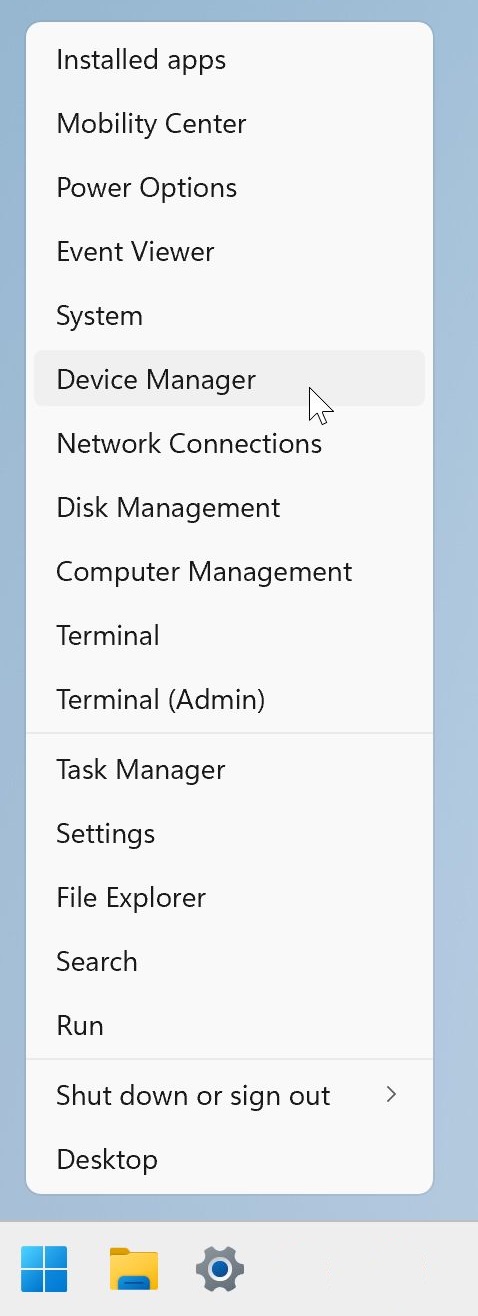
To locate the device manager on Windows 10/11, right click on the Microsoft logo at the bottom left-hand corner of the screen and select Device Manager.
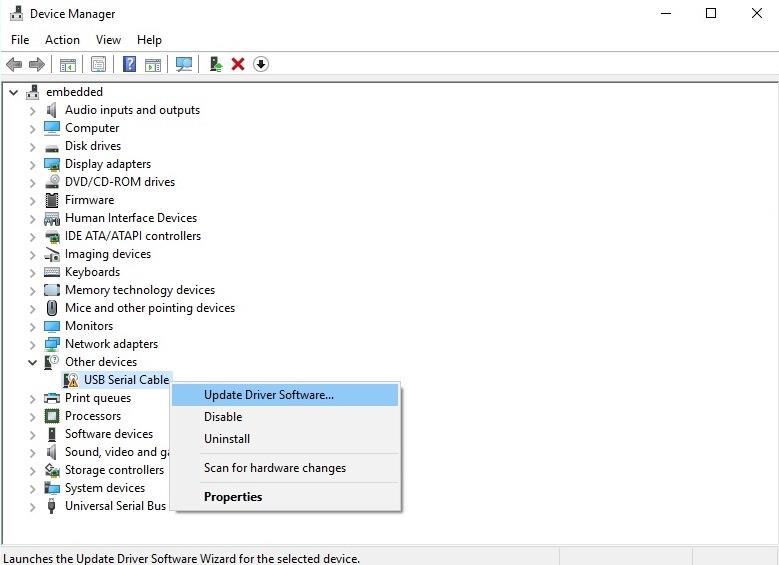
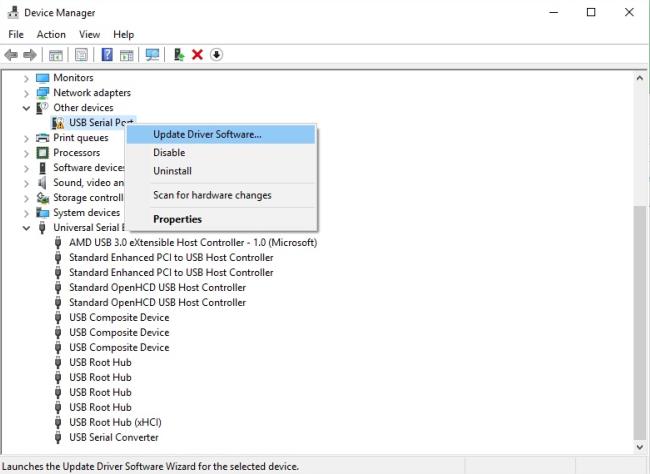
In the Device Manager window there should be a device under Other Devices with a yellow warning symbol to indicate a problem i.e. no driver installed, as shown below.

Right click on the device, then select “Update Driver Software…”
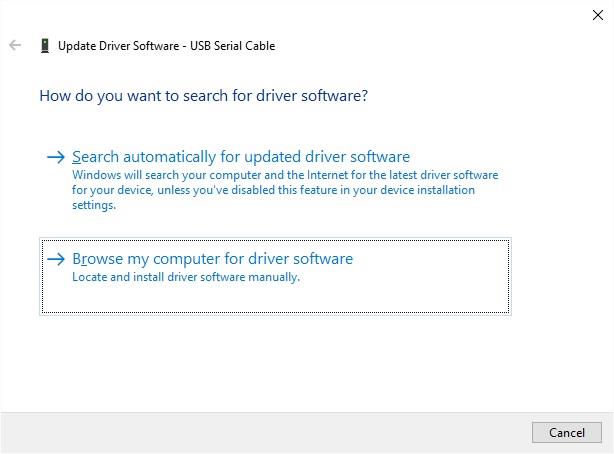
This then displays the option for an automatic search or a manual search. Select the second option to browse manually.
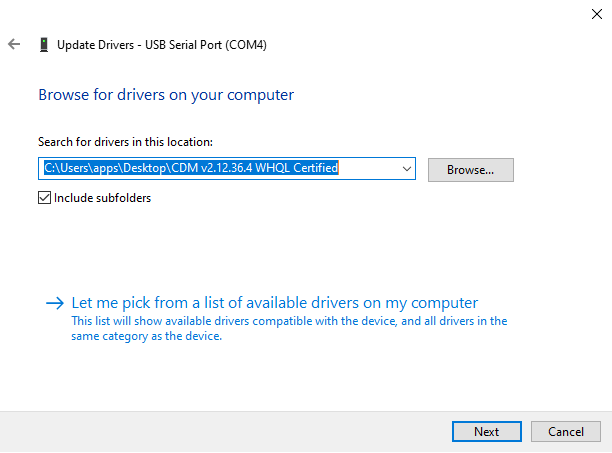
Click Browse... and select the top-level folder of the extracted files (thisthe folderlocation shouldshown containin twothe *screenshot will not necessarily be the same as the location you choose).INF files).
Select “Next” to start the installation.
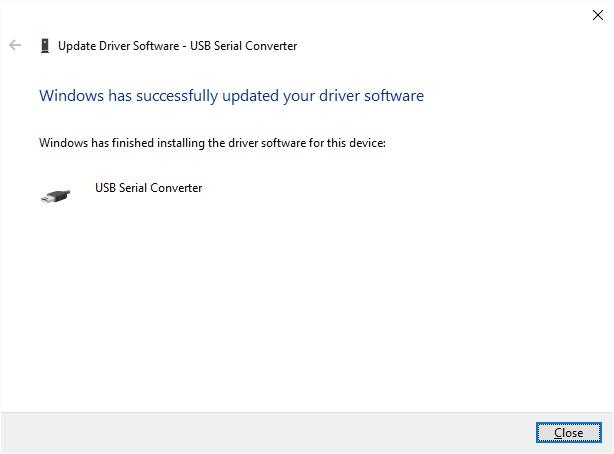
When the installation has finished a completion screen is displayed. Press Close to close this window and go back to the Device Manager window.
Step 2: Install the Virtual Com Port layer of the driver
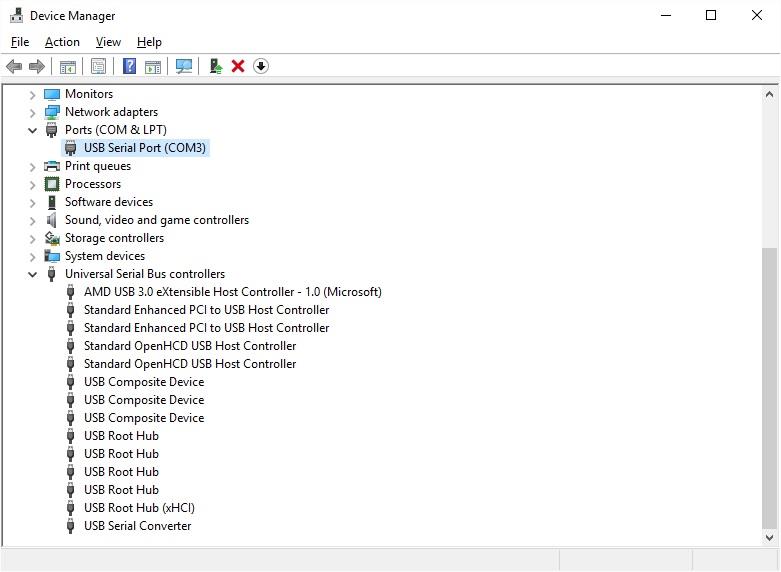
Device Manager will show a device under Other Devices but in addition to this there is a new entry under Universal Serial Bus Controllers as the USB Serial Converter. This indicates the bus layer of the driver is installed.
Installing the Virtual Com Port layer of the driver is a repeat of the last few steps.
Right click on the other device (USB Serial Por in this example) to bring up a menu as shown below. From the displayed menu select “Update Driver Software…”
This then displays the option for an automatic search or a manual search. Select the second option to browse manually.
Click Browse... and select the top-level folder of the extracted files (the location shown in the screenshot will not necessarily be the same as the location you choose).
Select “Next” to start the installation.
When the installation has finished a completion screen is displayed. Press Close to close this window and go back to the Device Manager window.
This time Device Manager does not have an entry under Other Devices but does show entries under Universal Serial Bus Controllers and Ports (COM & LPT). The image below displays a correct installation. The device is now ready to use.