Navigation Menu: Products
Create, View, Edit, & Manage Products in all statuses
- Product: Page Controls
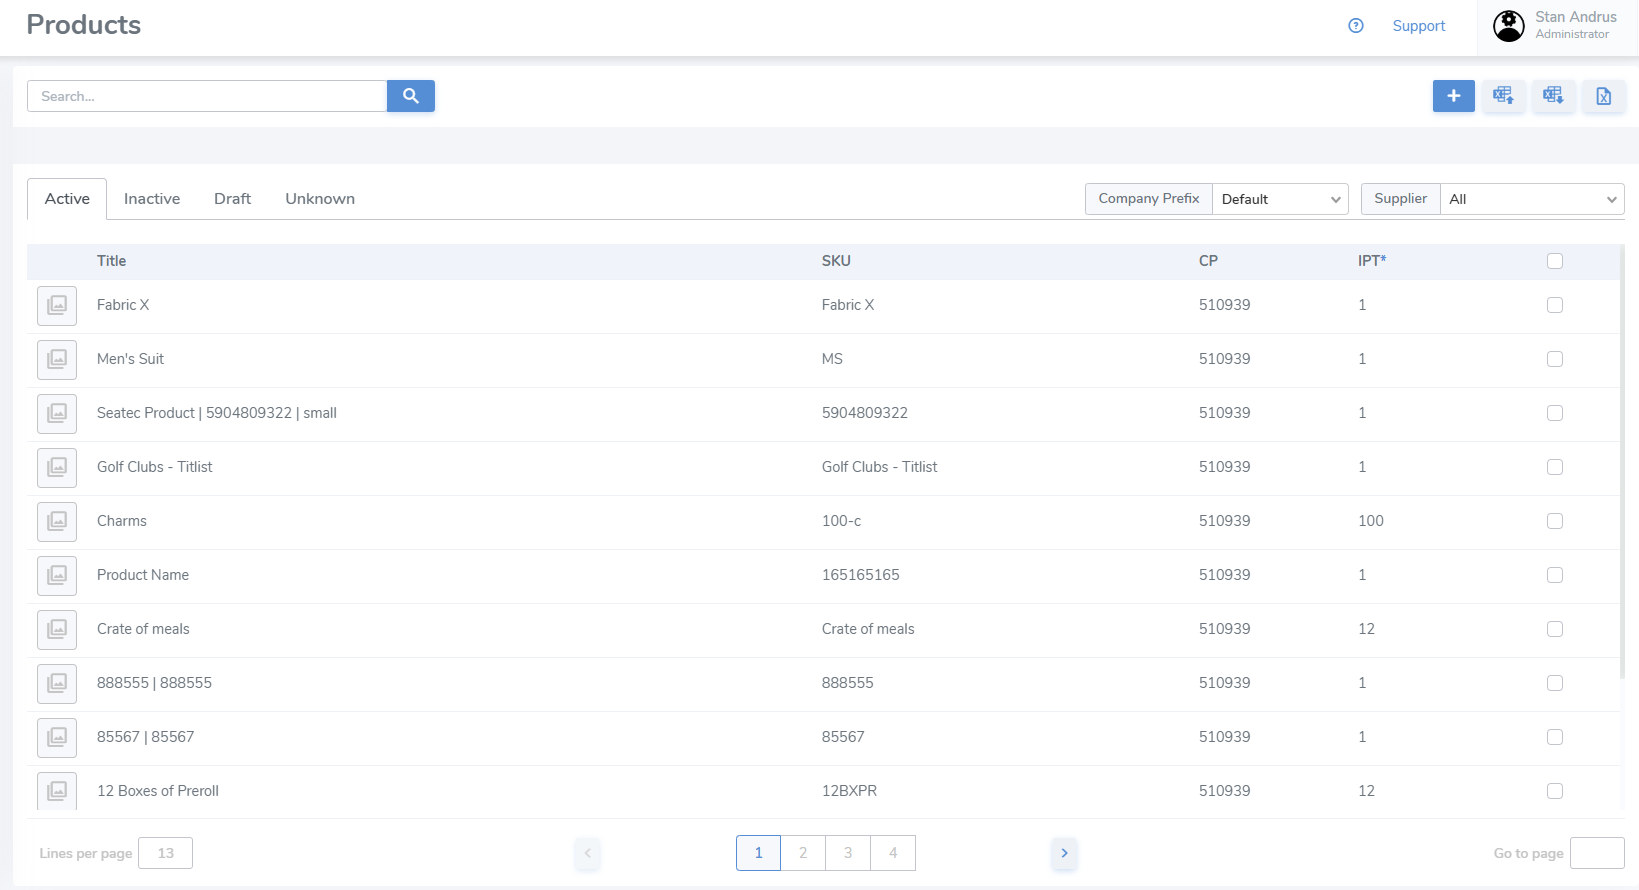
- Products: Active
- Products: Inactive
- Products: Draft
- Products: Unknown
- Create Product with Case Quantities
- Create a Product
- Creating Products via Spreadsheet
Product: Page Controls
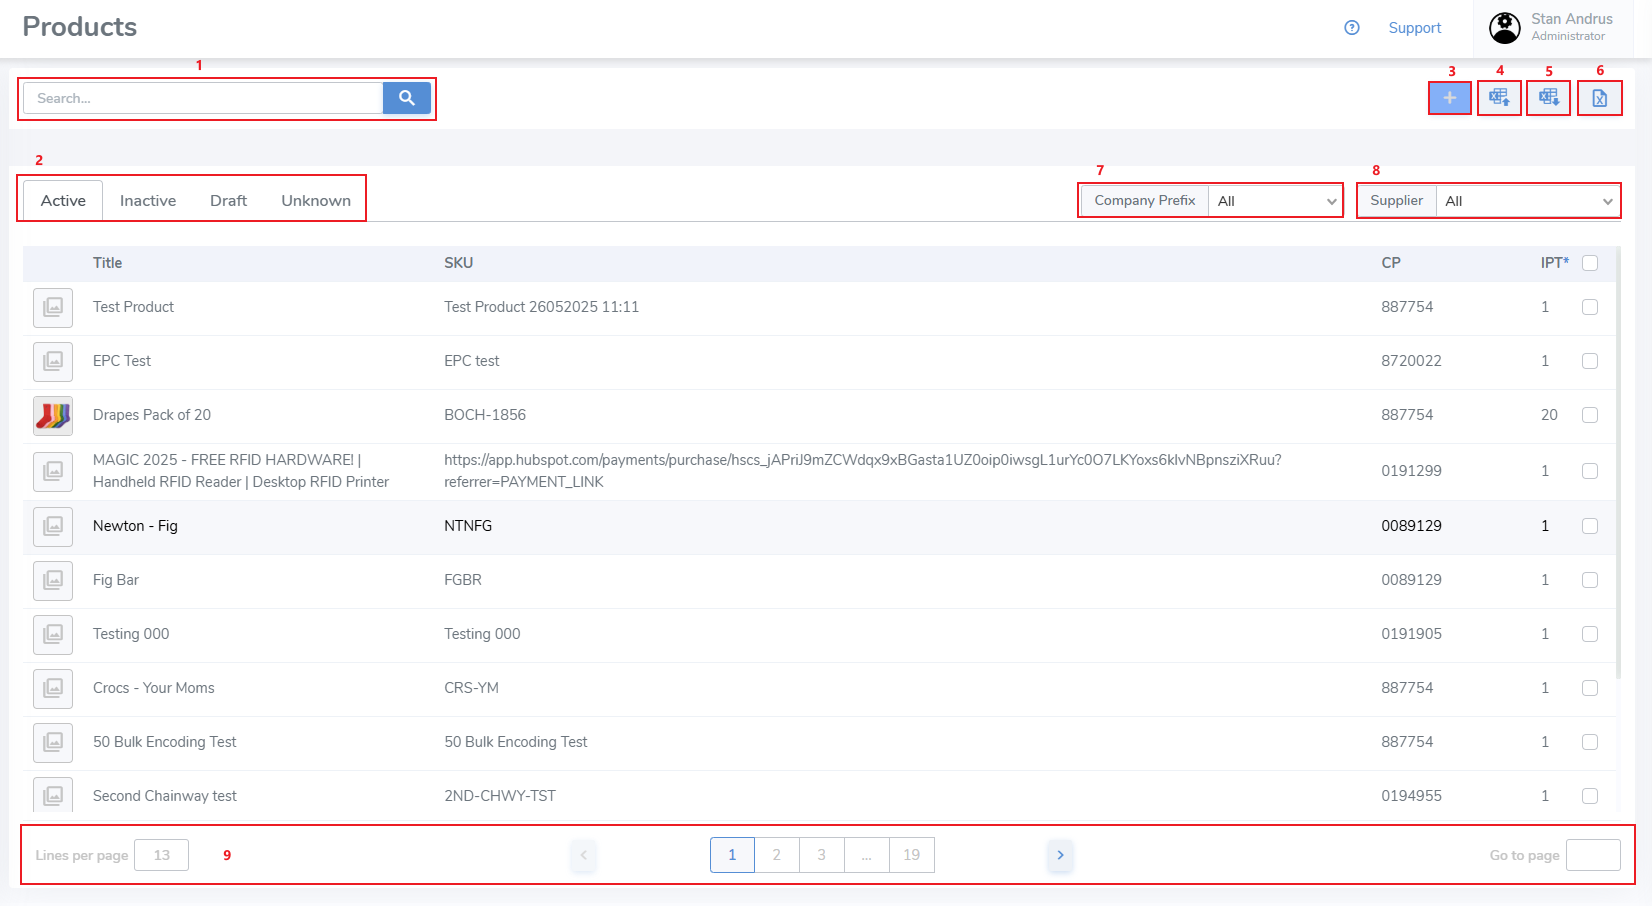
Products: Active
Create Product
To create a new product you must first select the Company Prefix you wish to use to create the item
This allows you to choose a GS1 company prefix to create an official GTIN / SGTIN, or choose a non-official GTIN or the Closed Loop prefix
- Choose the desired Company Prefix
- Click the "+" button
Create GTIN / SGTIN
To create a product using the GS1 format GTIN / SGTIN do the following:
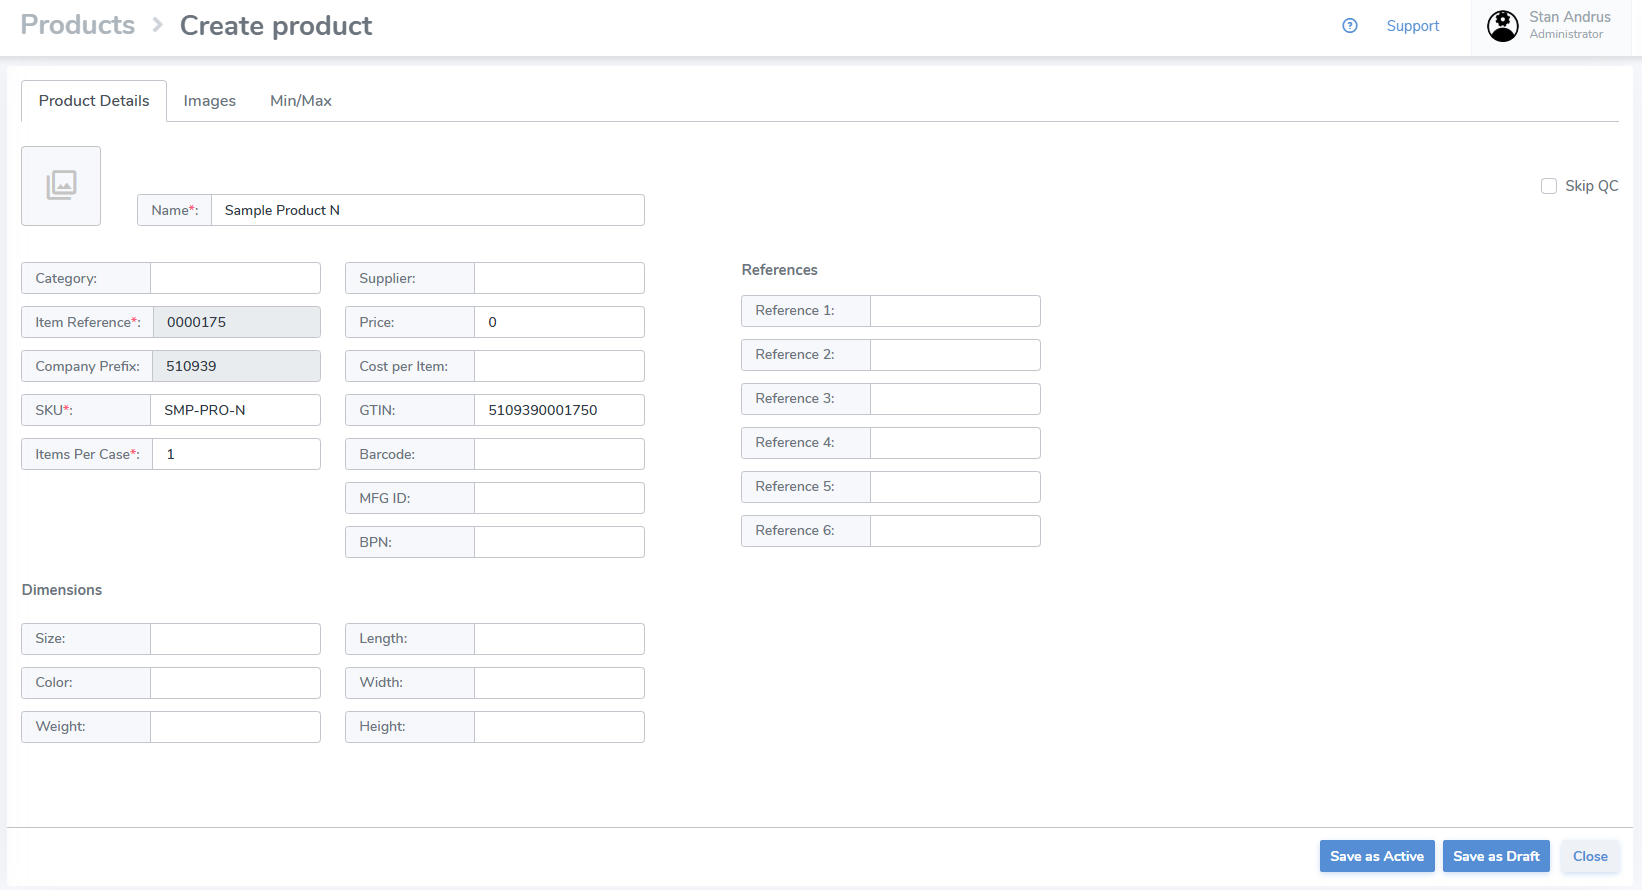
- Enter the item's Name
- Enter the Item Reference
- Enter the SKU
- Enter the GTIN & Barcode (these can be the same value)
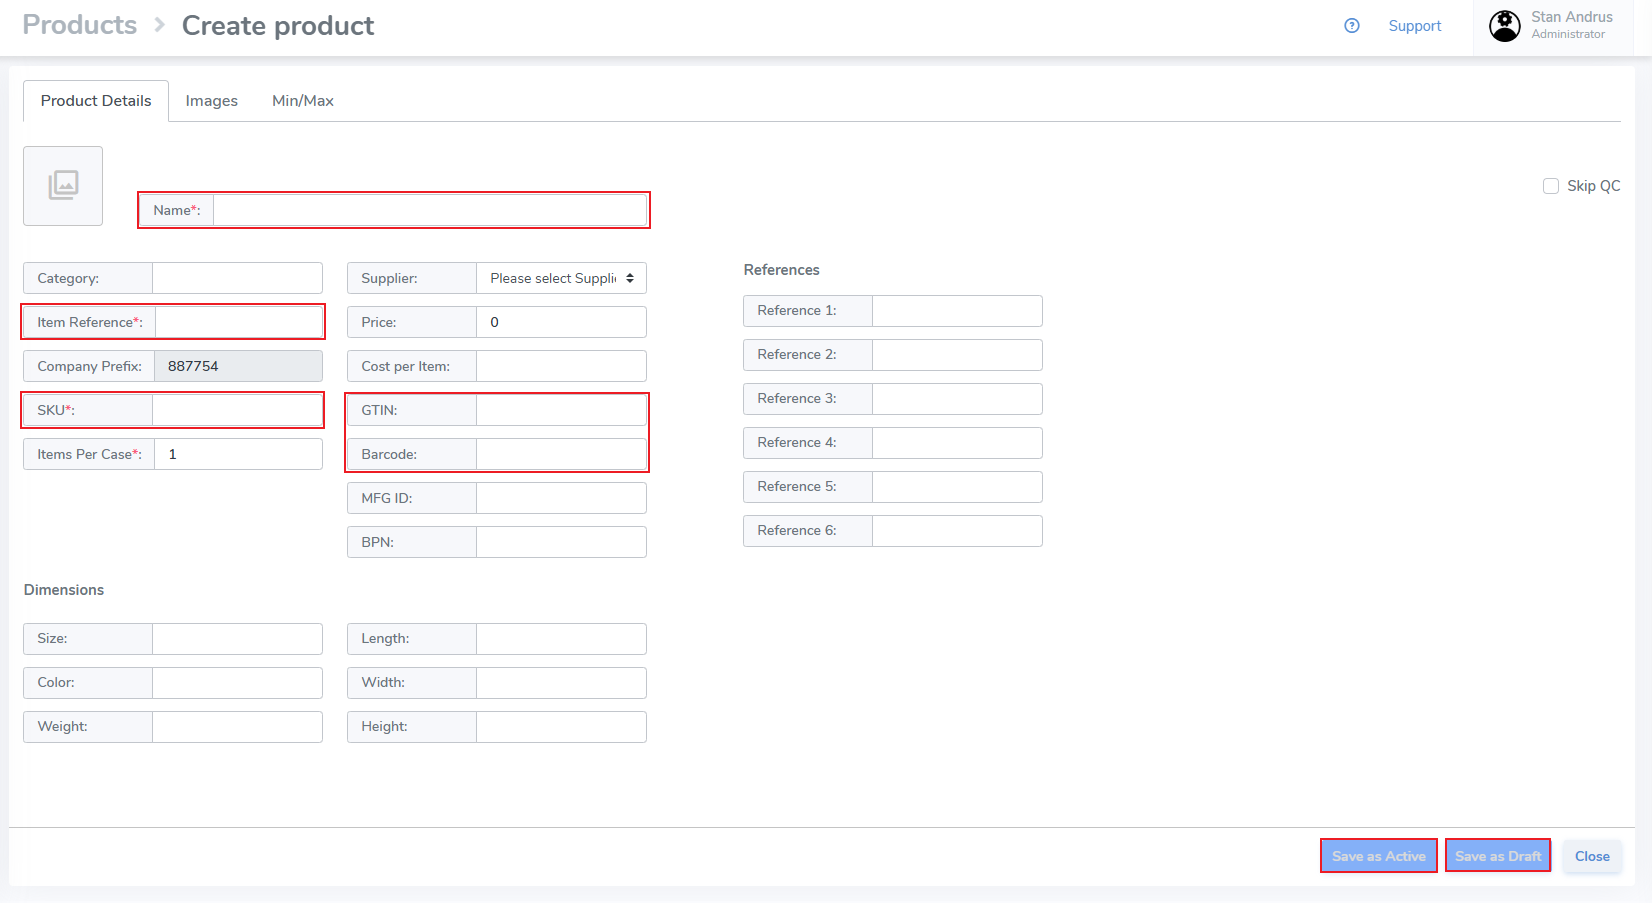
- Click Save as Active to create as an Active product
- Click Save as Draft to create a Draft product
- Click Close to exit without saving
Create Closed Loop
Products: Inactive
Products: Draft
Instructions for creating and updating Draft Products.
Draft Products can be created manually, by integration, or via the Brand Magic feature.
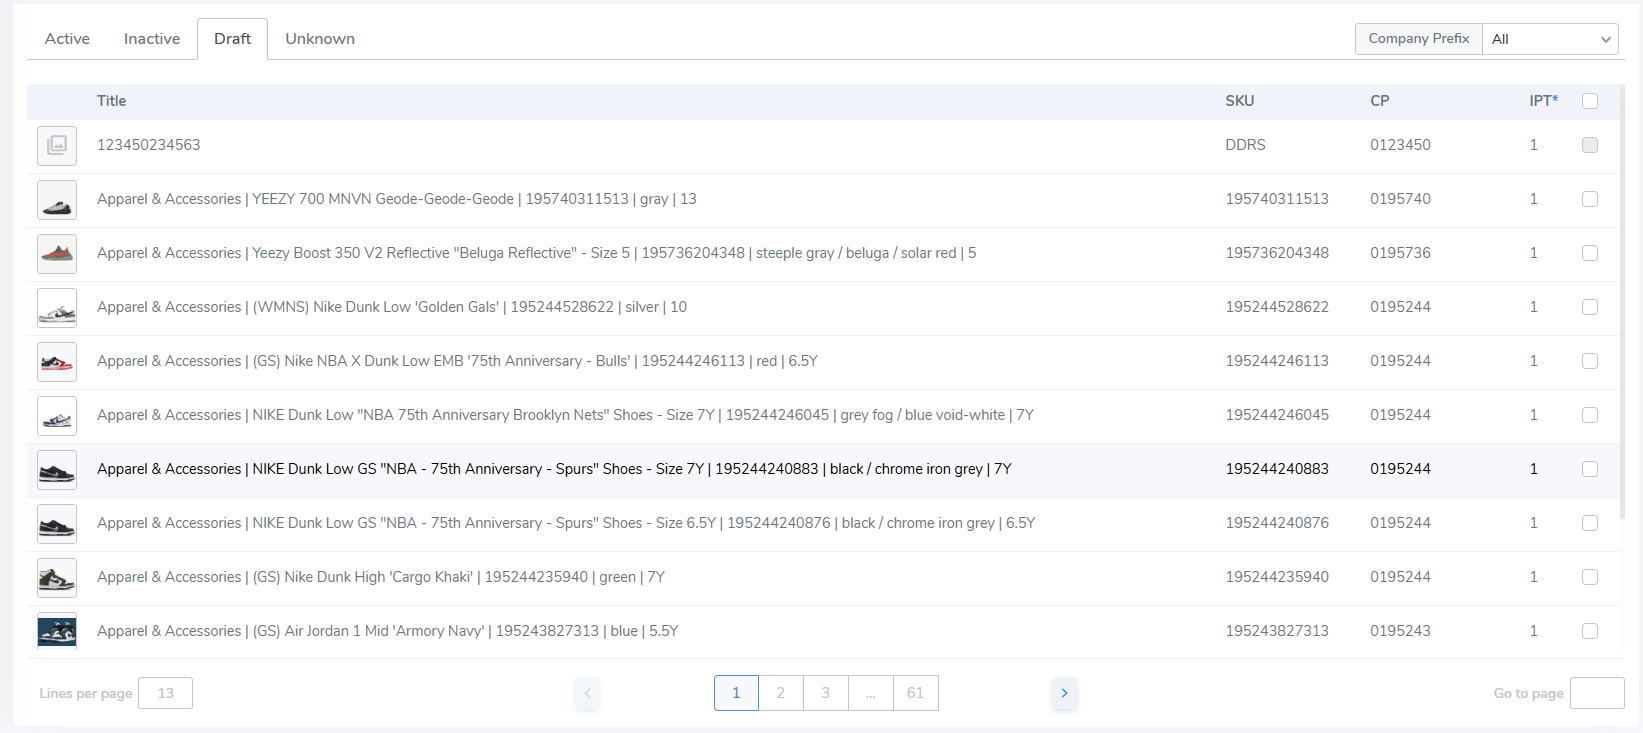
Update Draft Products
To update a Draft Product to Active / Inactive status, the product must have data in all required fields. If the product is missing a required value it cannot be imported until added.
Move to Active or Inactive In Bulk
- Update multiple Products in one action by clicking on the checkbox on the far right side.
- Then, click the Activate / Deactivate button which appears above.

- Click "Yes" on the pop-up
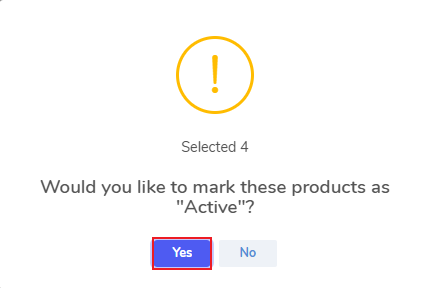
- This moves the Draft Products to Active / Inactive status.
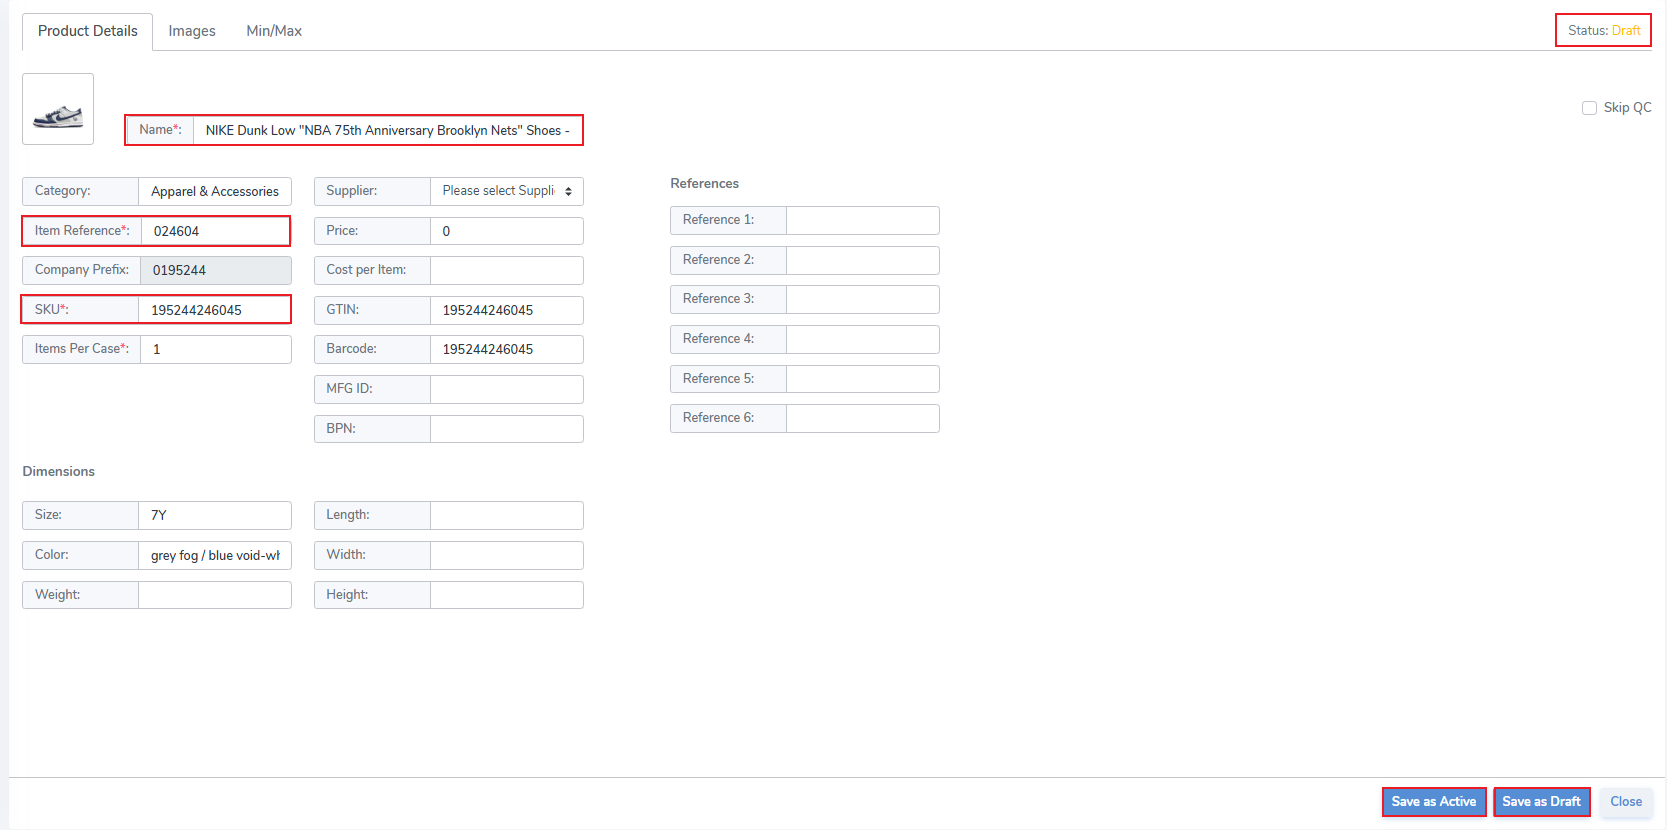
Move to Active / Save Draft Individually
- Click an individual Product from the Draft page
- This opens the Edit Product tab
- Ensure that all required fields are completed
- Click Save as Active to move to Active status
- Click Save as Draft to update the Draft product
Products: Unknown
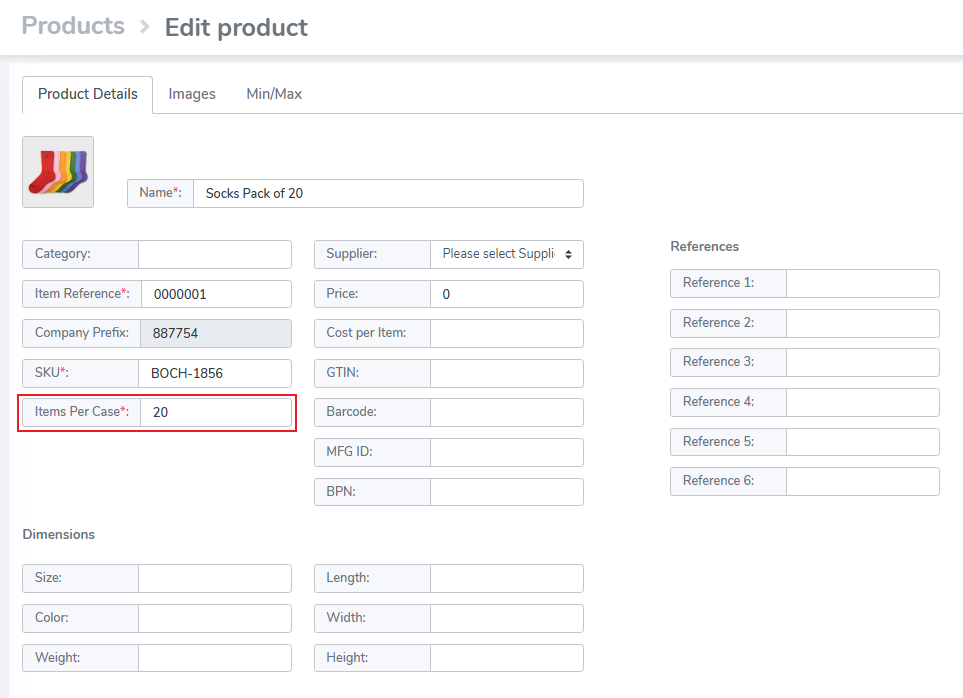
Create Product with Case Quantities
Products can be created which represent more than 1 item. This can represent a case pack, or any packaging with multiple items.
To create a case pack simply create the SKU from the Products tab
Edit the "Items Per Case" quantity from the default of "1." In the below example the quantity is 20, so each time the tag is scanned it will generate a quantity of 20.
Once you have printed tags for these items, edit these case quantity values from a specific serialized tag (ISN) from the Inventory Tag level view
Create a Product
This article provides instructions to create Products, both Closed Loop & GS1.
Create Product
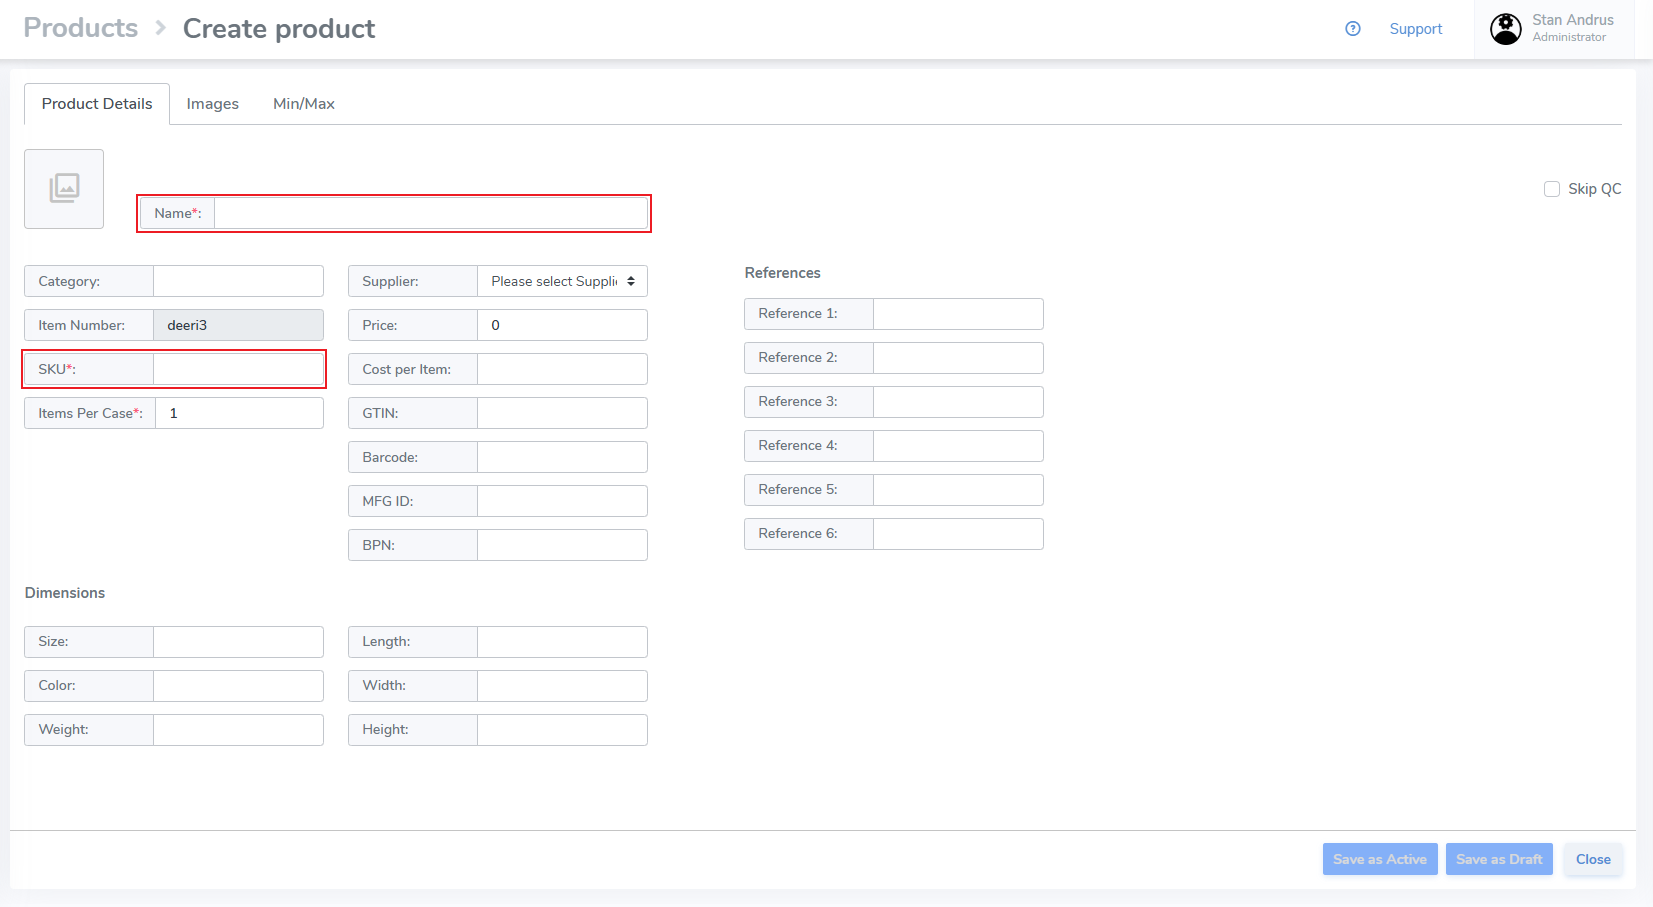
Create a Closed Loop "Default" Product
Default does not require the user enter a format to program tags.
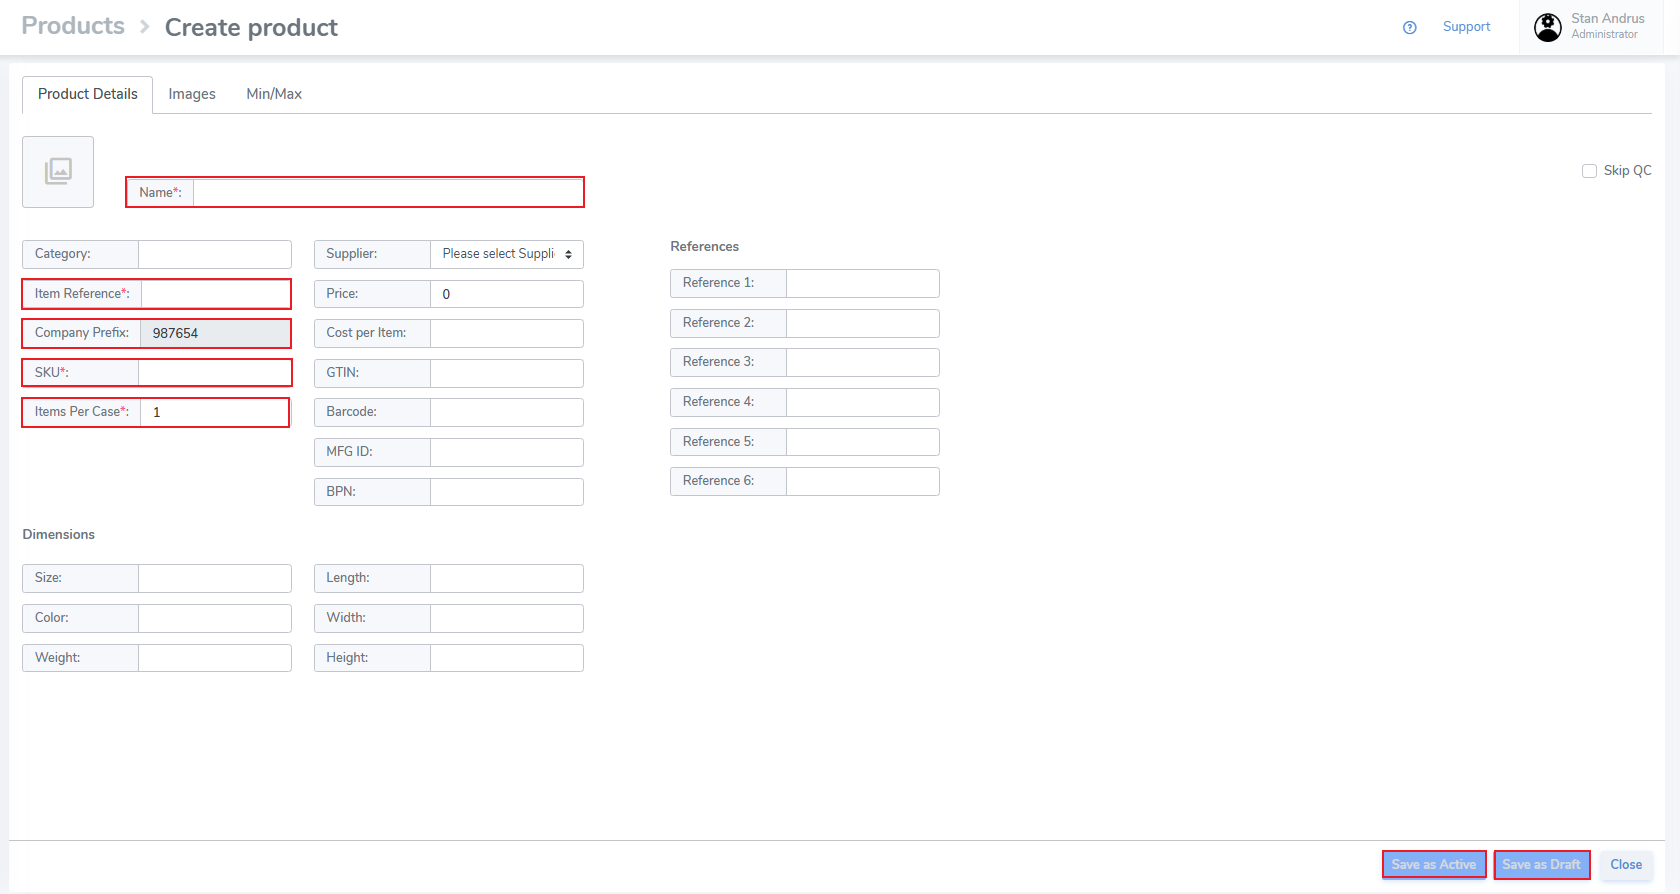
- Click Default
- Click the [+] button
- Enter Name
- Enter SKU
- Company Prefix and Item Reference are automatically generated
- Items Per Case default is set to "1"
- Input data for any other fields you wish
- Click Save as Active if you wish to immediately use the Product OR
- Click Save as Draft is you wish to continue editing the Product
- Click Cancel to exit the page without saving
Create Product as GS1 SGTIN-96
Requires a Company Prefix, & User must enter Item References for products.
- Enter Name
- Enter SKU
- Item Reference must be manually entered and must be unique
- Items Per Case default is set to "1"
- Input data for any other fields you wish
- Click Save as Active if you wish to immediately use the Product OR
- Click Save as Draft is you wish to continue editing the Product
- Click Cancel to exit the page without saving
Creating Products via Spreadsheet
If you are using Shopify please import your products from the Simple RFID app in Shopify
1 - Download Spreadsheet
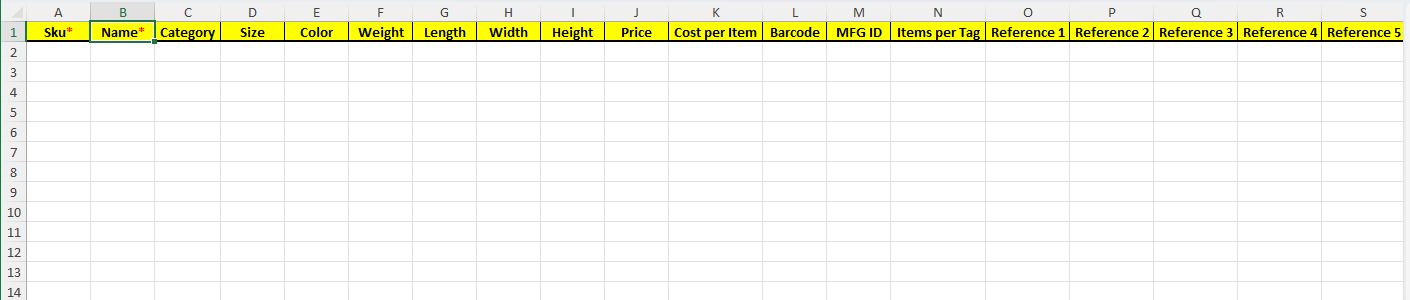
Spreadsheet will need to have the correct columns named Sku and Name. (The rest of the columns can be used but are not required).
Spreadsheet template is not required to use, the only columns required would be the Sku and Name. You can just add those two columns to your spreadsheet. If you would prefer to upload the spreadsheet with the template you can find that on the Products page as well in the top right "Get Template" button.
2 - Upload into the Web Portal
Now that you have the spreadsheet with the correct columns, the next thing we need to do is sign into our Simple RFID Web Portal.
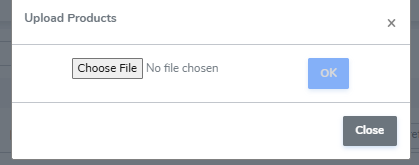
After signing in we will go to the "Products" tab located on the left hand side. At the top right of this page we will see the "Upload XLSX" button. (Circled in yellow)

After selecting Upload it will now allow you to choose a file from your computer. Select the XLSX file with your products and hit "OK"
Step 3 - Check for errors
Once you have uploaded it should have all your products in the Simple RFID Web Portal. However sometimes if there is an issue with the spreadsheet it can show an error and the reason. If you encounter an issue like this you can try to fix the issue or you can reach out to our support team to assist using the "Support" button on the Web Portal.
Most issues come from the SKU column, duplicate SKU's will not allow the upload. Make sure all of your products have unique SKU's tied to them.