Zebra ZD500R
ZD500R: Reset to Factory Defaults
Turn off the printer using the switch on the back.
Press and hold FEED + PAUSE while turning on the printer.
Continue holding FEED + PAUSE until the first control panel light turns off.
The printer configuration is now reset to the factory default values.
ZD500R: Calibrate from Printer's Interface
ATTENTION: We suggest first performing the calibration from the website. If the calibration fails, then follow these steps.
Step 1: Media Calibration
Hold the PAUSE + CANCEL buttons for 2 seconds to start the media calibration.
Step 2: RFID Calibration
Press the menus ‘Home’ (![]() ) button. Navigate to the ‘RFID’ (
) button. Navigate to the ‘RFID’ (![]() ) menu button and press the ‘Select’ ( — ) button.
) menu button and press the ‘Select’ ( — ) button.
Use the Left and Right navigation arrows to browse to the RFID CALIBRATE procedure. Press the select button ( — ) below the START on the lower right hand of the display.
The printer will slowly feed a label while adjusting the location and RFID read/write communication settings for your chosen RFID tag/label.
The printer will feed an additional label in some cases when calibration has completed successfully with the display message reading: READY
At this point, you can open the printer and roll the excess labels back inside. Then, close the printer, unpause it, and you will be ready to print.
ZD500R: Alignment
Adjusting the vertical print position on your labels
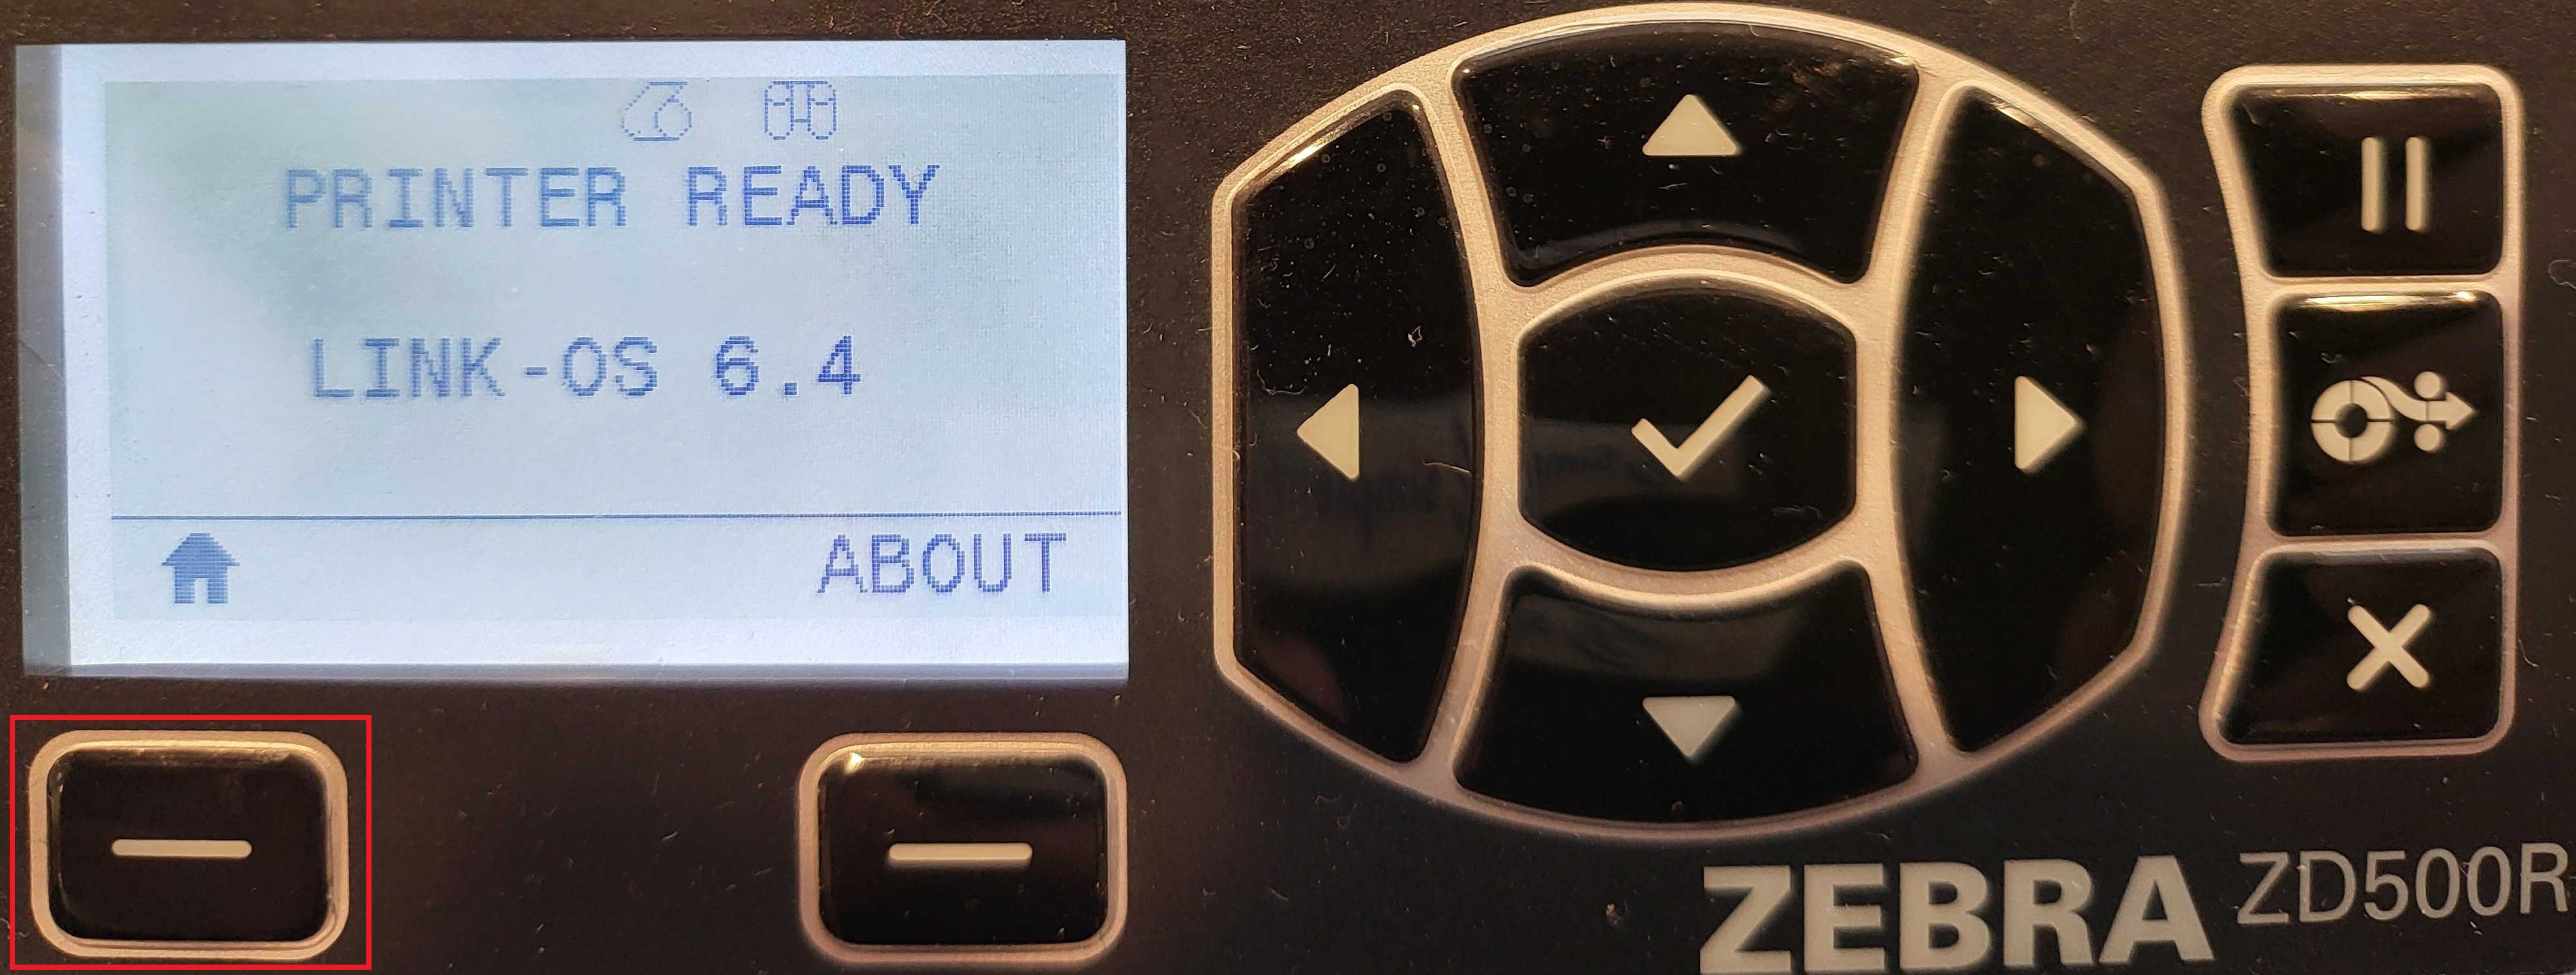
From the main screen, press the Home button (house icon).
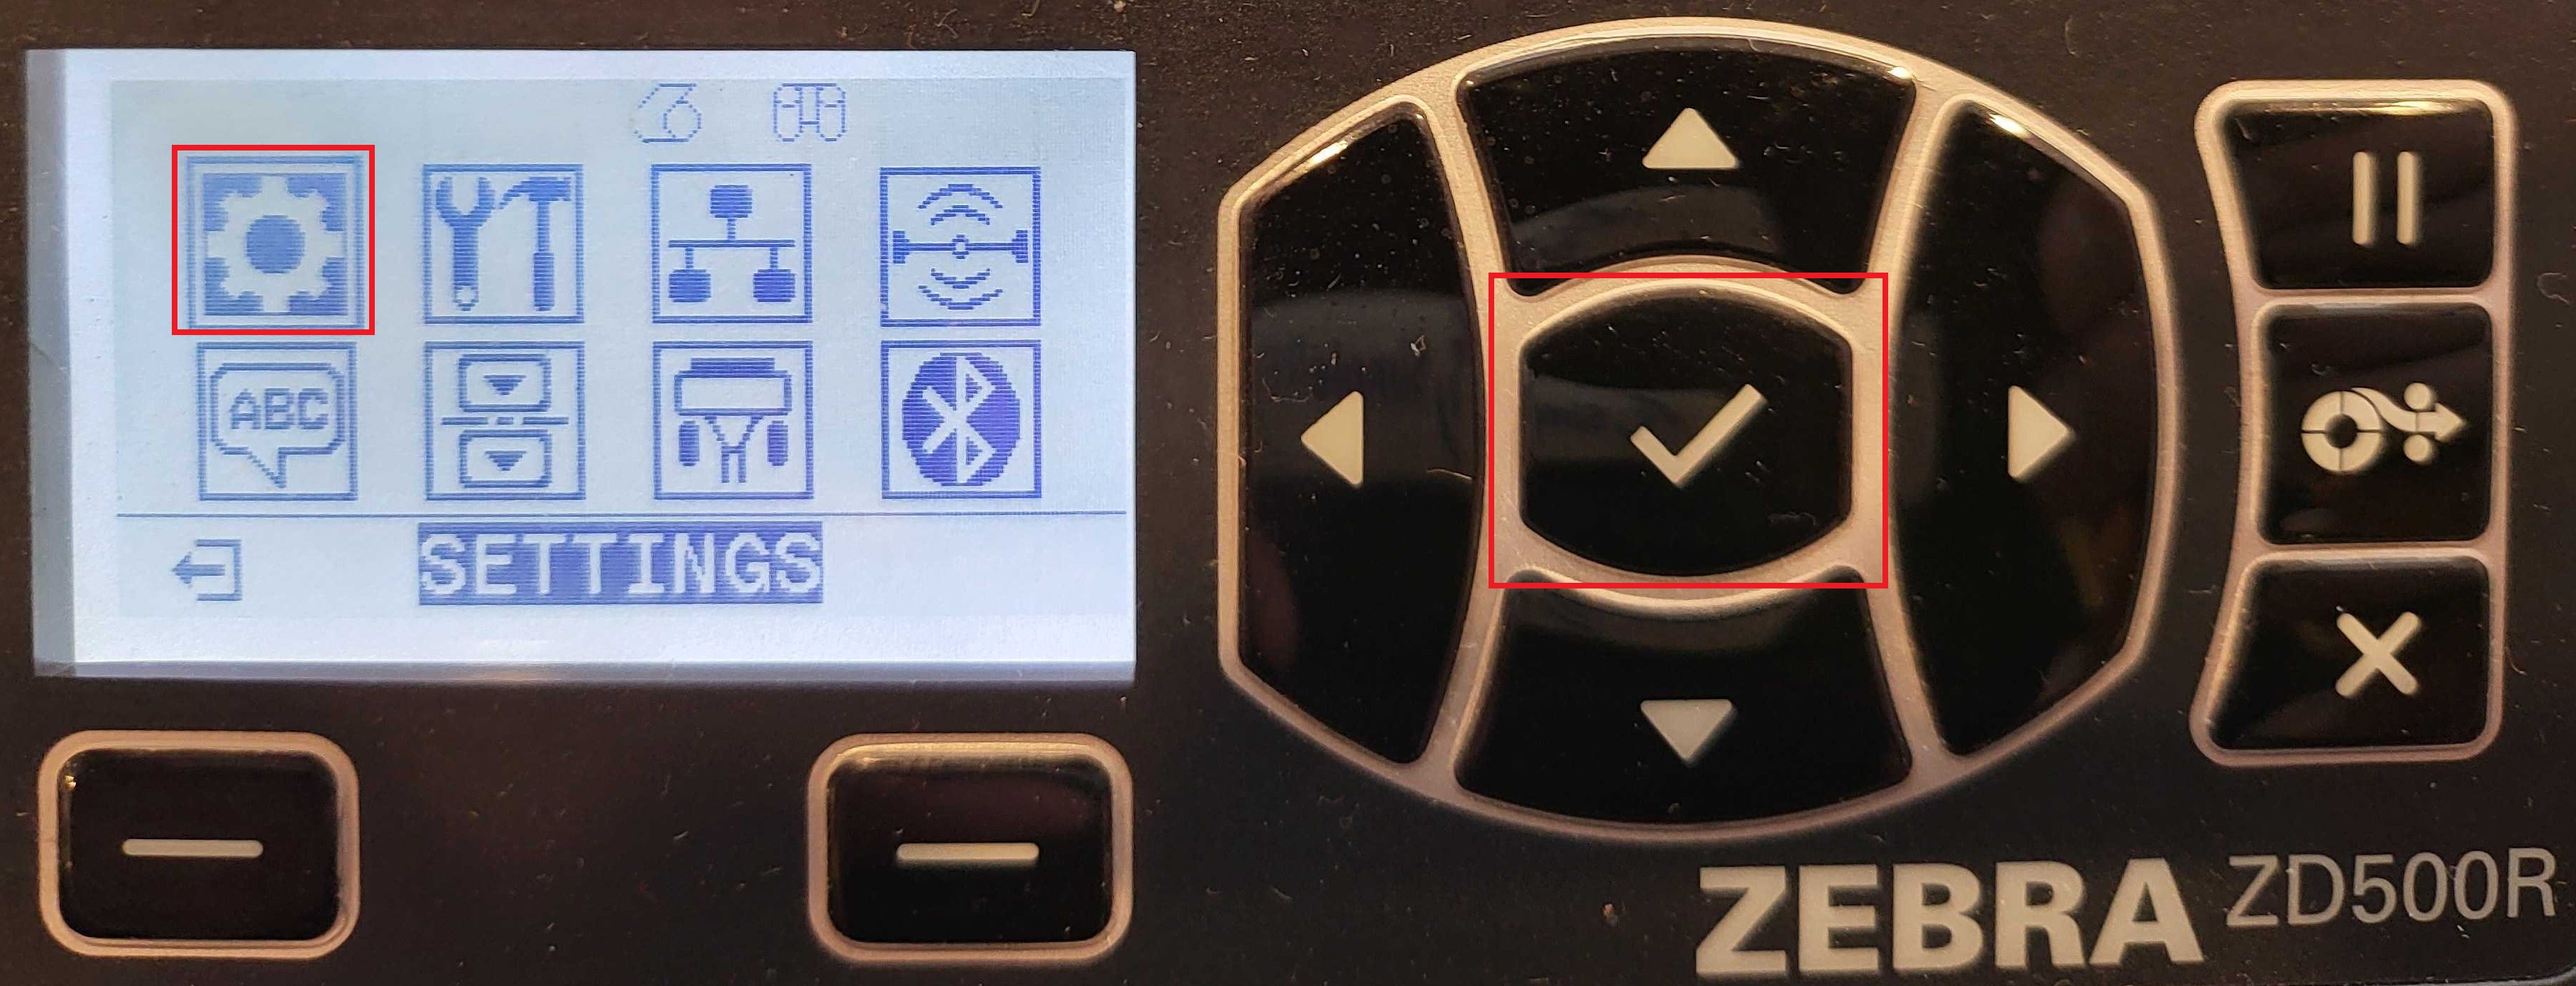
Select Settings (gear icon).
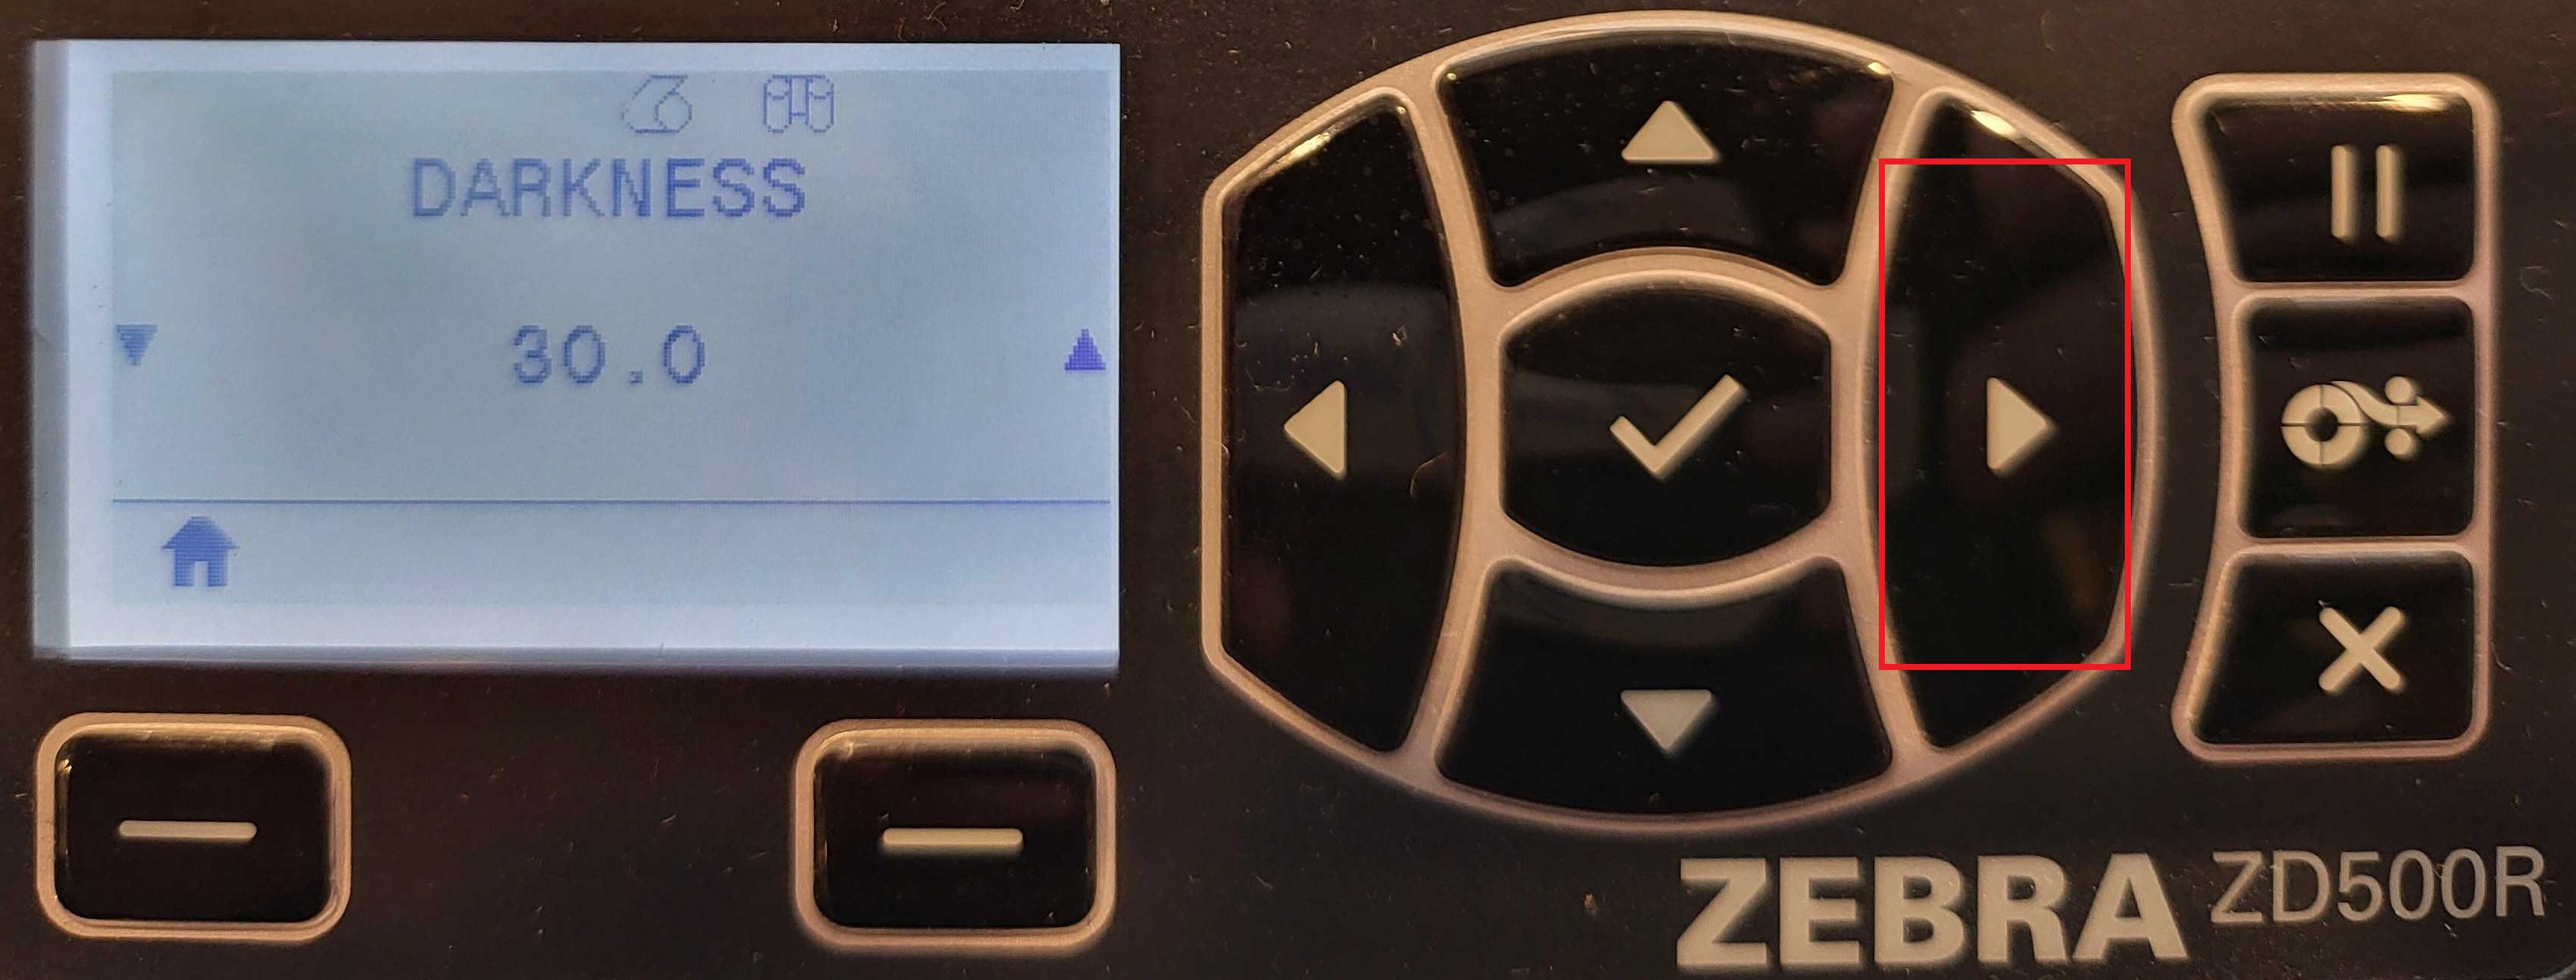
Use the right arrow on the navigation buttons until you reach LABEL TOP.
Use the up/down arrows to adjust the value:
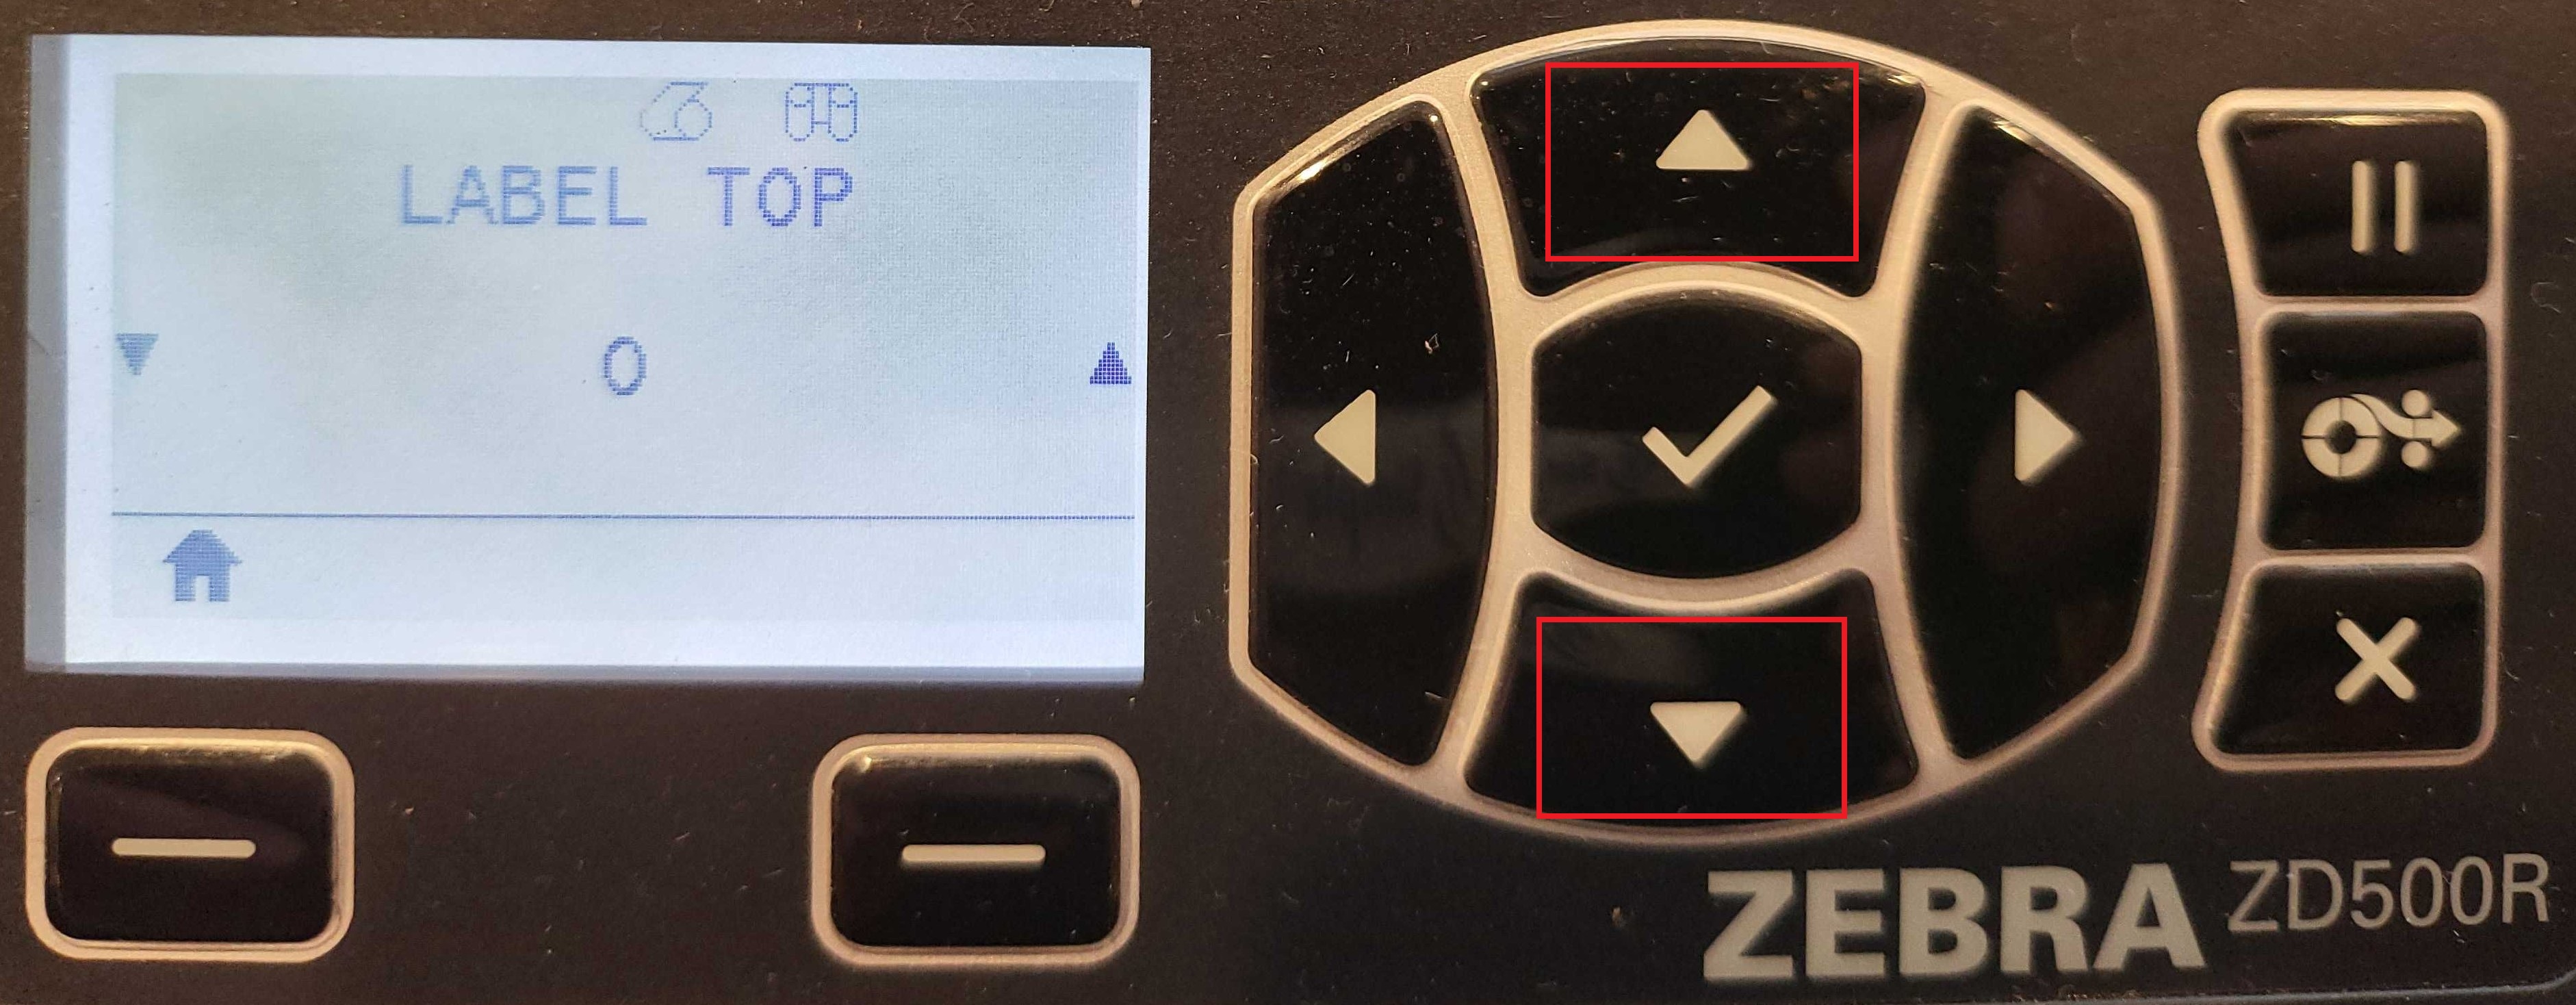
- Negative values move the print toward the top of the label.
- Positive values move it away from the top.
- Accepted range: –120 to 120.
When you're done, press the Home button again. Your changes will be automatically saved.