Printer set up
- Identifying your Printer Model
- Installing Print Client
- Configuring your Printronix Printer after a reset
- Printer Setup Instructions
- Zebra Printers: Loading Media & Ribbon
- What Needs to Be Plugged Into a Printronix Printer?
- Printronix Printers: Loading Media & Ribbon
Identifying your Printer Model
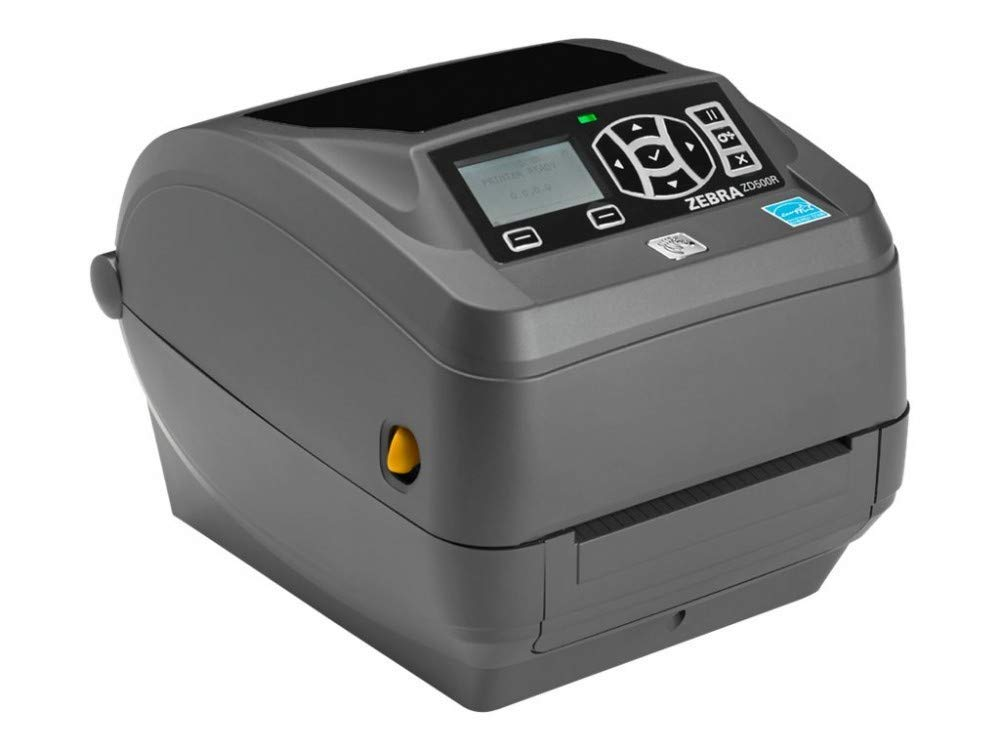
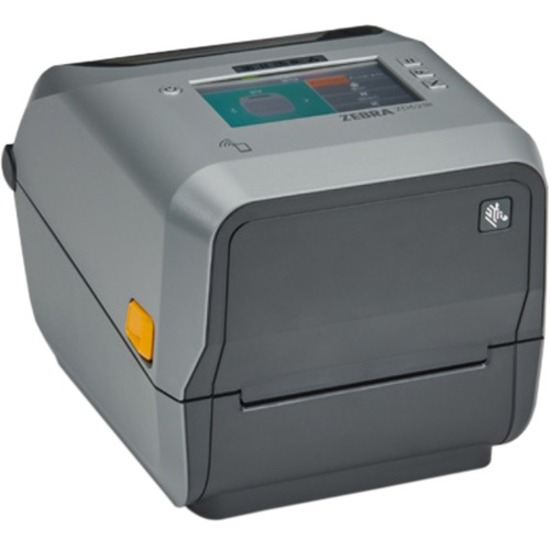
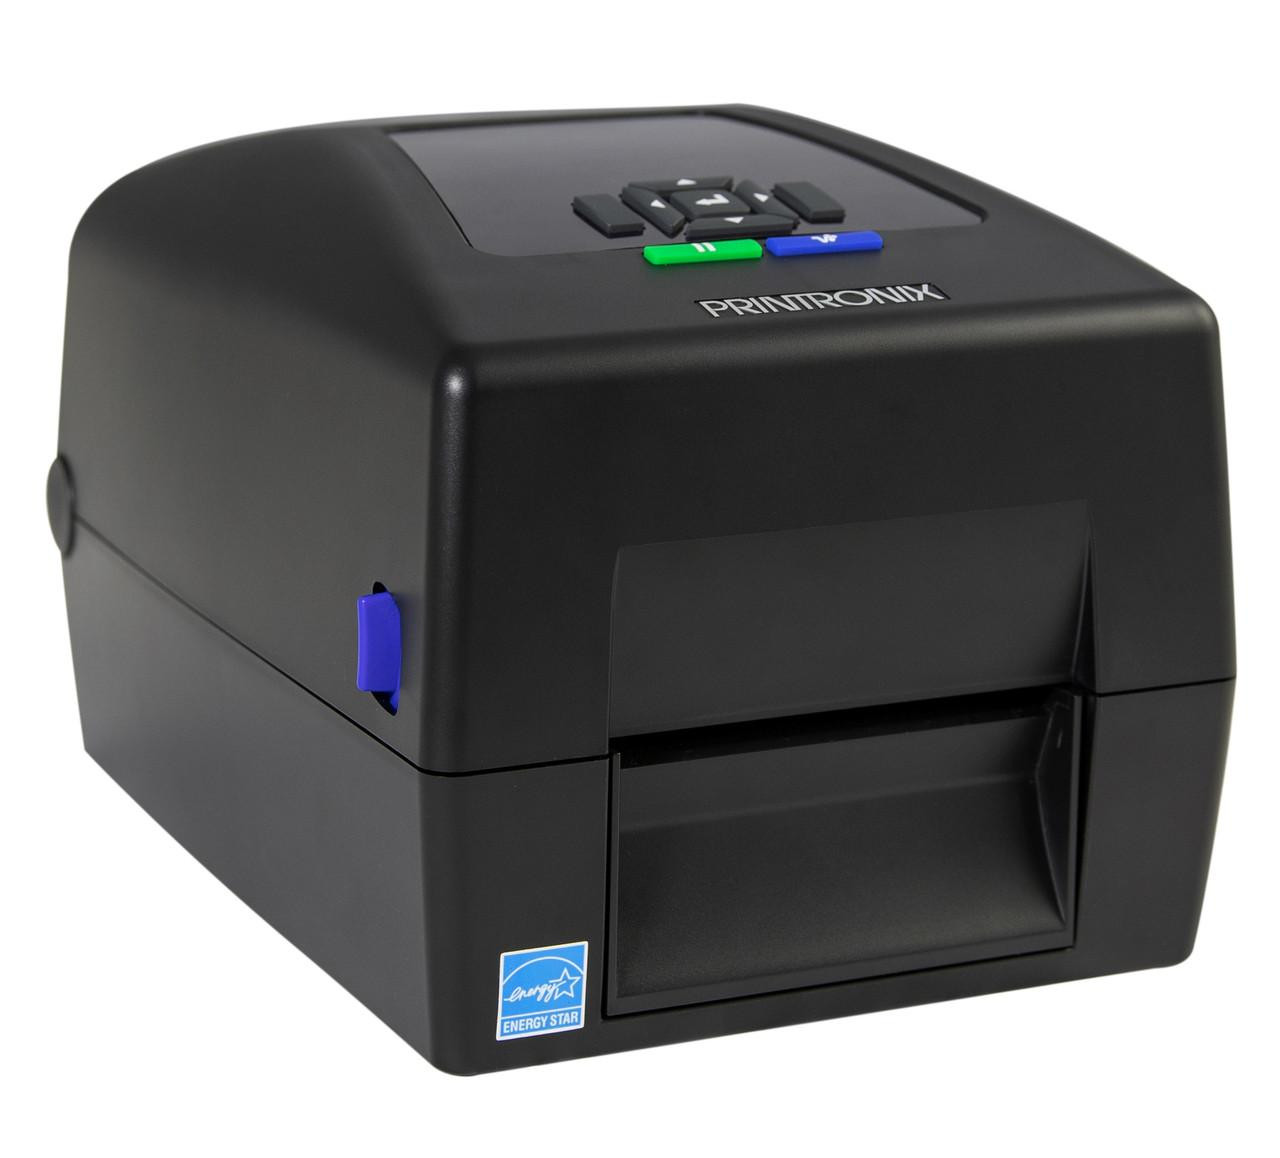
Desktop printers
These printers can easily be identified visually.
Zebra ZD500R:
Zebra ZD621R:
Printronix T800 (T820, T830):
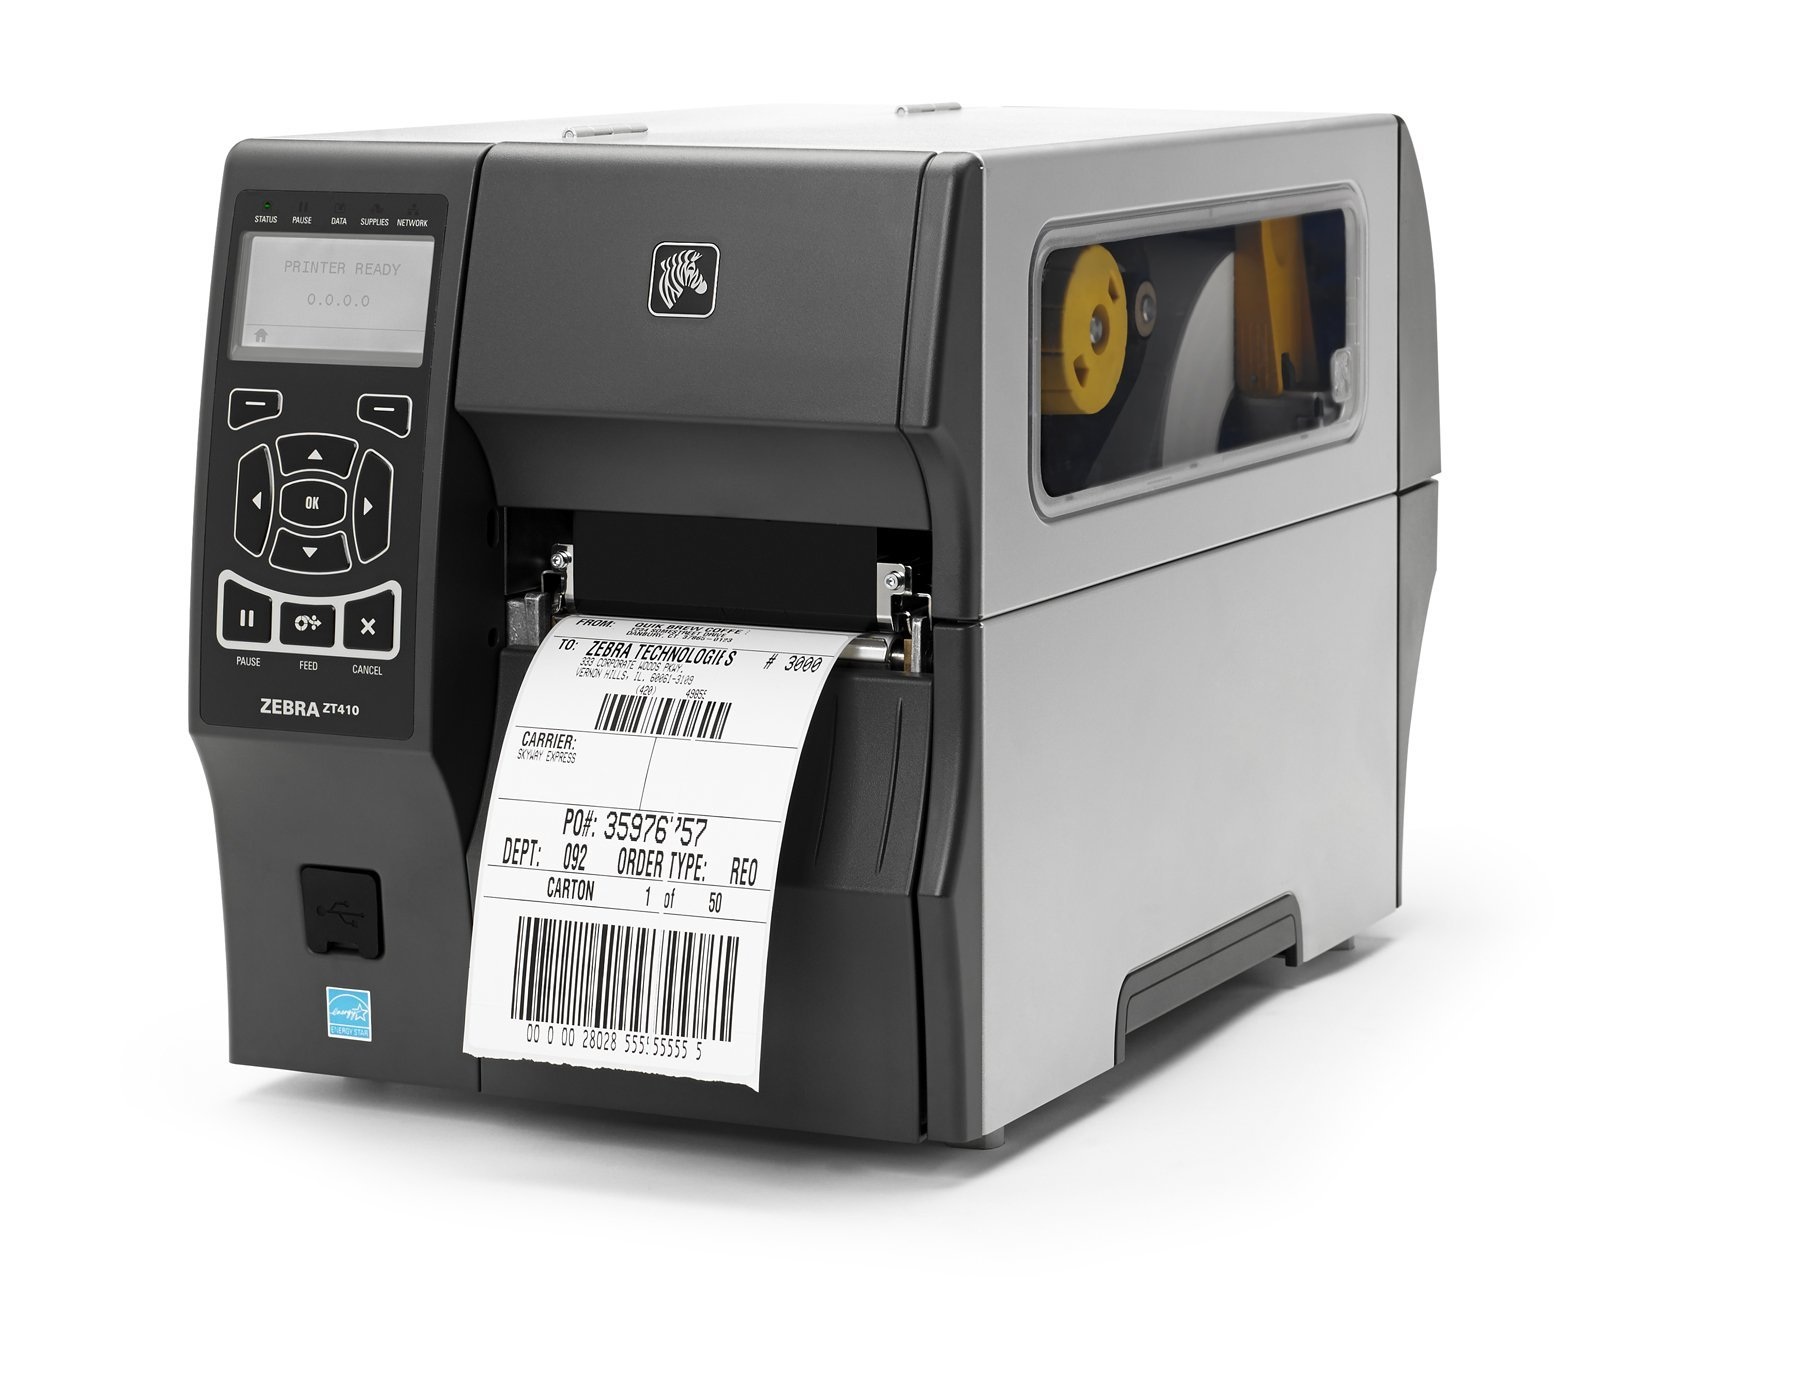
Industrial Printers
These printers can be harder to tell apart visually, however you can usually find the model number printed on the front as well.
Zebra ZT410:
Zebra ZT411:

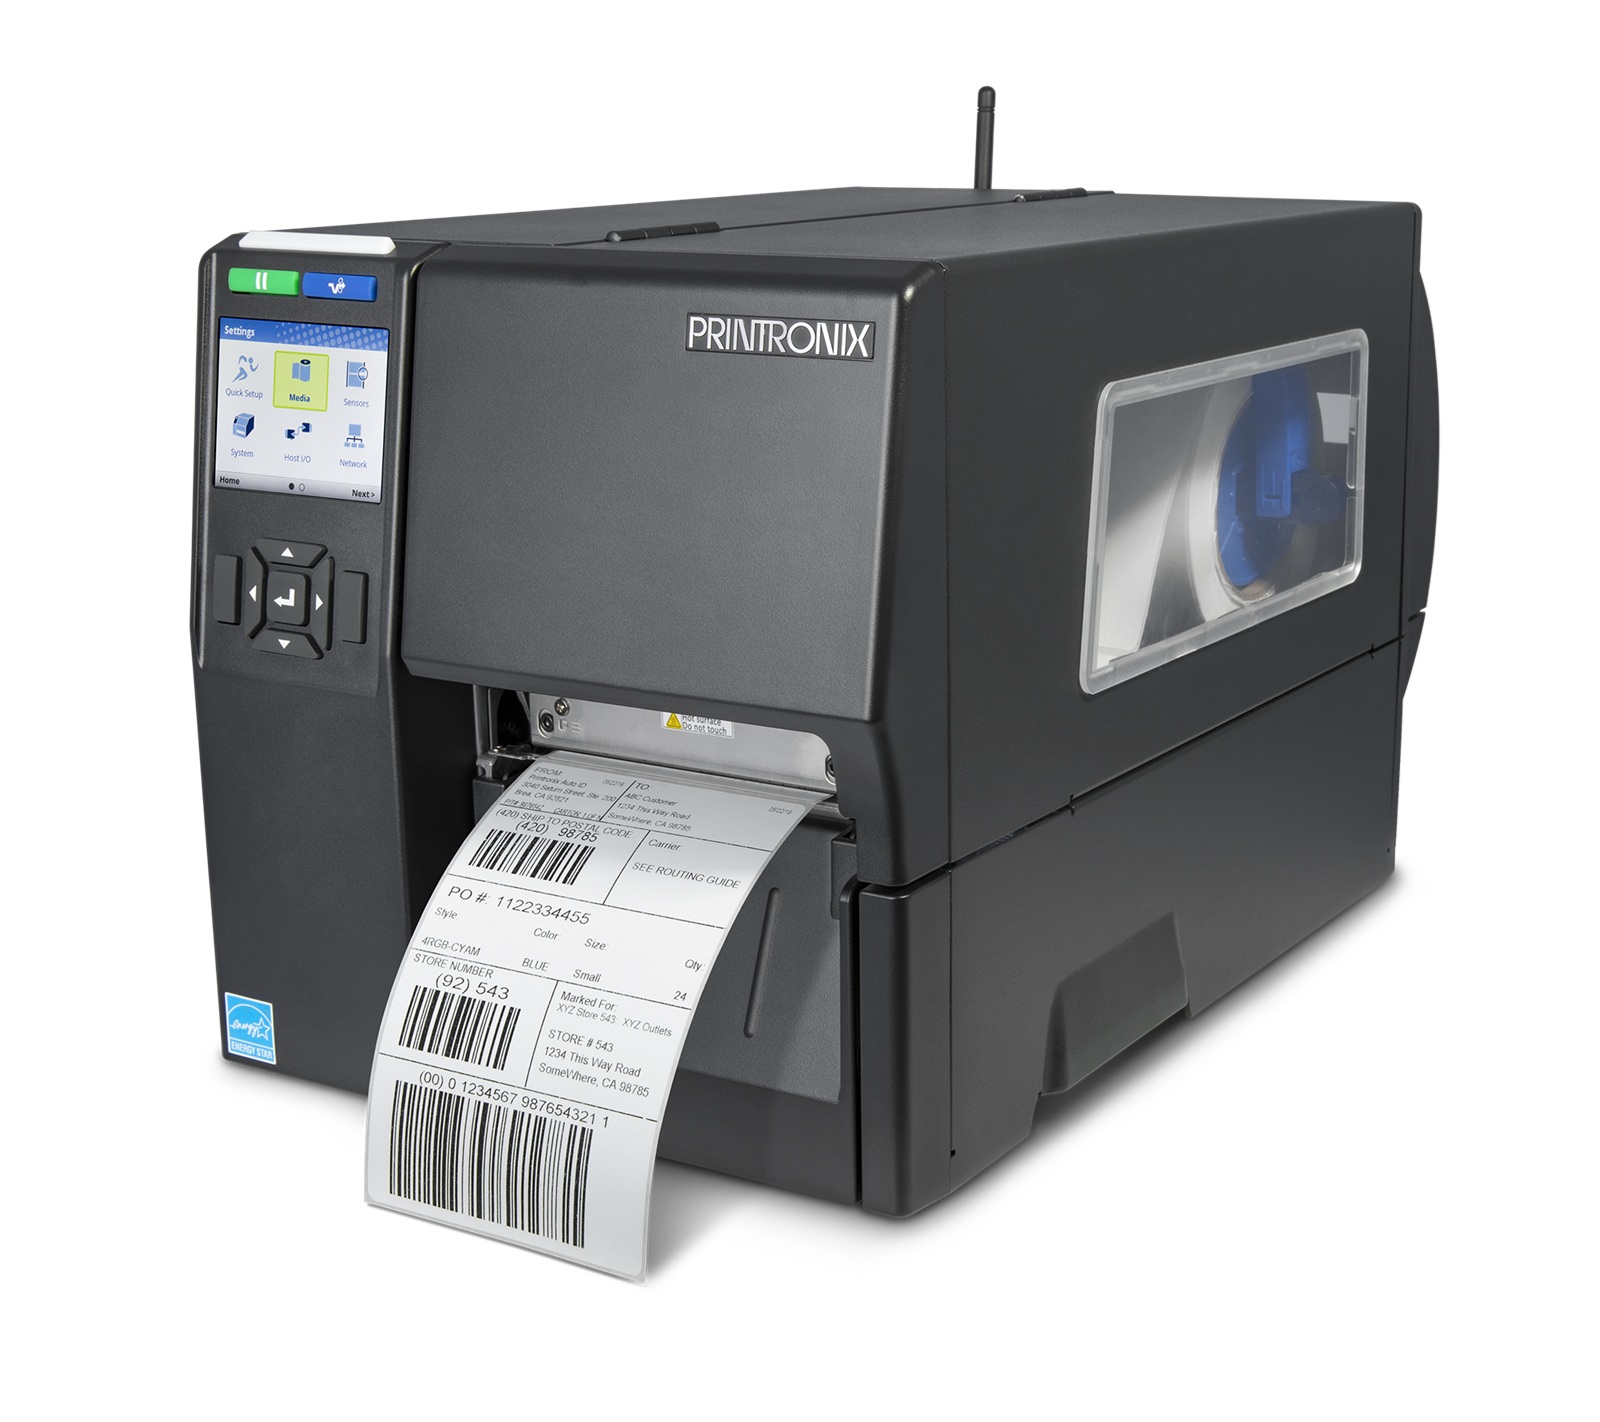
Printronix T4000:
Note: The T4000 has a media cover that can fold when opened, whereas the T6000e does not.
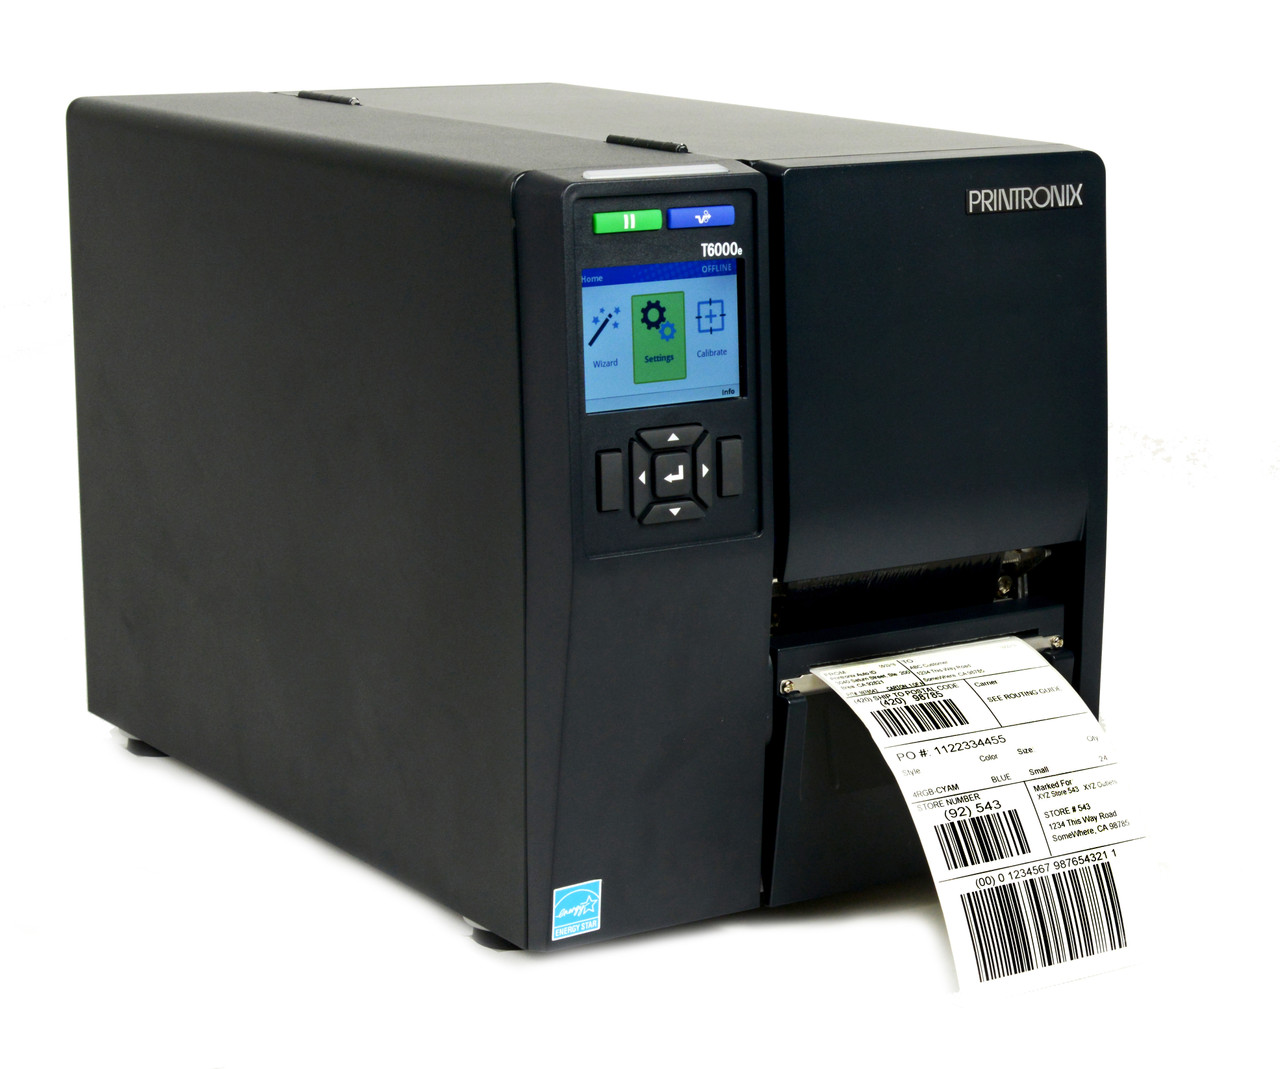
Printronix T6000e:
Note: The T4000 has a media cover that can fold when opened, whereas the T6000e does not.
Installing Print Client
Step 1. Connect the printer to the device
The printer can be connected to the PC via Network or USB. Network method is generally more reliable, and therefore preferred if possible.
WARNING: MACOS DEVICES
The macOS version of the Print Client is currently in beta. As such it has the following limitations:
- The macOS Print Client requires Apple Silicon (M1 or later). Macs with Intel processors are not compatible.
- The macOS Print Client does not support Printronix printers via USB. Zebra printers can be connected via USB, but Printronix printers can only be connected via local network.
- The macOS Print Client will not work if certain USB storage devices are connected. This can include flash drives, external hard drives, or even mobile phones. If you disconnect these devices, the print client will run.
Network method
If connecting via network, use the provided CAT6 cable, or a network cable of your own, to attach the printer to your network.
The printer must be on the same subnet as the host PC in order to be detected by the Print Client.
USB method
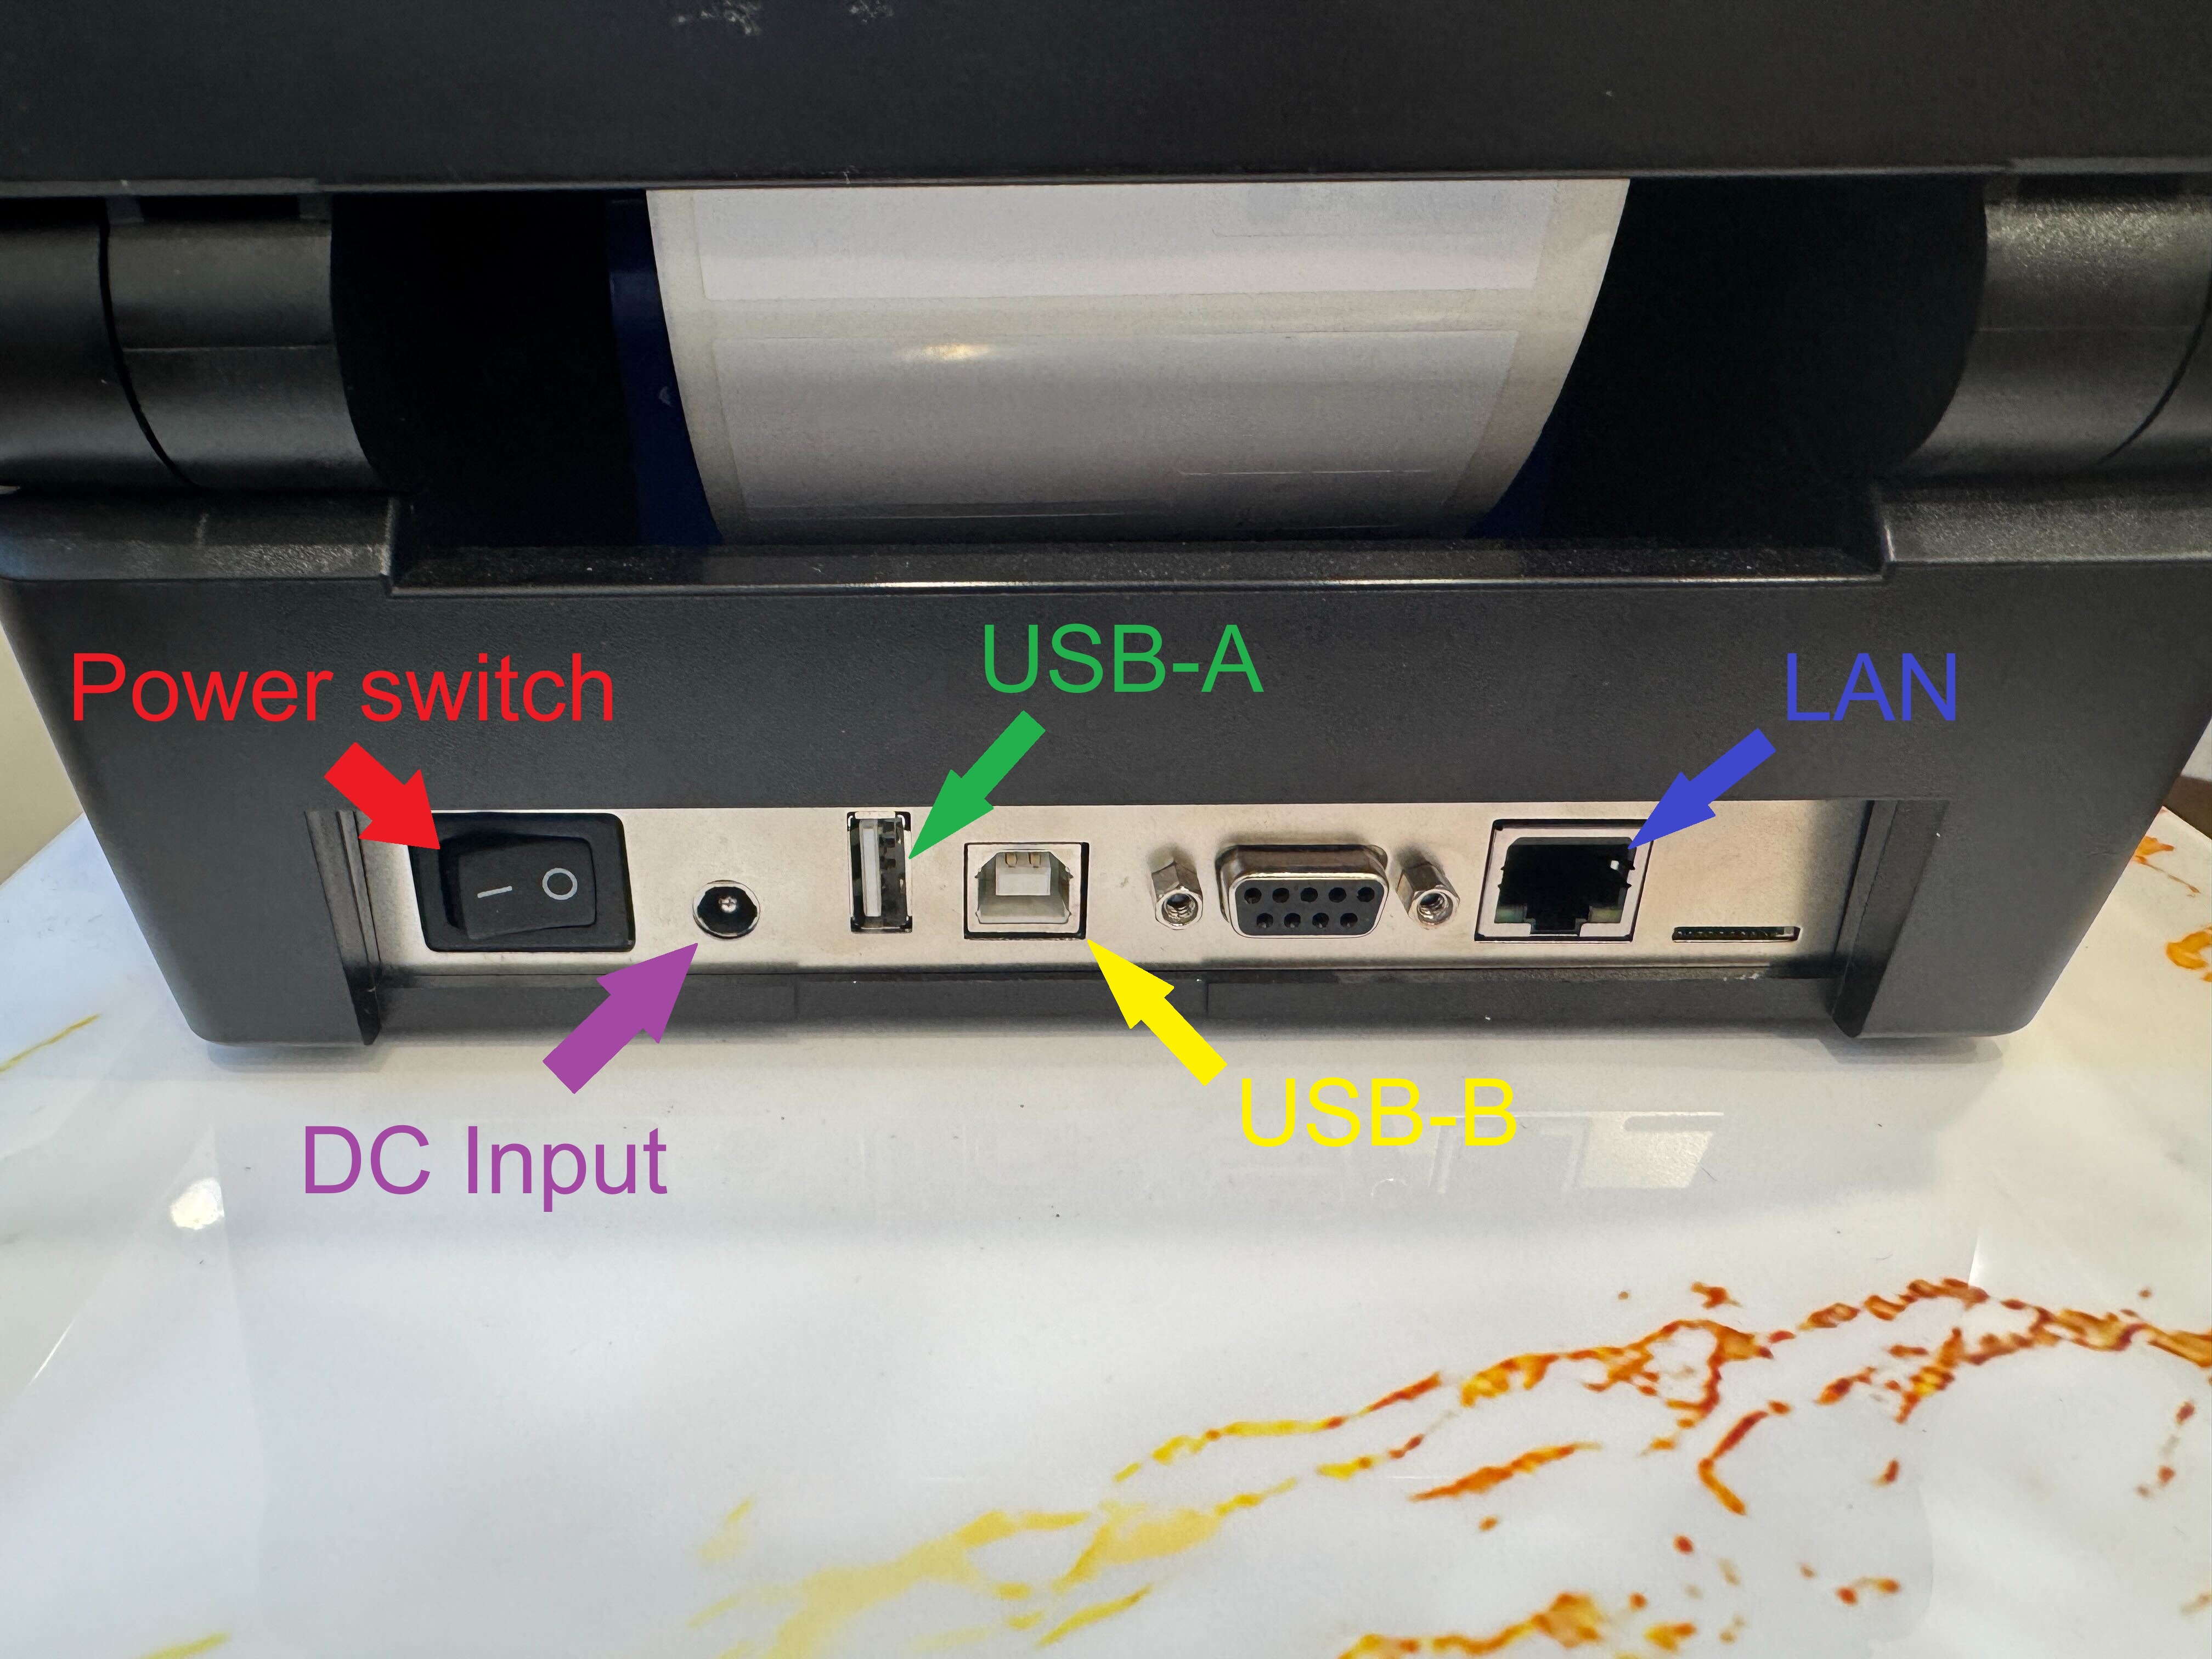
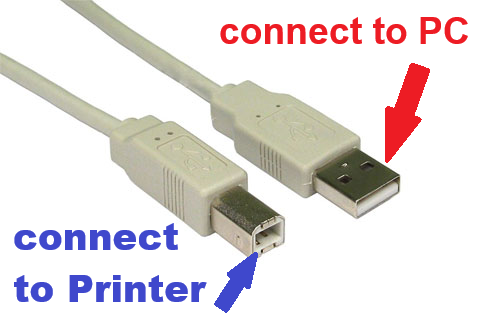
If connecting via USB, plug the provided USB cable into your PC and printer. The USB-A connector should be plugged into the PC, while the USB-B connecter should be plugged into the printer:

Last, for the USB method, you'll need to change the Interface setting on the printer to USB.
Such cable type is often used by regular inkjet/laser printers as well.
Step 2. Install Print Client
If you are connecting a Printronix printer via USB, you must use the Windows version currently. macOS only supports Printronix printers via network connection.
Download the Print Client:
- Login to the web portal
- Click on your account name in the top-right corner
- Click "Resources"
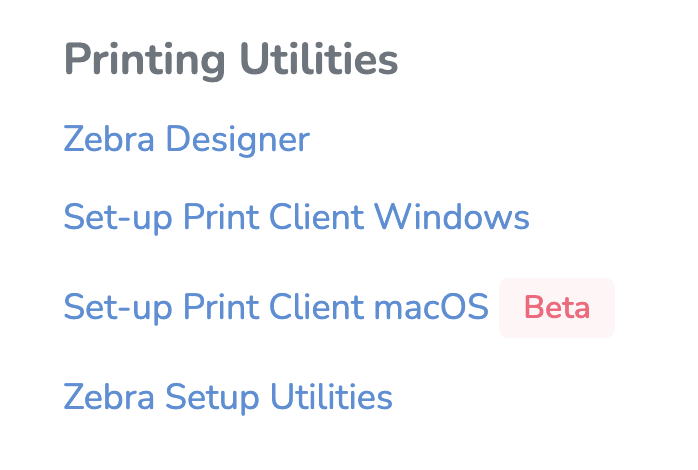
- On the resources page, under Printing Utilities, click "Set-up Print Client Windows" or "Set-up Print Client macOS" to download

Install Client
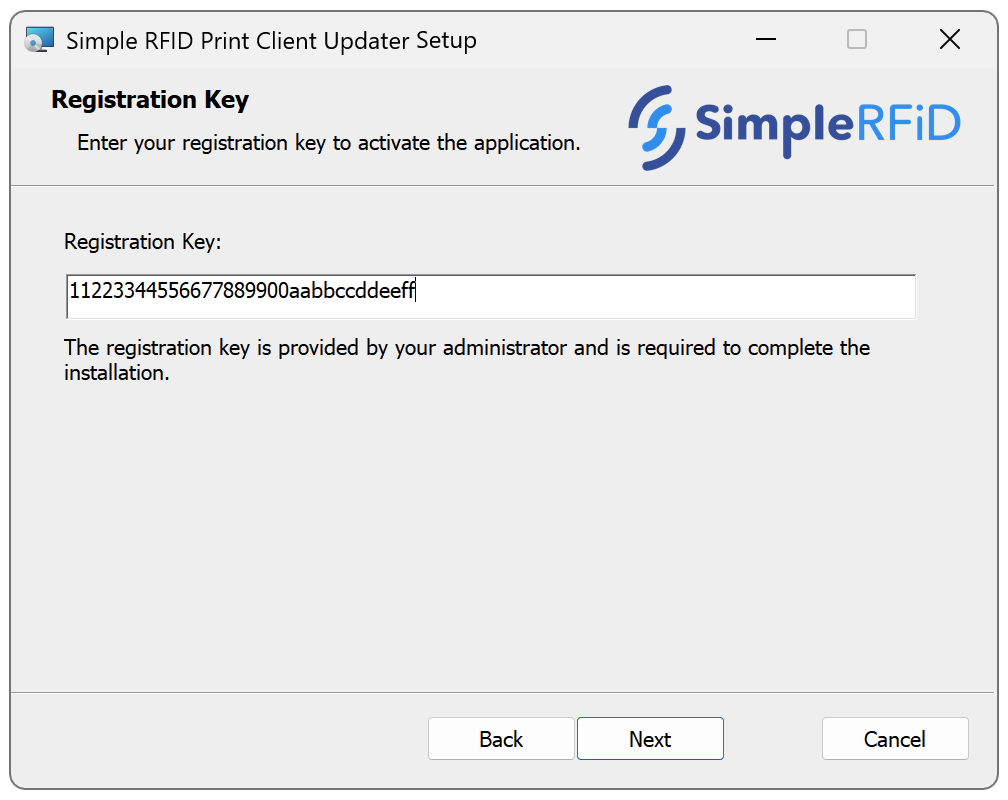
- Open the downloaded file (PrintClient.Updater.Installer.msi or PrintClientUpdater.Installer.pkg). This will launch the installer.
- Follow the steps in the installer. You will need to provide Administrator approval to complete the installation.
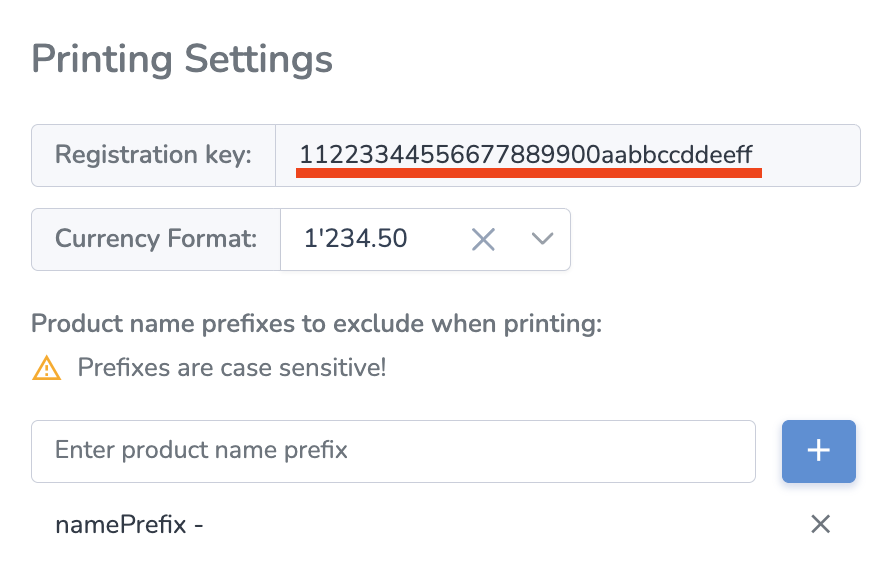
- Enter your Registration Key when prompted. You can find this key on the web portal, on the Customer Profile page under Printing Settings.
If you don't have access to the key, reach out to your manager.
If you are not prompted to enter the key, finish the installation, then reach out to Simple RFID support to connect your printer.

- When the installation is completed successfully, you can close the installer.
Step 3. Assign Location
Please ask your manager to assign the location.
Here are the steps for manager:
- Go to User Menu (click on the name on the top right)
- Select Printers
- Find the new Print Station (often on top, will have "Not assigned" under the location column)
- Click the gear icon (
 ) on the right from the Print Station)
 - In the Location dropdown, set the desired location
- Click Apply

Once the printer is connected, it will appear on the Printers page, and in the Available Printers menu.
Configuring your Printronix Printer after a reset
When you update the firmware on your Printronix printer, or if you have to reset its settings during troubleshooting, you'll need to configure a few settings for the printer to work with Simple RFID.
- First, navigate to the Home screen of the printer by pressing the Pause button. You should see this screen:

- Click the Settings button
- Within the Settings menu, set the following values:
If you see an ENTER SWITCH LOCKED error, press the Up and Down keys at the same time, once. You should then see ENTER SWITCH UNLOCKED, and then you can perform the calibration.
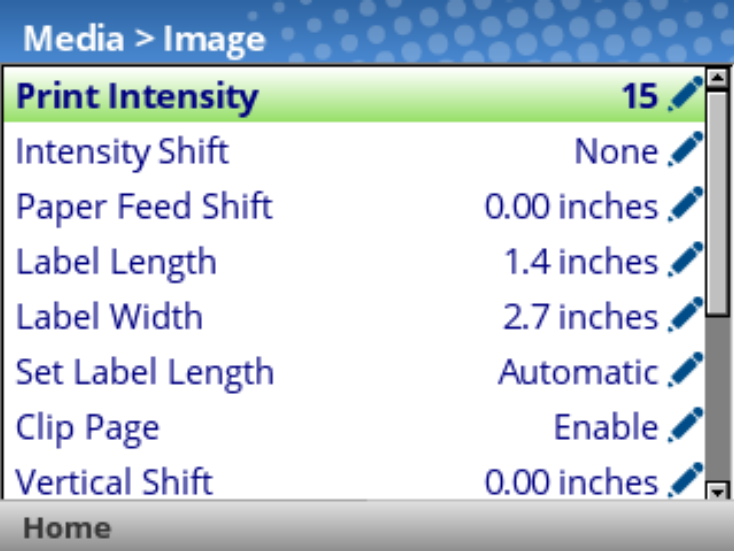
- Media > Image
- Print Intensity: 15
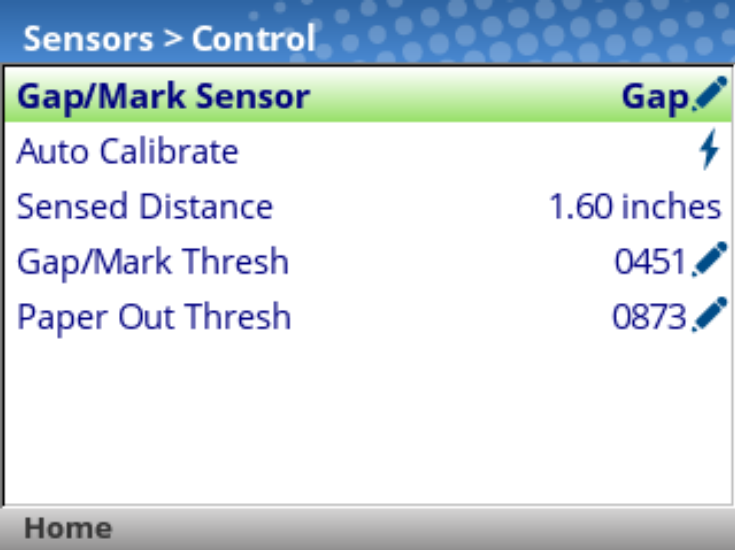
- Sensors > Control
- Gap/Mark Sensor: Gap
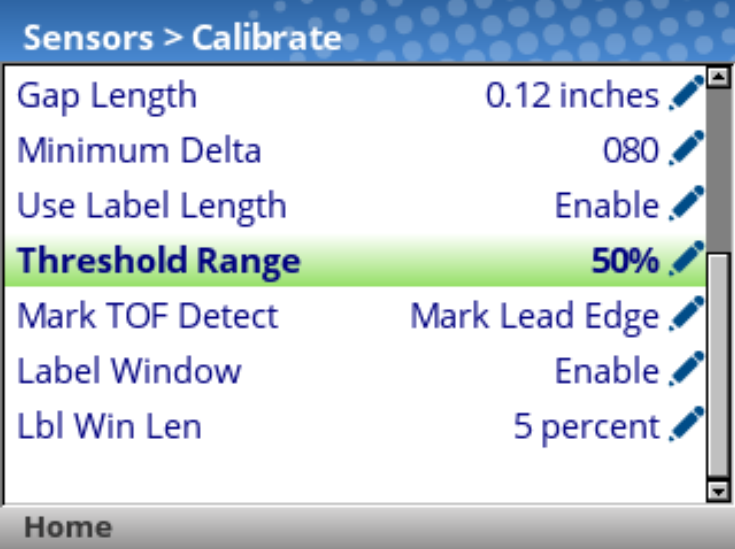
- Sensors > Calibrate
- Power-Up Action: Disable
- Head Close Action: Seek TOF
- Threshold Range: 50%
- Label Window: Enable
- Host I/O > Control
- Interface: USB or Ethernet depending on how the printer is connected

- Application
- Control
- Active IGP Emul: ZGL
- Control

-
- ZGL Setup
- Preparser: Enable
- ZGL Setup

After changing these settings, press the green Pause button to unpause the printer, then select "Save permanently in Active Config".
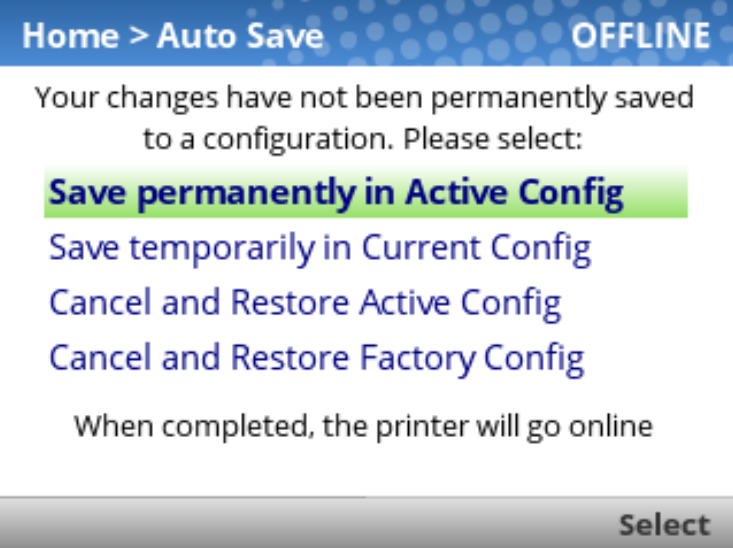
When all the steps have been completed, the printer should show "ONLINE" in the top-right corner of the screen:

You should now be ready to calibrate the printer with either Auto or Manual calibration.
Printer Setup Instructions
Set up your printer
Watch the video corresponding to your printer model for setup instructions, then continue for instructions to install the Print Client.
Make sure you do both of these steps before your first onboarding call!
Desktop Printers
Zebra Printer (ZD621R, ZD500R)
Printronix Printer (T800)
Industrial Printers
Zebra Printer (ZT411, ZT410)
Printronix Printer (T6000e)
Printronix Printer (T4000 series)
Install the Print Client
Step 1. Connect the printer to the device
The printer can be connected to the PC via Network or USB. Network method is generally more reliable, and therefore preferred if possible.
WARNING: MACOS DEVICES
The macOS version of the Print Client is currently in beta. As such it has the following limitations:
- The macOS Print Client requires Apple Silicon (M1 or later). Macs with Intel processors are not compatible.
- The macOS Print Client does not support Printronix printers via USB. Zebra printers can be connected via USB, but Printronix printers can only be connected via local network.
- The macOS Print Client will not work if certain USB storage devices are connected. This can include flash drives, external hard drives, or even mobile phones. If you disconnect these devices, the print client will run.
Network method
If connecting via network, use the provided CAT6 cable, or a network cable of your own, to attach the printer to your network.
The printer must be on the same subnet as the host PC in order to be detected by the Print Client.
USB method
If connecting via USB, plug the provided USB cable into your PC and printer. The USB-A connector should be plugged into the PC, while the USB-B connecter should be plugged into the printer:
Last, for the USB method, you'll need to change the Interface setting on the printer to USB.
Such cable type is often used by regular inkjet/laser printers as well.
Step 2. Install Print Client
If you are connecting a Printronix printer via USB, you must use the Windows version currently. macOS only supports Printronix printers via network connection.
Download the Print Client:
- Login to the web portal
- Click on your account name in the top-right corner
- Click "Resources"
- On the resources page, under Printing Utilities, click "Set-up Print Client Windows" or "Set-up Print Client macOS" to download
Install Client
- Open the downloaded file (PrintClient.Updater.Installer.msi or PrintClientUpdater.Installer.pkg). This will launch the installer.
- Follow the steps in the installer. You will need to provide Administrator approval to complete the installation.
- Enter your Registration Key when prompted. You can find this key on the web portal, on the Customer Profile page under Printing Settings.
If you don't have access to the key, reach out to your manager.
If you are not prompted to enter the key, finish the installation, then reach out to Simple RFID support to connect your printer. - When the installation is completed successfully, you can close the installer.
Step 3. Assign Location
Please ask your manager to assign the location.
Here are the steps for manager:
- Go to User Menu (click on the name on the top right)
- Select Printers
- Find the new Print Station (often on top, will have "Not assigned" under the location column)
- Click the gear icon () on the right from the Print Station)
- In the Location dropdown, set the desired location
- Click Apply
Once the printer is connected, it will appear on the Printers page, and in the Available Printers menu.
Zebra Printers: Loading Media & Ribbon
ZD500R & ZD621R
Ribbon & Media
ZT410R & ZT411R
Ribbon & Media
What Needs to Be Plugged Into a Printronix Printer?
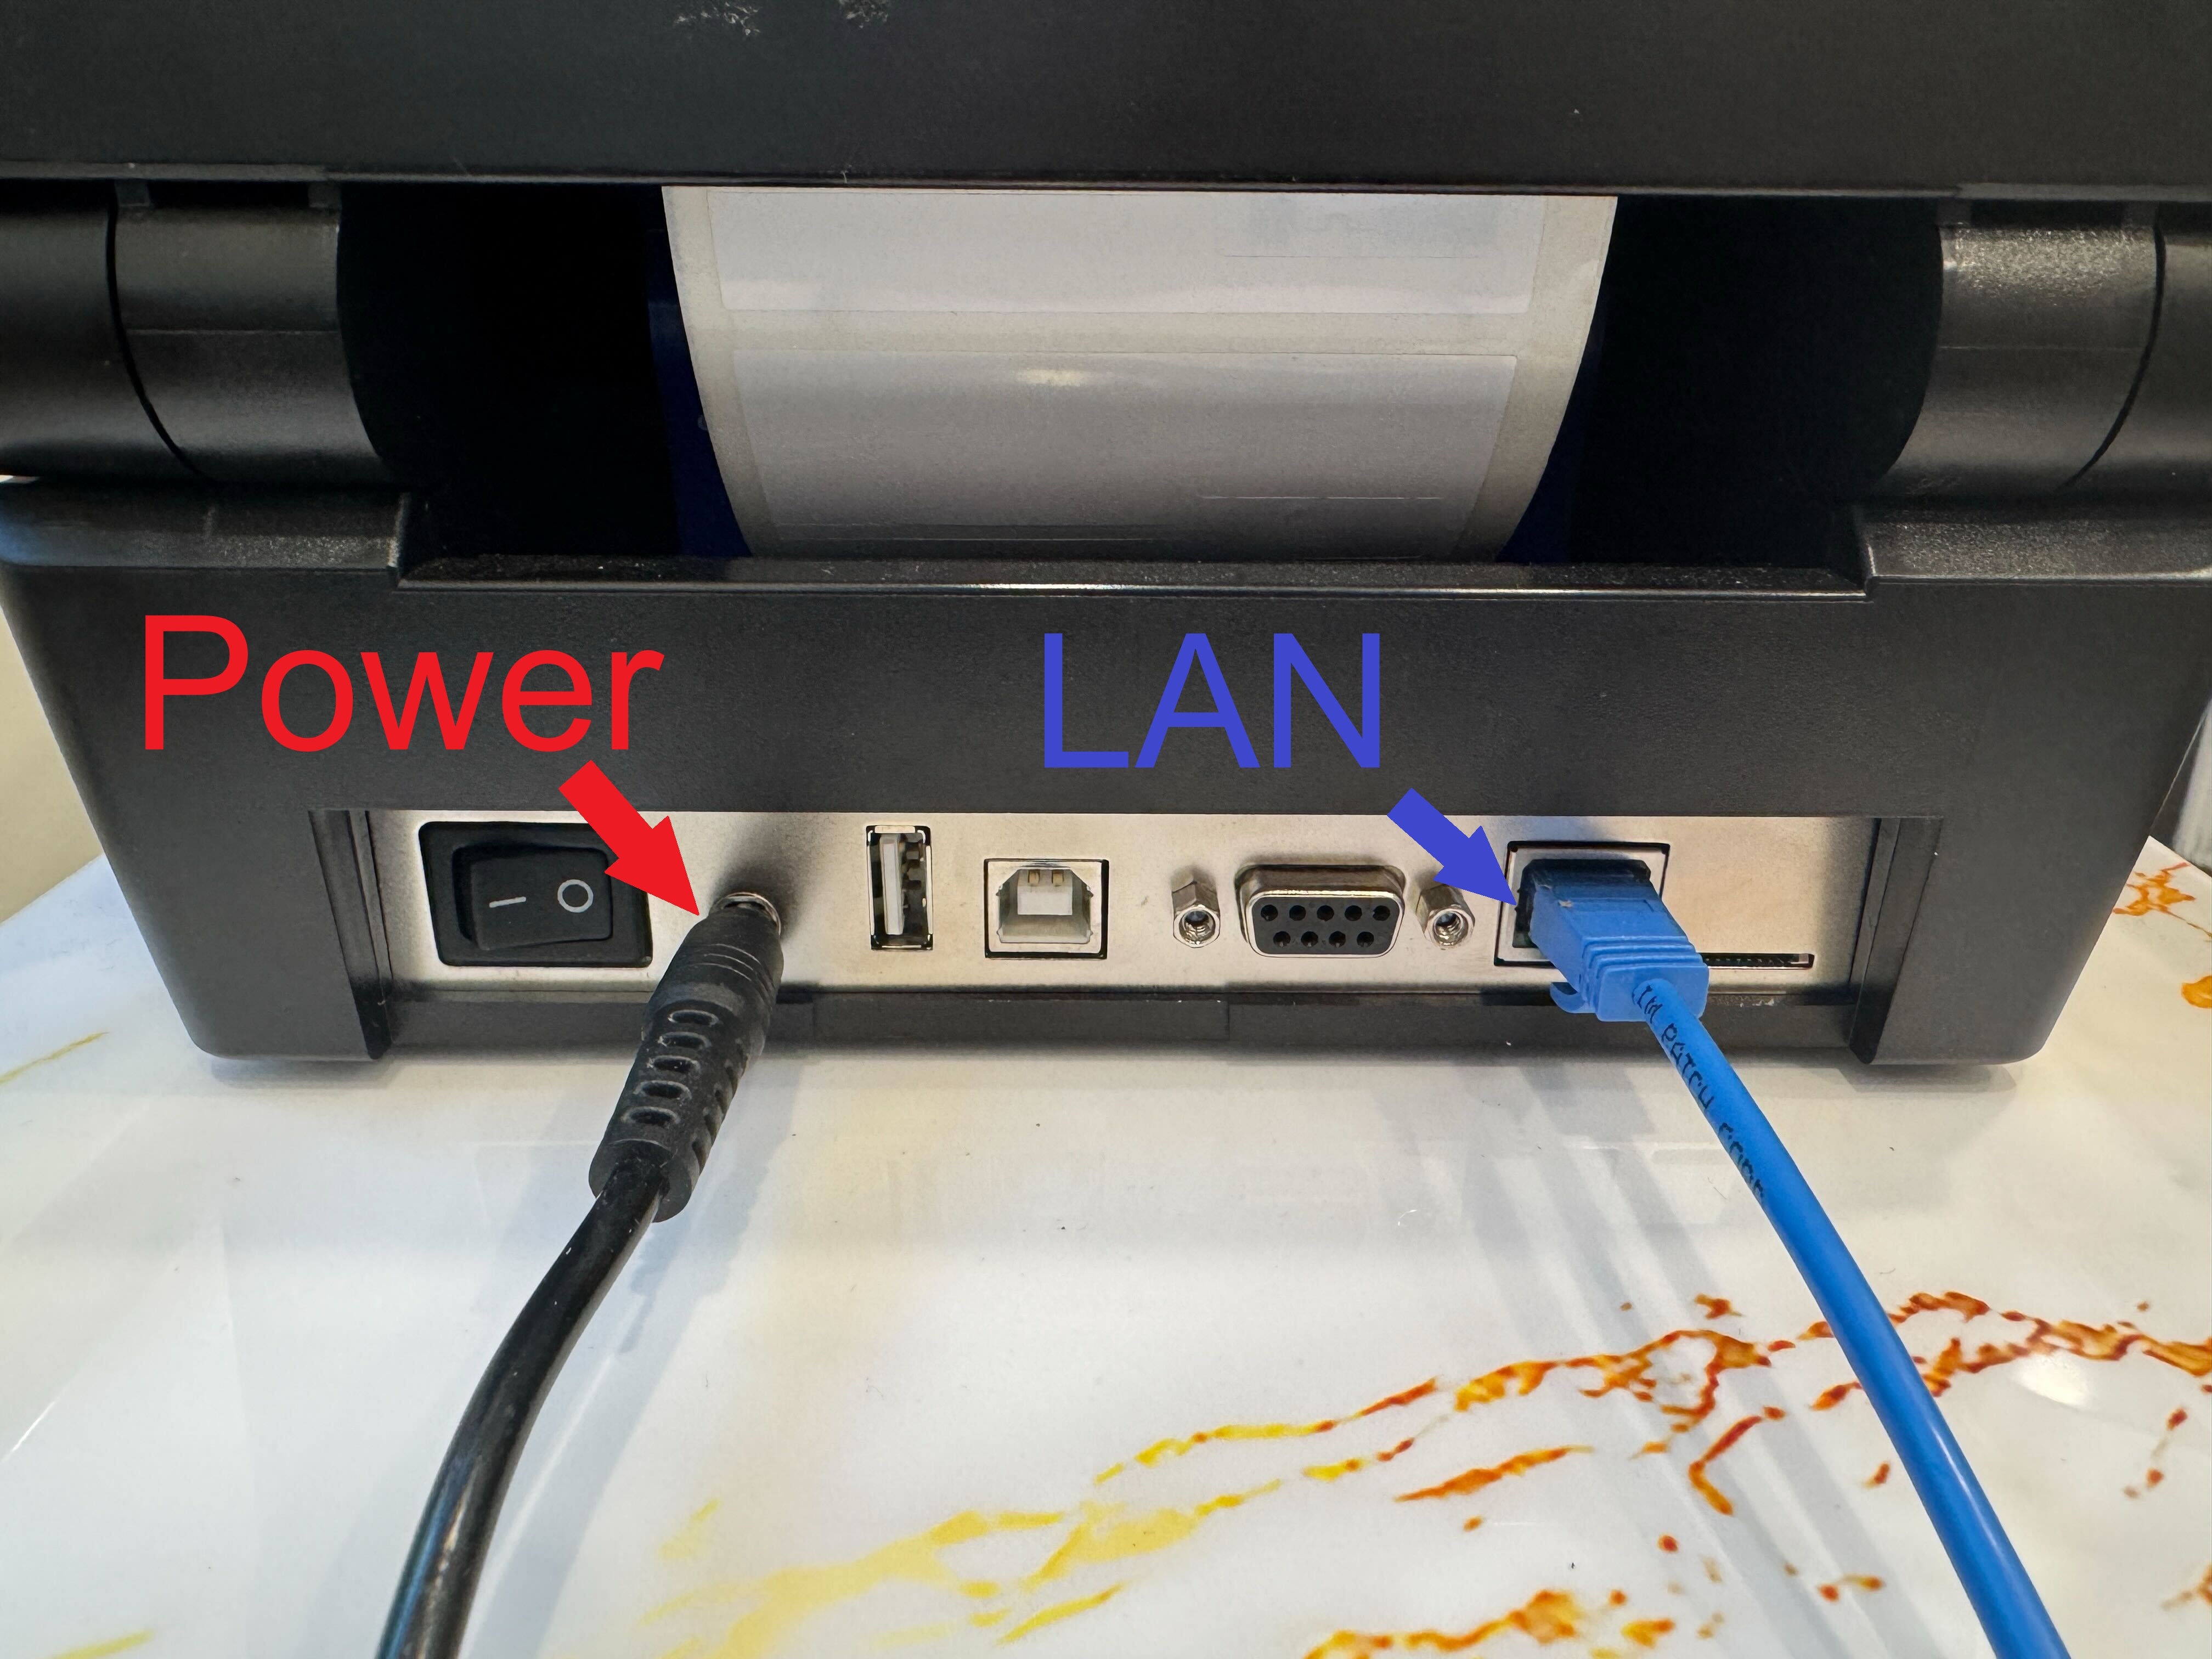
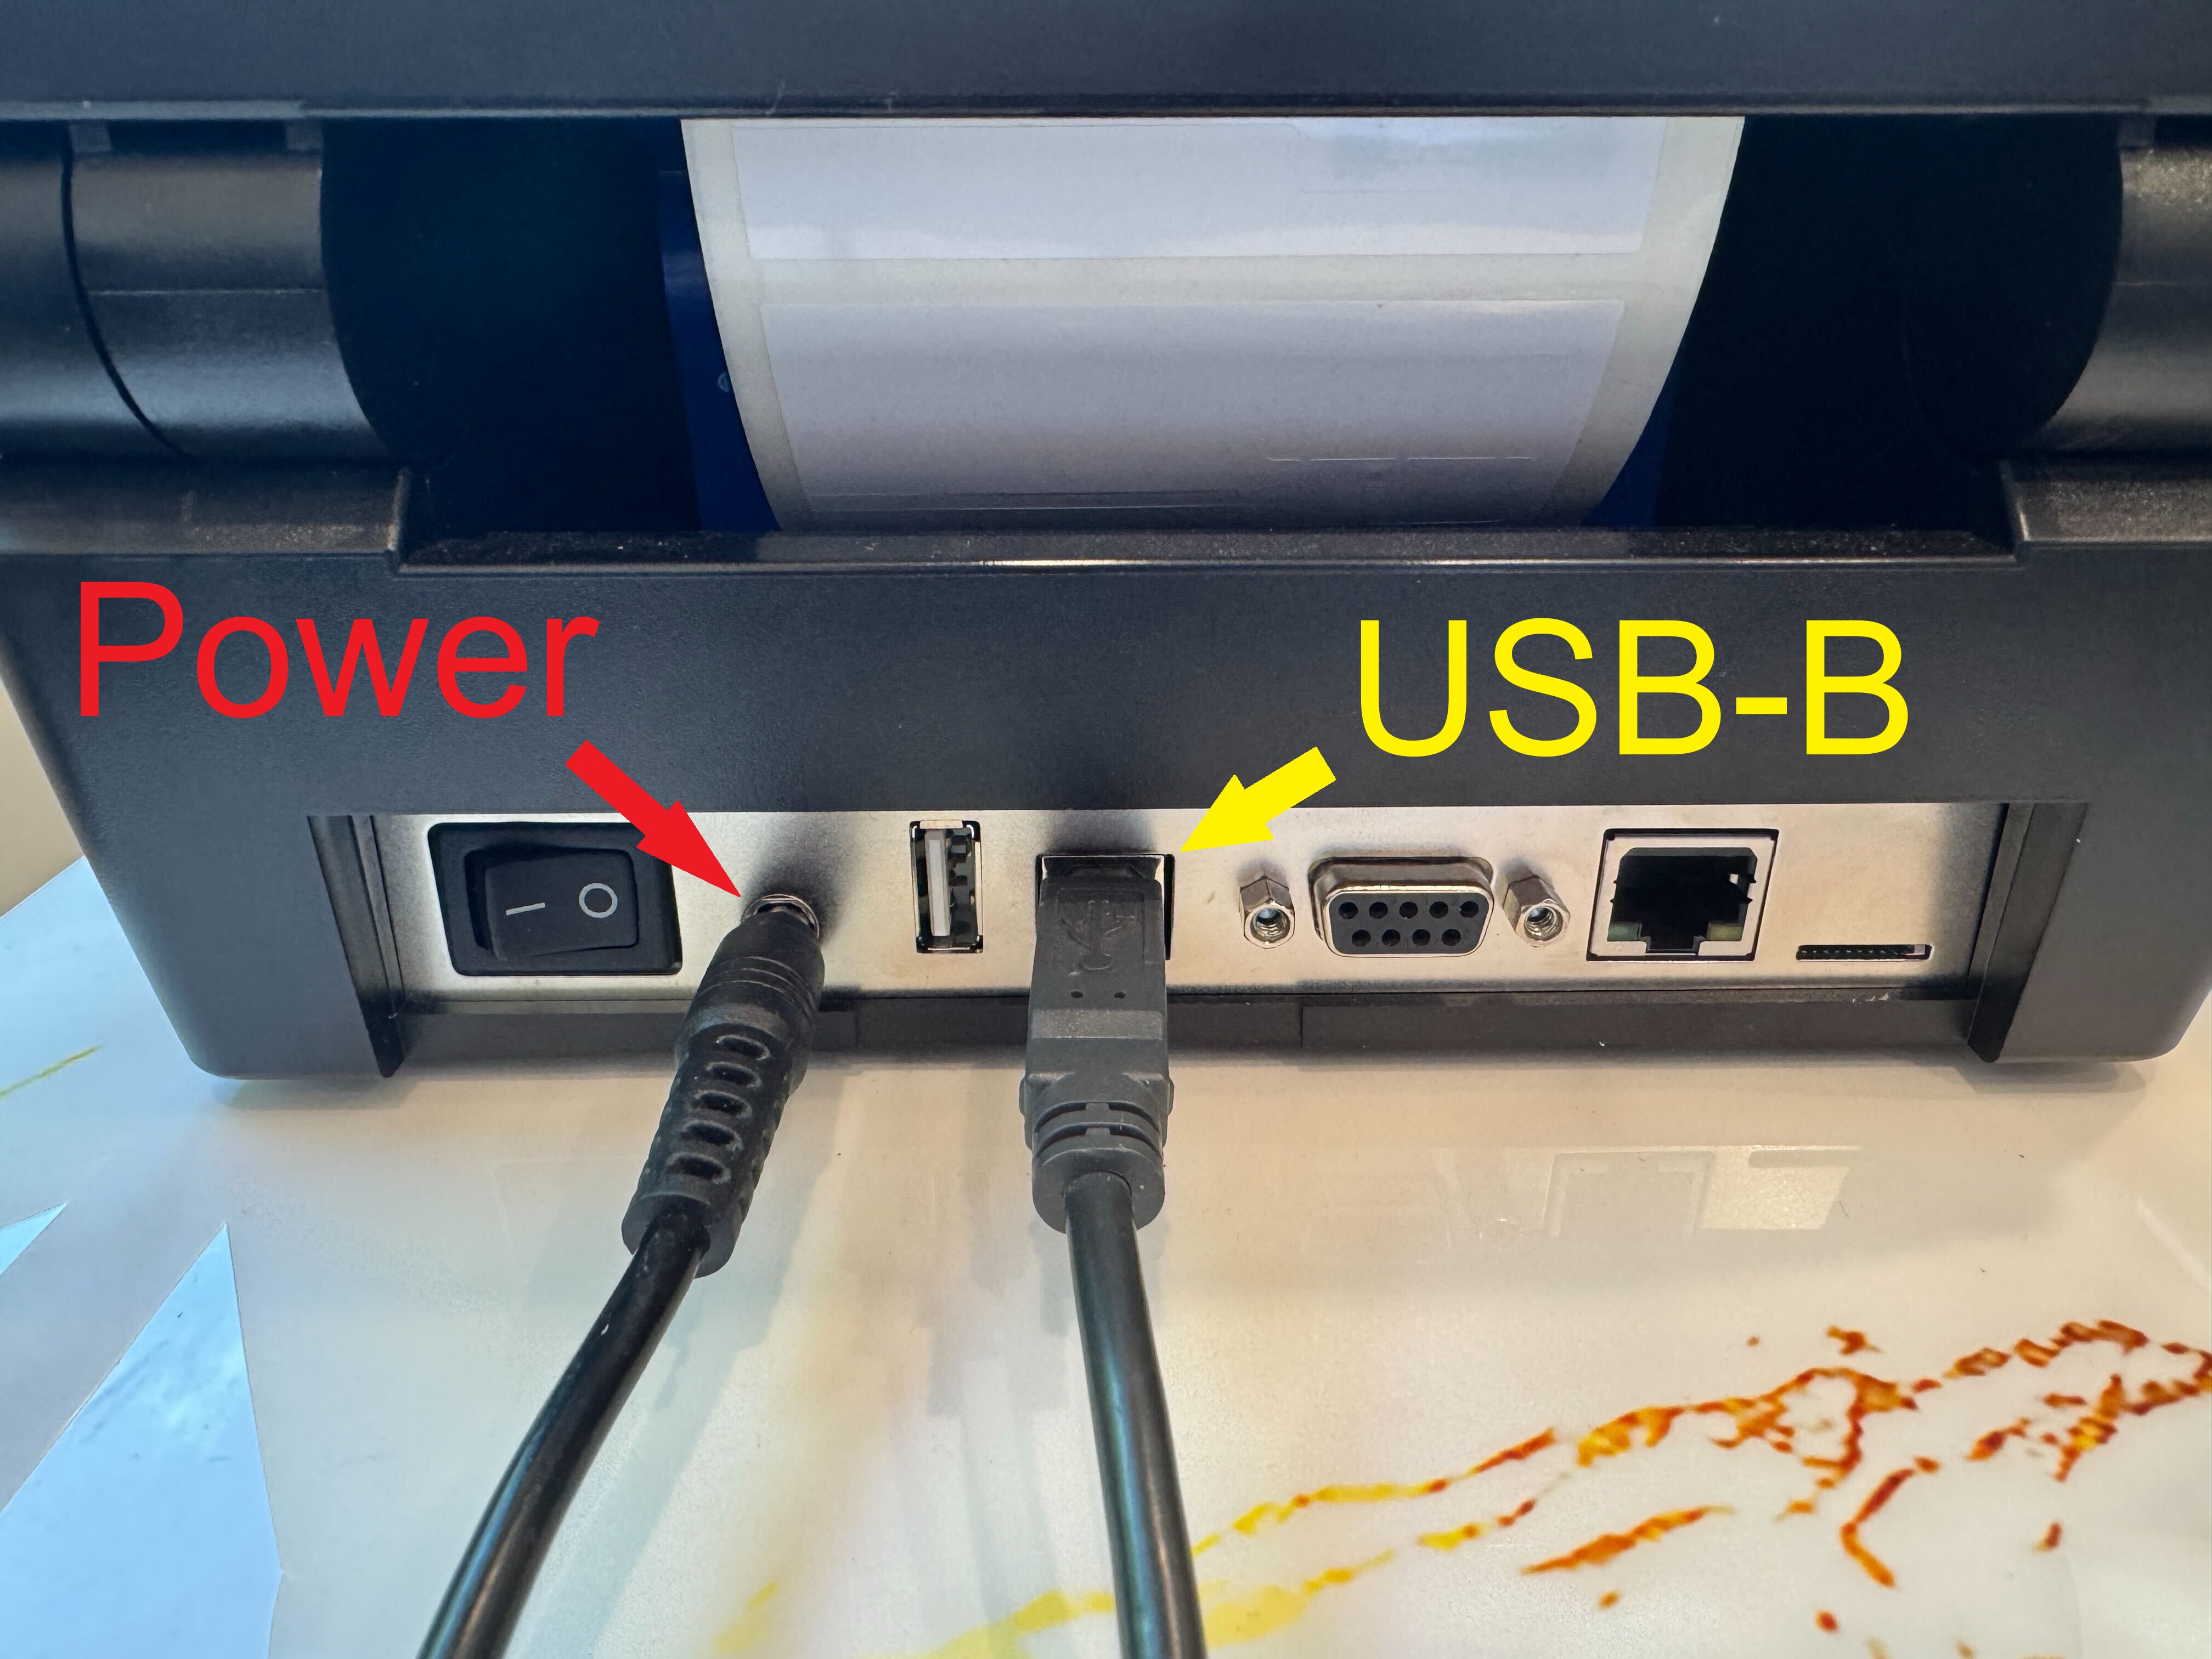
1. Power Connection (Required)
The first and most critical connection is the power supply.
- The T800 uses an AC power cord connected to a standard electrical outlet.
- The power cable plugs into the back of the printer.
- Once connected, the printer can be turned on using the power switch.
Without power, none of the other connections matter—the printer will not initialize or respond.
2. Media and Ribbon (Required for Printing)
Although not “cables,” these are essential physical components:
- Label roll (media) – the material the printer prints on
- Thermal ribbon (for thermal transfer models) – required for certain print types
These are loaded inside the printer. Without them, the printer may power on but cannot produce labels.
If you need help with loading media you can visit this article: https://kb.simplerfid.com/books/printer-set-up/page/printer-setup-instructions
3. Data / Communication Cables
To send print jobs, the printer must be connected to a computer or network. The T800 supports several connection types:
Simple RFID recommends using an Ethernet (LAN) connection for the best stability. USB connections can be used, but Ethernet will provide a more reliable connection.
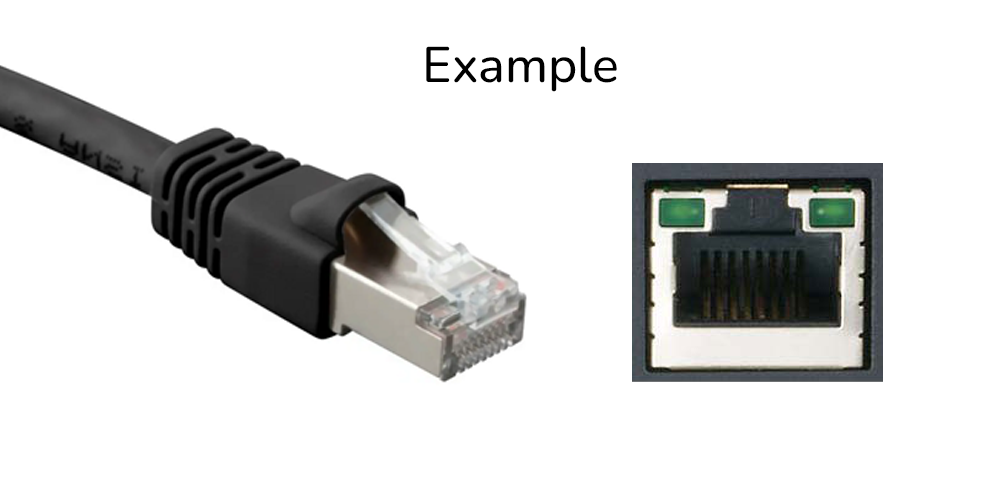
Ethernet (LAN) Connection (Most Common)
- Uses an RJ-45 Ethernet cable
- Connects the printer to a router, switch, or network wall port
- Allows multiple users to access the printer over a network
This is one of the most widely used setups in warehouses and offices. The printer supports 10/100 Ethernet LAN connectivity
Printer will not work if the connection interface is set up incorrectly in the printer settings! Follow this article to configure the interface properly.
USB Connection
- Uses a USB Type-B cable (printer port) to a computer
- Plug one end USB-B into the printer and the other USB-A into a PC
- Ideal for direct, single-computer setups
The T800 includes USB as a standard interface
Printronix Printers: Loading Media & Ribbon
Load media & ribbon into your: