From this point, you can add optional tag-specific information such as born date, expiration date, sell by date, lot number, serial number, or cost. None of it is required, but if you do not change anything, the tag’s default born date will be the day it is printed. To add this information, click on the name of the item once and the details panel will pop up on the right
#### #### # Add Details to Print Job from Excel **Add details to a print job using a spreadsheet. Use our formatted spreadsheet template, or use your own template.** Inside the ****Printing > Create**** Print Job page, click the upload button on the right [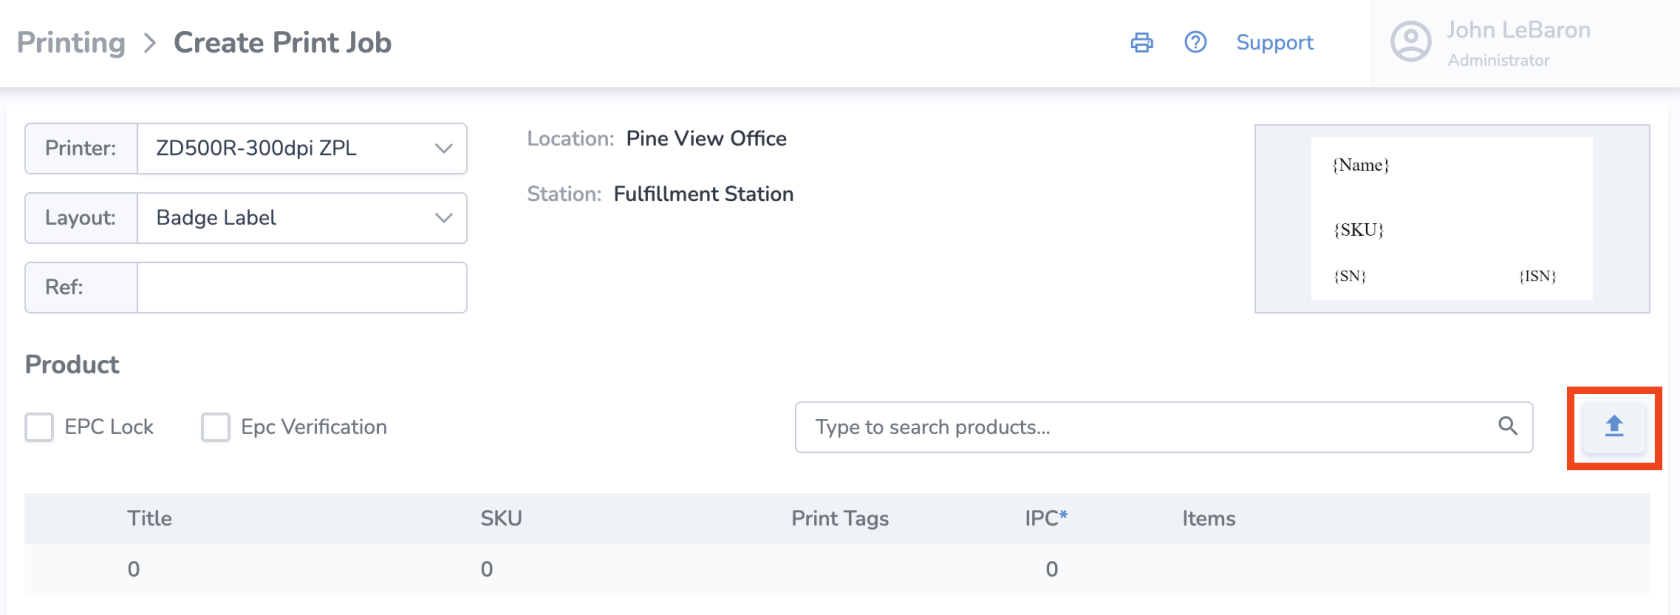](https://kb.simplerfid.com/uploads/images/gallery/2025-09/5rHimage.png) If you'd like to use our spreadsheet template and input data there, in the new pop up window, click on the “Get Template” button. Then fill out the information for your print job and save the spreadsheet.  - Back on the web, click the '+ Choose' button and select the file with the information you saved - Once the file has been selected, click 'Import'  ****Next, if you're using your own existing spreadsheet instead of the template,**** click "The Custom Template details" and select which columns contain the corresponding information. It will then add all the items to the print job, which you can print immediately or postpone.Note: If any of the information from the uploaded spreadsheet is invalid, you'll see this validation error on that item in the list
A good practice is to scan the labels and upload them to verify that all tags have been printed correctly.
##### # Print Actions: Postpone & Resume, Cancel, Reprint ##### ****Postpone & Resume**** Perhaps you want to save your print job and print it later. To do this, instead of clicking "Print" from the Print Controller, click "Postpone." [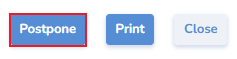](https://kb.simplerfid.com/uploads/images/gallery/2025-06/Smcimage.png) This will create a saved Print Job which will appear on the Print History [](https://kb.simplerfid.com/uploads/images/gallery/2025-06/sMTimage.png) On the main ****Printing**** page, you can see the ****Printing Status**** of each job in the listed history. ##### ****Start**** - To start a print job, click the start button under the 'Actions' column [](https://kb.simplerfid.com/uploads/images/gallery/2025-05/8veimage.png) ##### ****Pause**** - To pause a print job, click the [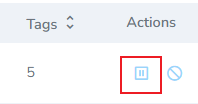](https://kb.simplerfid.com/uploads/images/gallery/2025-05/KVDimage.png) ##### ****Cancel**** [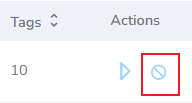](https://kb.simplerfid.com/uploads/images/gallery/2025-05/q4timage.png) - To cancel the job, click the strike-through circle icon ##### ****Reprint**** - To reprint a print job, click the "reprint" icon [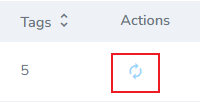](https://kb.simplerfid.com/uploads/images/gallery/2025-05/k69image.png)Clicking reprint will create a new job with the same details
[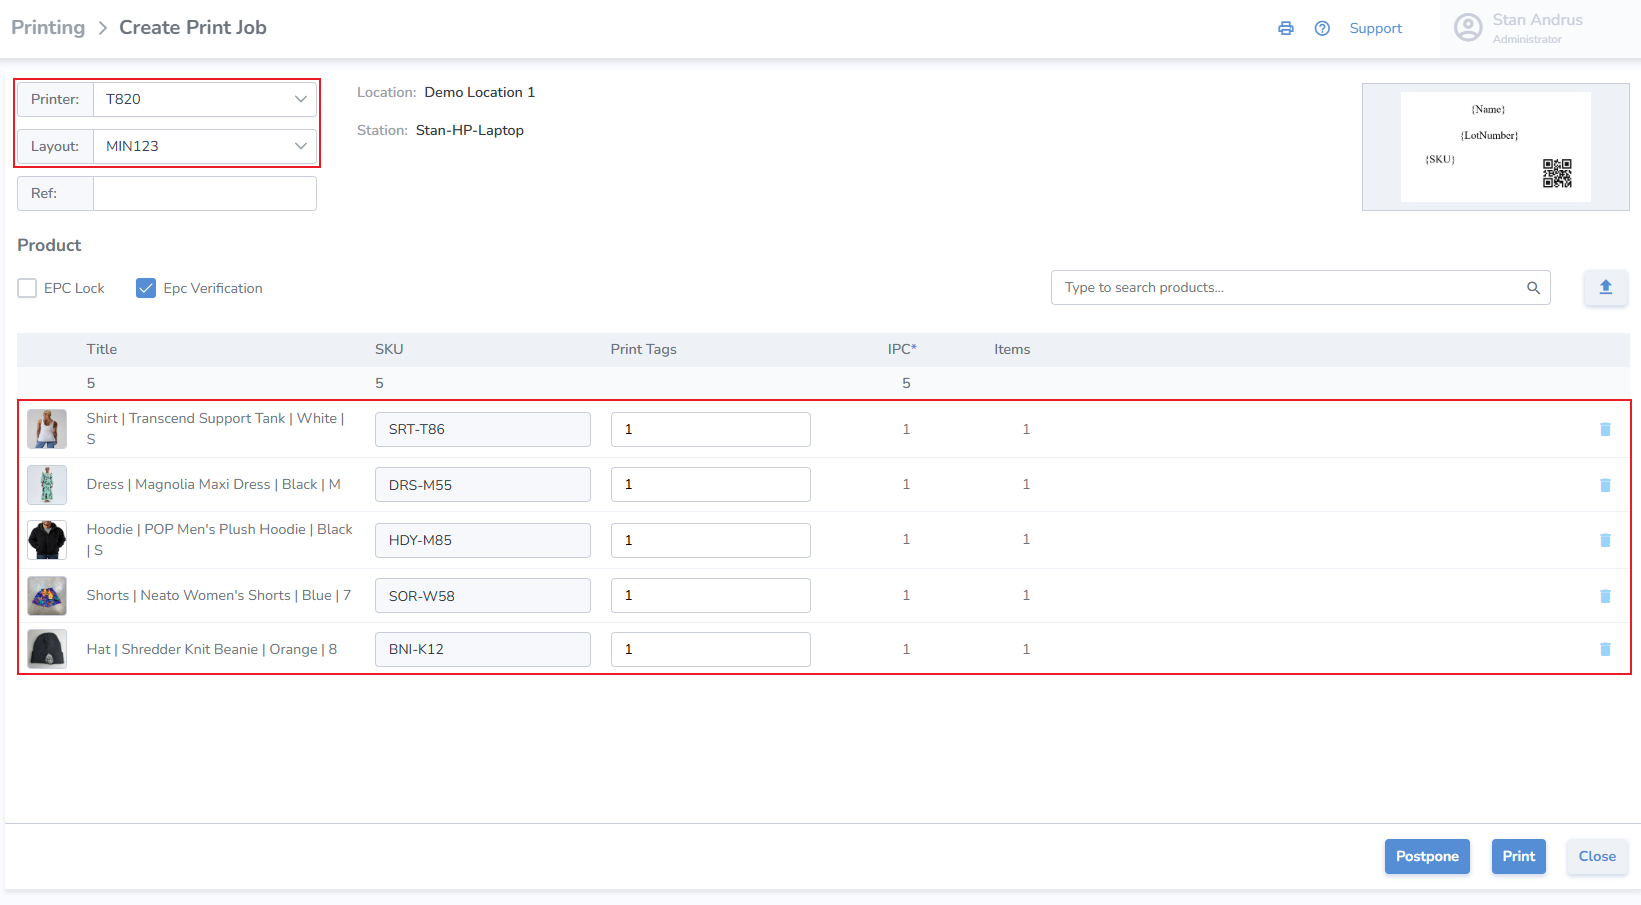](https://kb.simplerfid.com/uploads/images/gallery/2025-09/rCsimage.png) - Click Postpone to save the job in postponed status - Click Print to initiate the print job immediately - Click Close to exit without saving # Print History The print history displays a comprehensive record of all completed, postponed, and pending jobs. It includes a 'Print Actions' column that allows you to pause, cancel or reprint jobs. [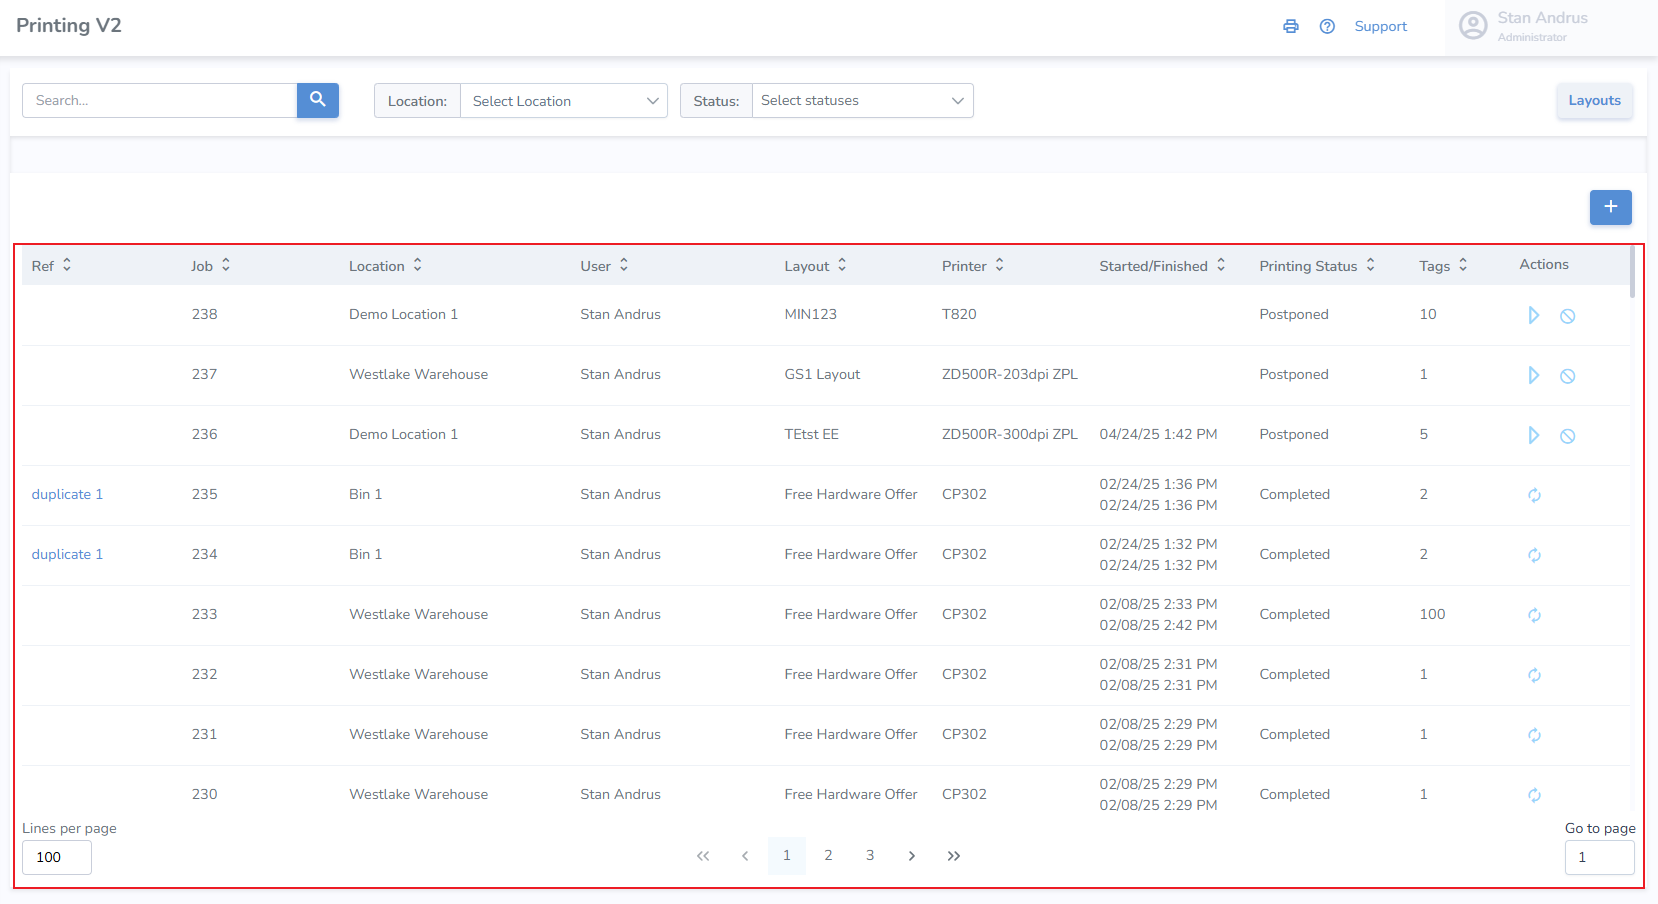](https://kb.simplerfid.com/uploads/images/gallery/2025-05/7Waimage.png) # Ability to trim product prefixes from labels when printing If you have information in one of your Product fields that you wish to have trimmed when printing, follow these steps to trim these properties.This feature requires Manager level permissions
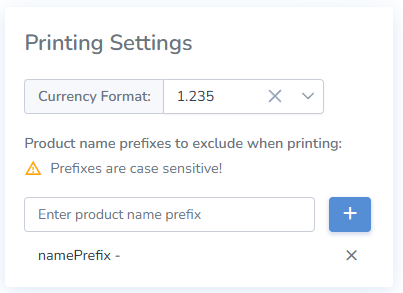- Using a manager’s account, access the ****Customer Profile**** from the ****Admin menu**** in the top right of the web portal - Then ****enter any prefixes that you wish to be trimmed**** from products named when printing - Finally, click ****save****. # Locking the Tag's MemoryLocking your tags prevents the tags from being edited. This is a requirement for all GS1 tags being submitted to ALEC for approval.
****Locking the Tag's Memory**** - Navigate to the Print Jobs menu in the left menu - Before starting the print job, click the "EPC Lock" check-box [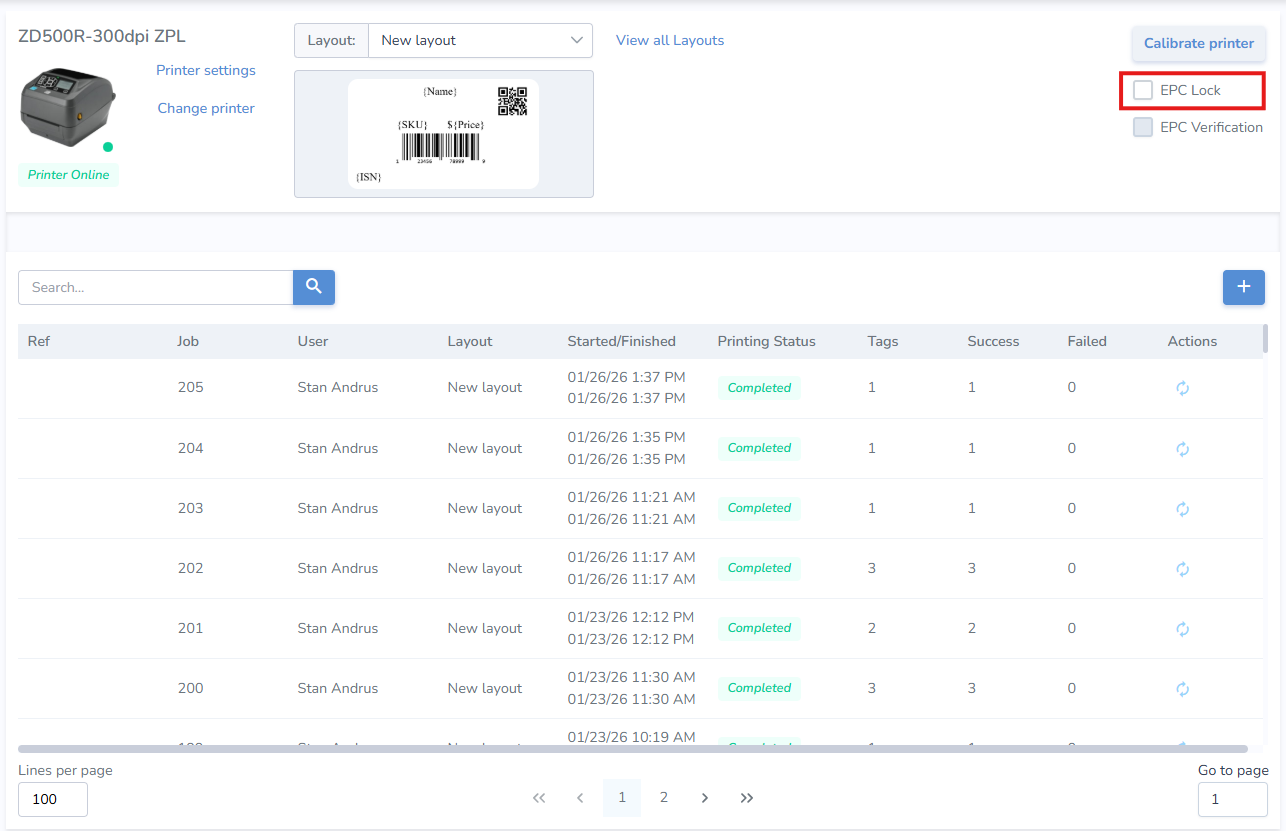](https://kb.simplerfid.com/uploads/images/gallery/2026-01/e1Limage.png) - This will permanently lock the tag and prevent it from being re-encoded