The printer can be connected to the PC via ****Network**** or ****USB****. Network method is generally more reliable, and therefore preferred if possible.
****WARNING: MACOS DEVICES**** The macOS version of the Print Client is currently in beta. As such it has the following limitations: ****- The macOS Print Client requires Apple Silicon (M1 or later).**** Macs with Intel processors are not compatible. ****- The macOS Print Client does not support Printronix printers via USB.**** Zebra printers can be connected via USB, but Printronix printers can only be connected via local network. ****- The macOS Print Client will not work if certain USB storage devices are connected.**** This can include flash drives, external hard drives, or even mobile phones. If you disconnect these devices, the print client will run.
#### Network method If connecting via network, use the provided CAT6 cable, or a network cable of your own, to attach the printer to your network. [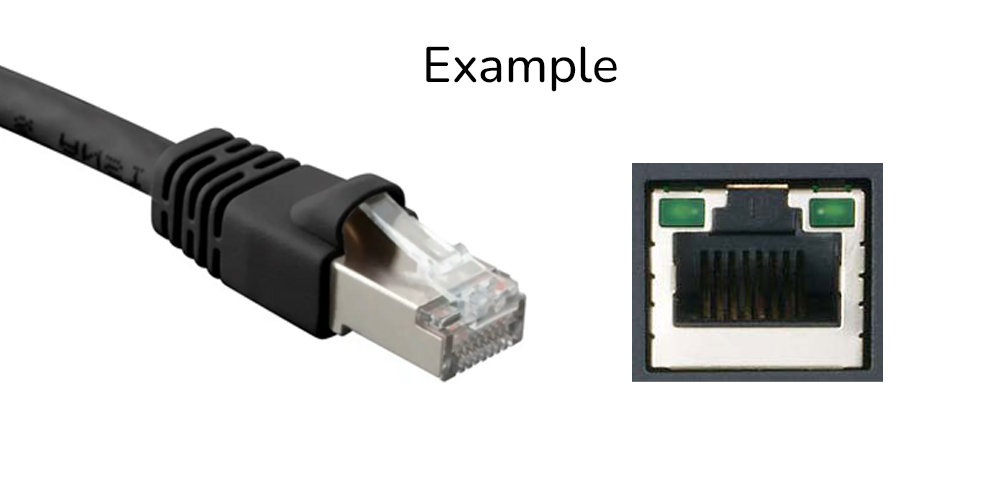](https://kb.simplerfid.com/uploads/images/gallery/2026-01/image.png)The printer must be on the same subnet as the host PC in order to be detected by the Print Client.
#### USB method If connecting via USB, plug the provided USB cable into your PC and printer. The ****USB-A**** connector should be plugged into the PC, while the ****USB-B**** connecter should be plugged into the printer: 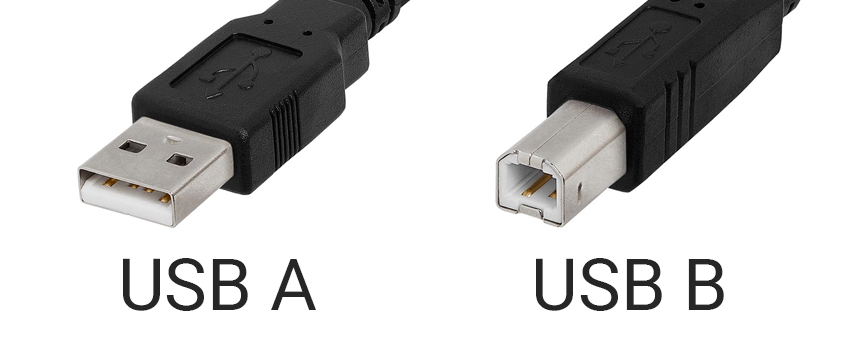Last, for the USB method, you'll need to [change the Interface setting](https://kb.simplerfid.com/books/hardware-readers-printers/page/printronix-change-interface) on the printer to USB.
Such cable type is often used by regular inkjet/laser printers as well.
--- ### ****Step 2. Install Print Client****If you are connecting a Printronix printer via USB, you must use the Windows version currently. macOS only supports Printronix printers via network connection.
#### ****Download the Print Client:**** 1. ****Login**** to the [web portal](https://portal.simplerfid.com/) 2. ****Click**** on your account name in the top-right corner 3. ****Click**** "Resources" 4. On the resources page, under Printing Utilities, ****click**** **"*****Set-up Print Client Windows*****"** ****or**** **"*****Set-up Print Client macOS*****"** to download 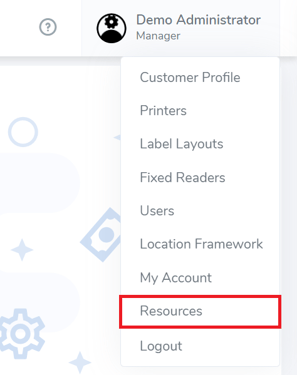 [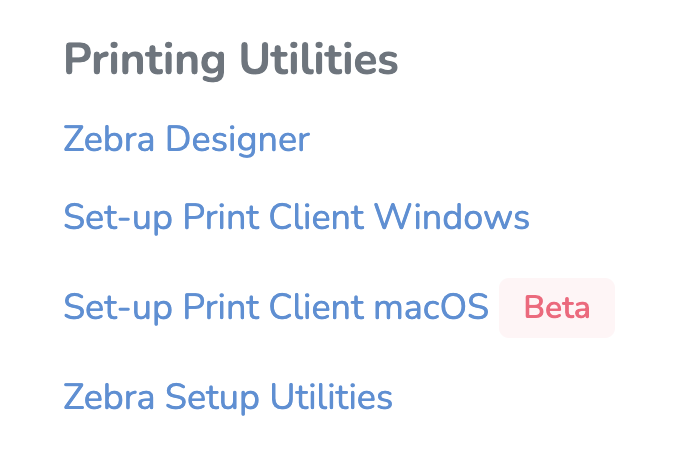](https://kb.simplerfid.com/uploads/images/gallery/2025-09/Bbjimage.png) #### ****Install Client**** 1. ****Open**** the downloaded file (****PrintClient.Updater.Installer.msi**** or ****PrintClientUpdater.Installer.pkg****). This will launch the installer. 2. ****Follow**** the steps in the installer. You will need to provide Administrator approval to complete the installation. 3. Enter your ****Registration Key**** when prompted. You can find this key on the web portal, on the ****Customer Profile**** page under ****Printing Settings****. ****If you don't have access to the key, reach out to your manager.**** ****If you are not prompted to enter the key, finish the installation, then**** [****reach out to Simple RFID support****](https://support.simplerfid.com/support/tickets/new) ****to connect your printer.**** [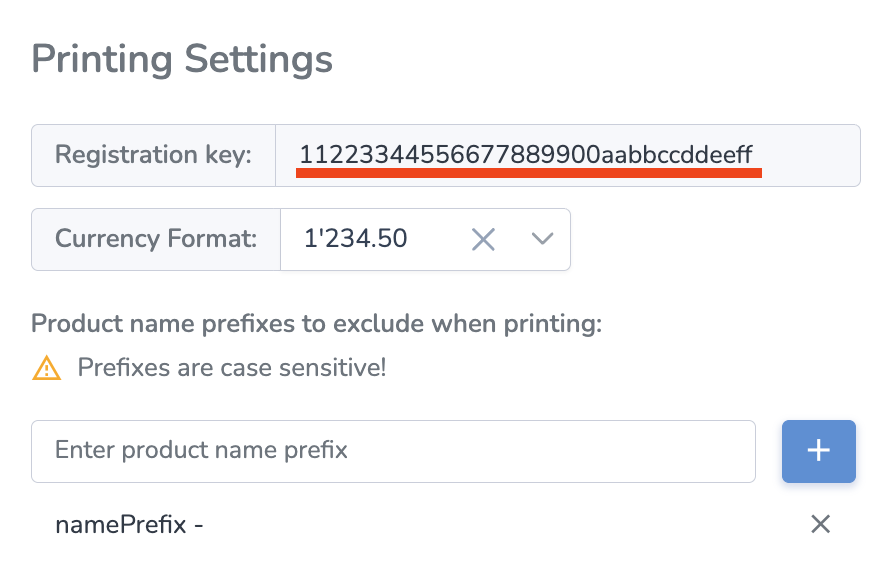](https://kb.simplerfid.com/uploads/images/gallery/2026-02/fBqscreenshot-2026-02-16-at-3-11-50-pm.png) [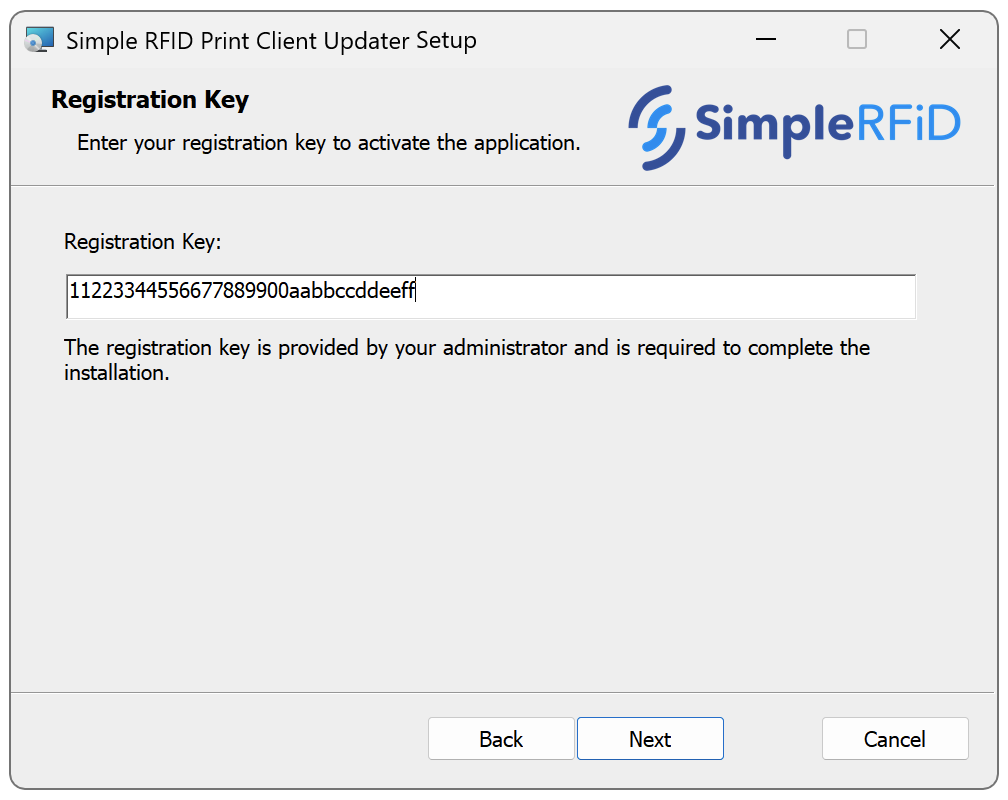](https://kb.simplerfid.com/uploads/images/gallery/2026-02/fYzimage.png) 4. When the installation is completed successfully, you can ****close**** the installer. --- ### ****Step 3. Assign Location****Please ask your manager to assign the location.
Here are the steps for manager: 1. ****Go to**** User Menu (click on the name on the top right) 2. ****Select**** Printers 3. ****Find**** the new Print Station (often on top, will have "**Not assigned**" under the location column) 4. ****Click**** the gear icon ([](https://kb.simplerfid.com/uploads/images/gallery/2026-03/BO8image.png)) on the right from the Print Station[)](https://kb.simplerfid.com/uploads/images/gallery/2026-03/zoZimage.png) 5. In the Location dropdown, ****set**** the desired location 6. ****Click**** ApplyOnce the printer is connected, it will appear on the Printers page, and in the Available Printers menu.