Software: Integrations
- Resolving "Compare On Hand" Issues
- Reimport Products
- Shopify
- Integrations: Point of Sale Interface
- ApparelMagic
- No integration available?
- Jonas
- Clubessential
- Senitron Tags
Resolving "Compare On Hand" Issues
"Why were On Hand counts subtracted twice?"
It looks like you have synced the counts in the middle of the order fulfillment process (after verified on mobile, before fulfilled on Shopify).
Here is the correct flow (if fulfilled after QC):
Reimport Products
If your Shopify products fail to appear in your Simple RFID Products tab, you may need to reimport them manually. Here's how:
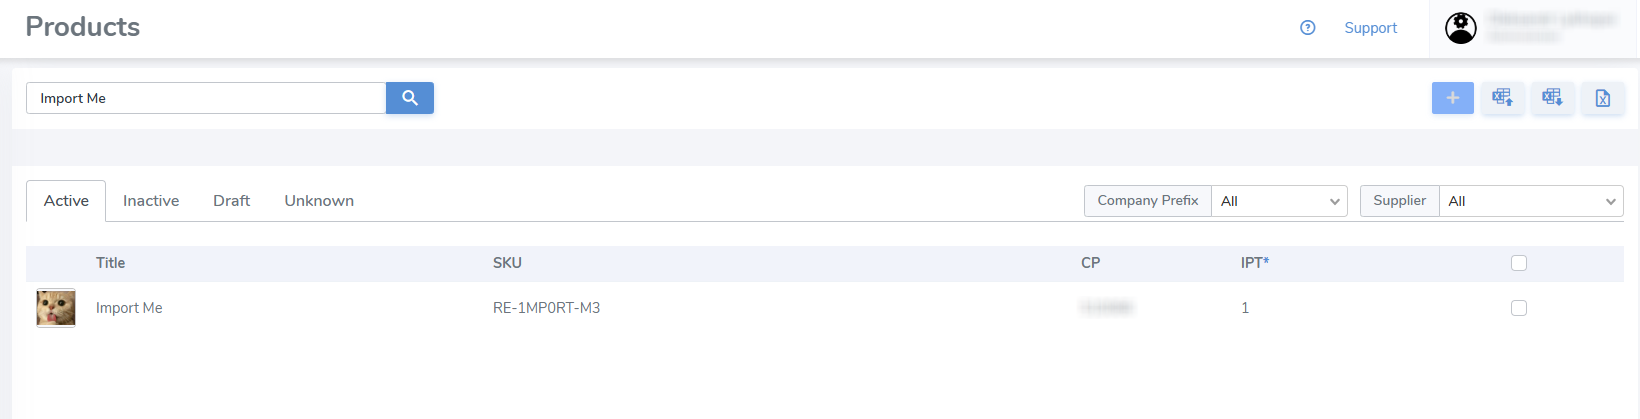
Go to the Products page in the SimpleRFID web portal and verify if the item can be found by its name or SKU.
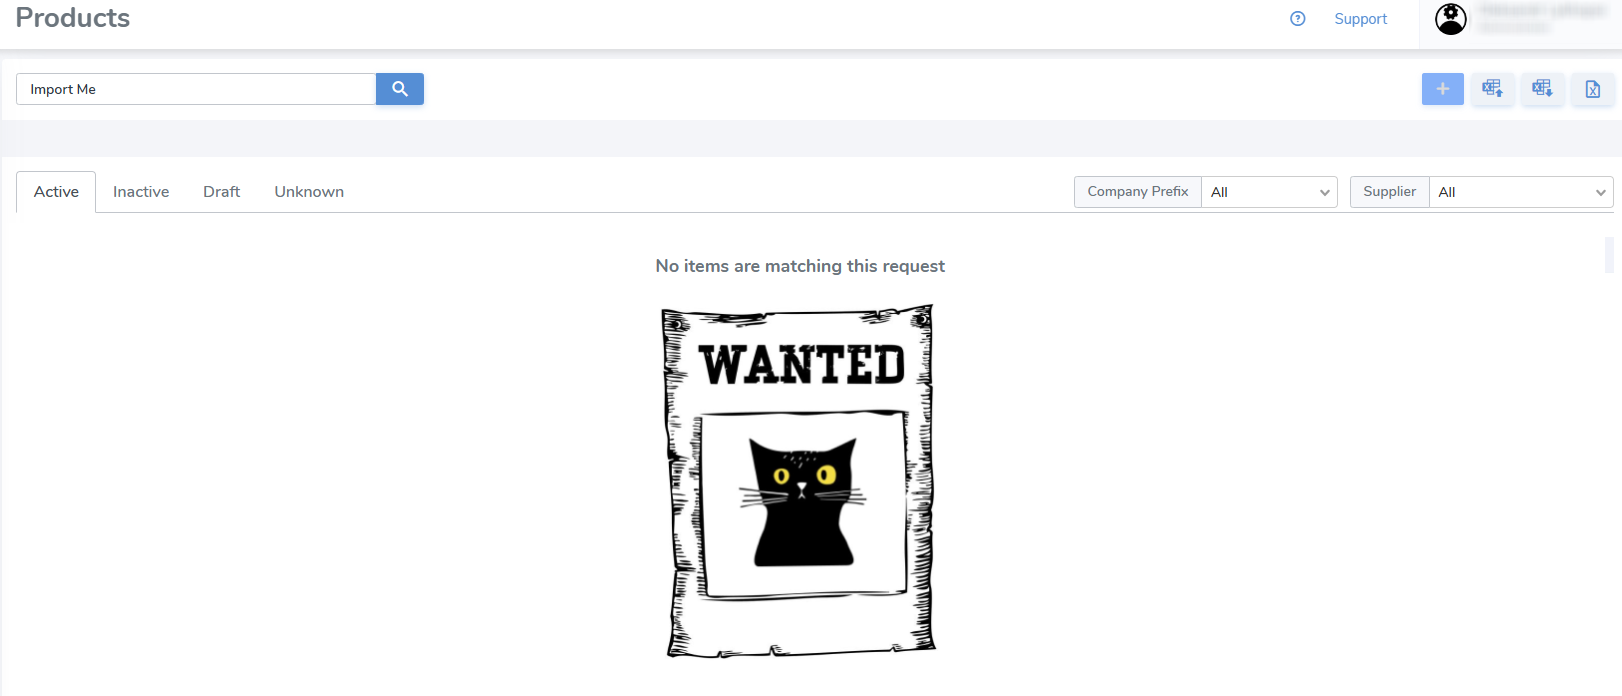
If a product wasn't found, go to the Products page under the SimpleRFID app in Shopify.
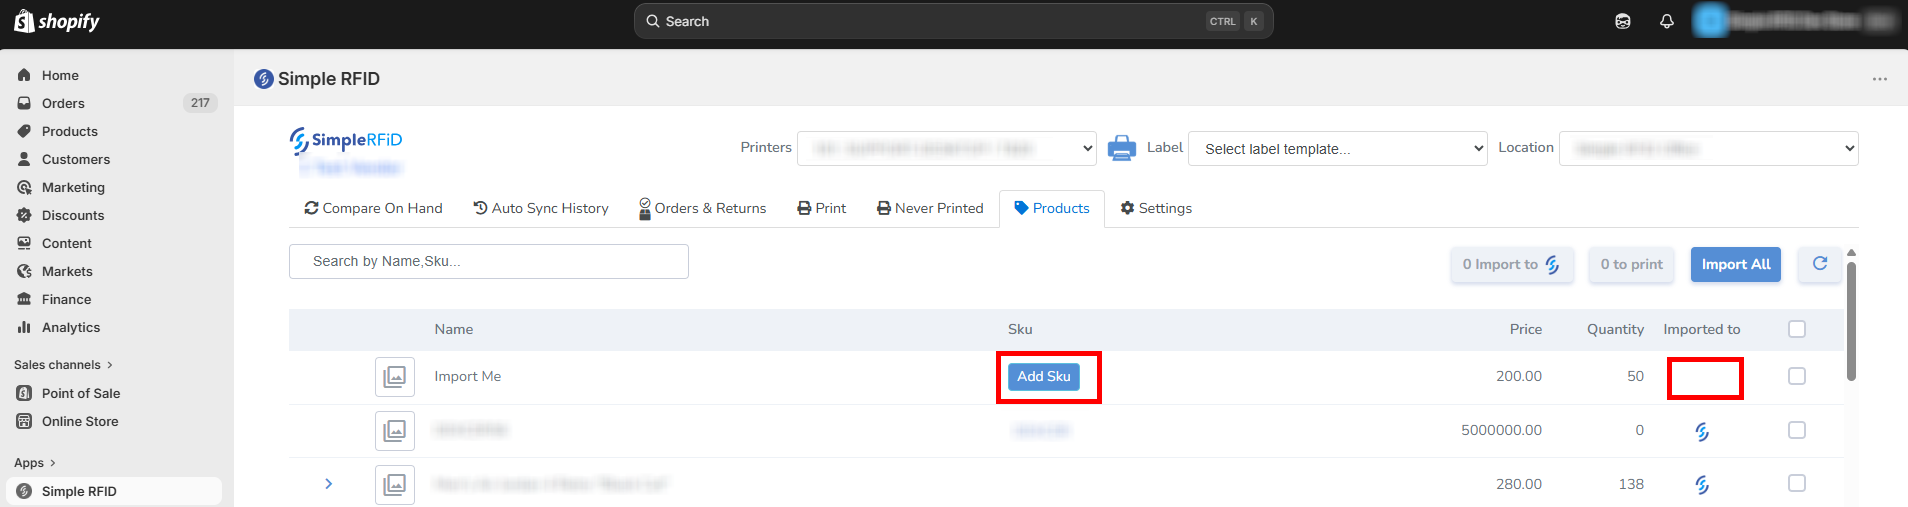
A product won't be imported, either manually or automatically, if a SKU is missing!
Click the Add Sku button. It will open the product properties.

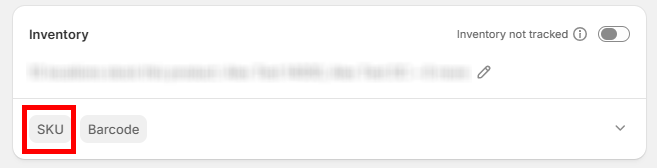
Scroll down to the Inventory tile and click SKU.
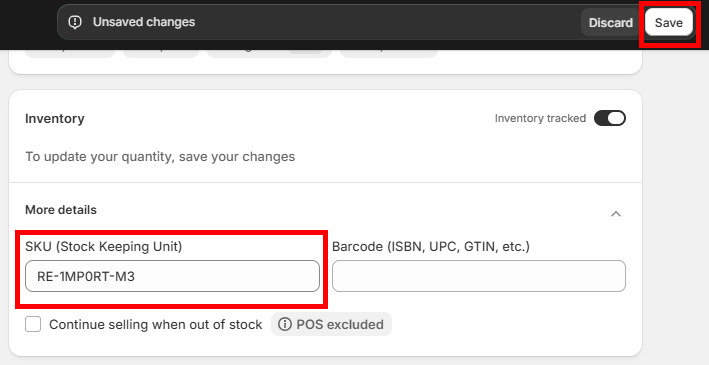
Type in the SKU and click Save.
Go back to the Products page under the SimpleRFID app in Shopify.
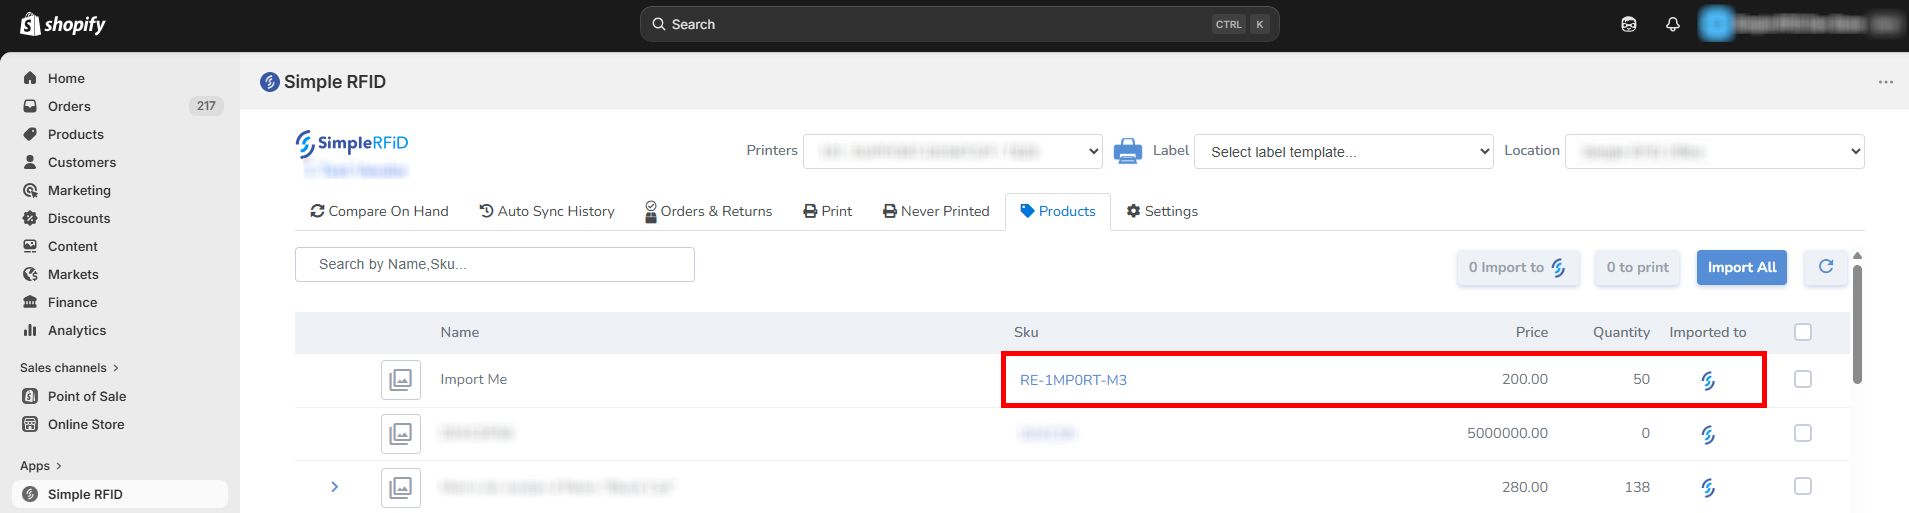
If a product has  icon in the Imported to column, it's now auto-imported
Products can still be imported manually. Select a product -> Import to SimpleRFID.
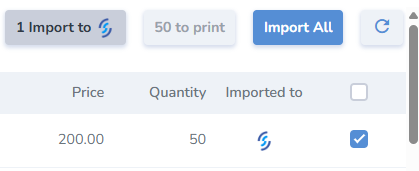
The product has been imported successfully!
Shopify
Shopify: Installation
From Shopify Admin, type "Simple RFID" in the search bar, then select Search "Simple RFID" in Shopify App Store.

Click on Simple RFID Inventory Solution. You may see a few advertisements in the search results before our app.

Next, click Install near the left side of the page.

Confirm the installation on the next screen by clicking Install.

If you're already logged into the web portal on this browser, you will automatically be logged in to the app as well. Otherwise, type in your Simple RFID username and password and log in.
You'll be greeted with this screen: press Next to continue.

Mapping your Shopify & Simple RFID Locations from the Web Portal
We have moved the mapping process from the Shopify extension to the web portal, Customer Profile tab.
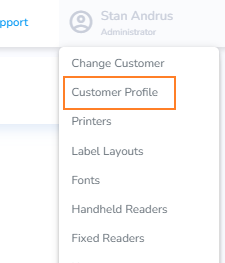
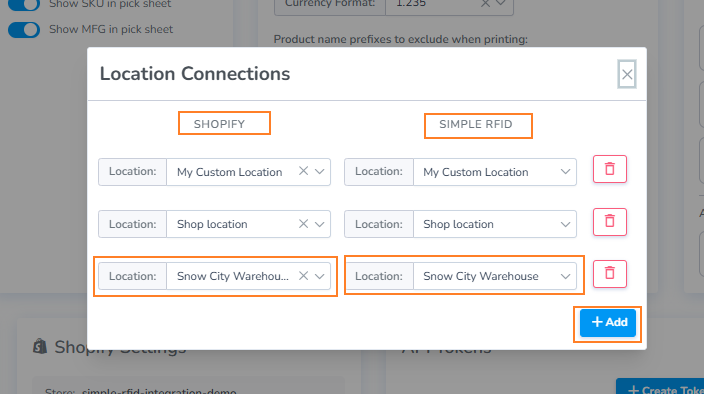
If you are a new user to Simple RFID, you can use Create Location to automatically create a location in Simple RFID with the corresponding name.
Locations can be created as either:
- DC or Distribution Center is any warehouse format locations
- Store is any retail location
If you wish to use Shopify Supplier locations
On the next screen, you'll map your Shopify locations to your Simple RFID locations.
Old Mapping Flow
If you're setting up the app for the first time, select Create new for each location that you want to track with Simple RFID.
Then, select which field in your Shopify products is unique. Simple RFID requires a unique property for every product and variant; choose whether the SKU or Barcode is more suitable for your products. Last, click Finish.

The Simple RFID app is now fully installed.
Shopify: Import Sales orders
Importing orders from Shopify to Simple RFID
Currently orders must be "submitted" to the mobile app for review. This limitation will be resolved in the near future.
After creating an order, go to Simple RFID app on Shopify and click Orders & Returns.
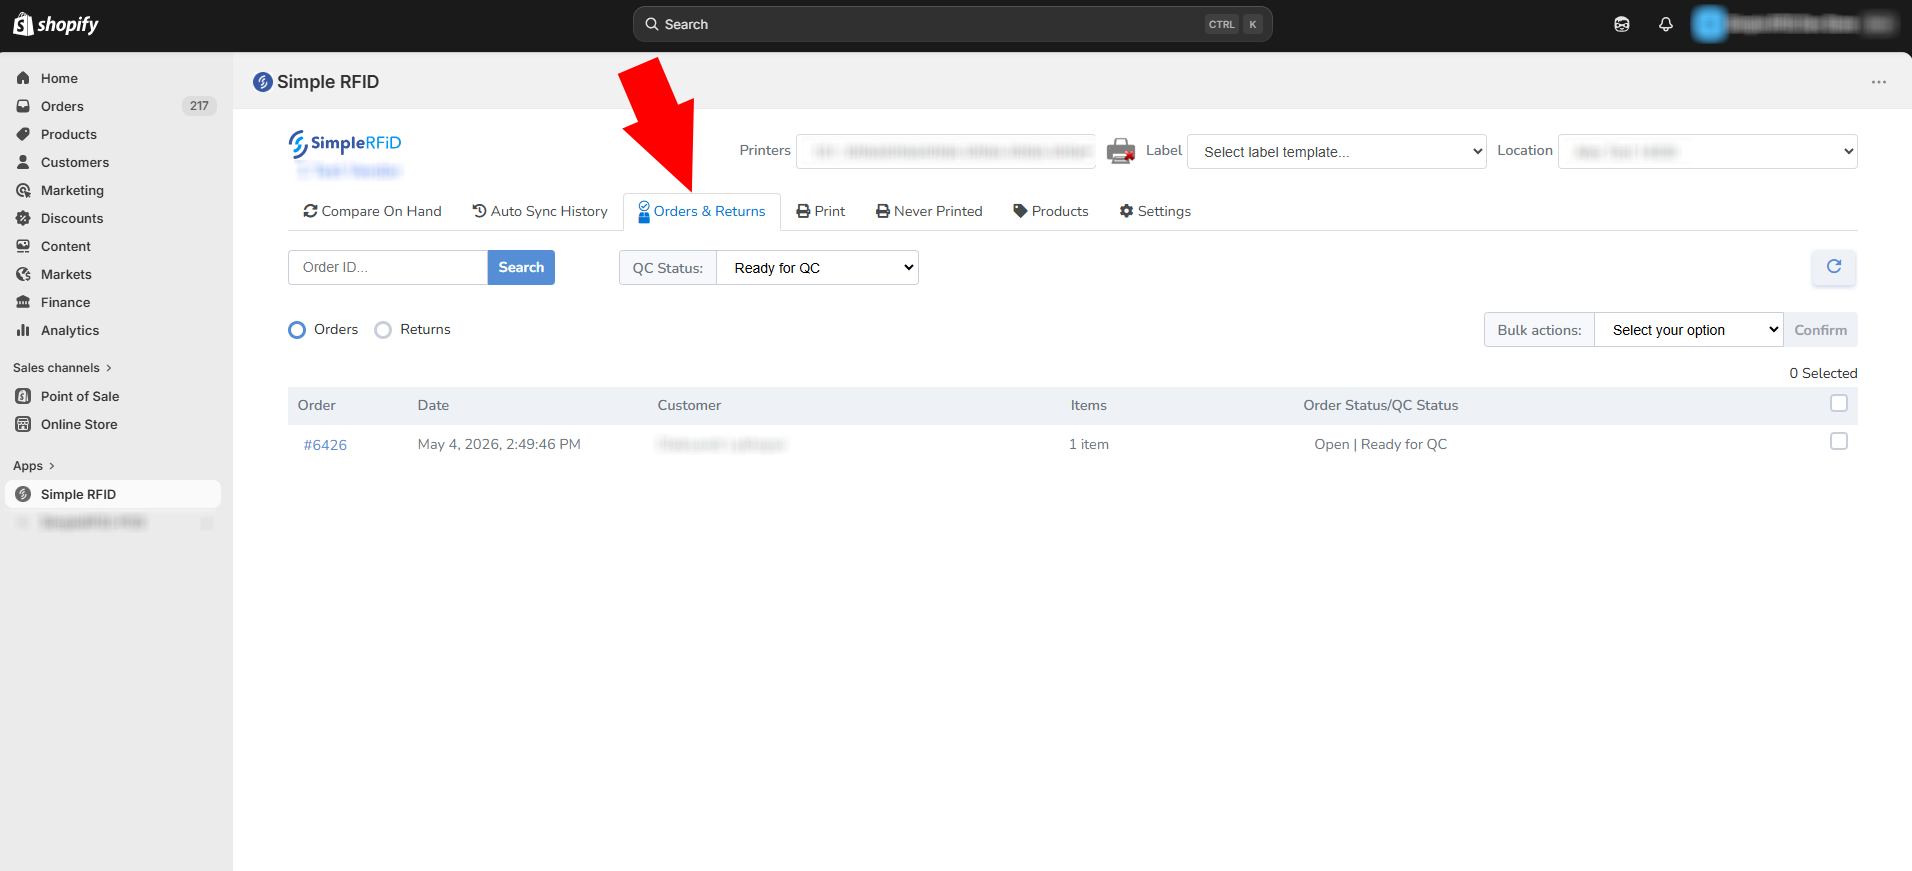
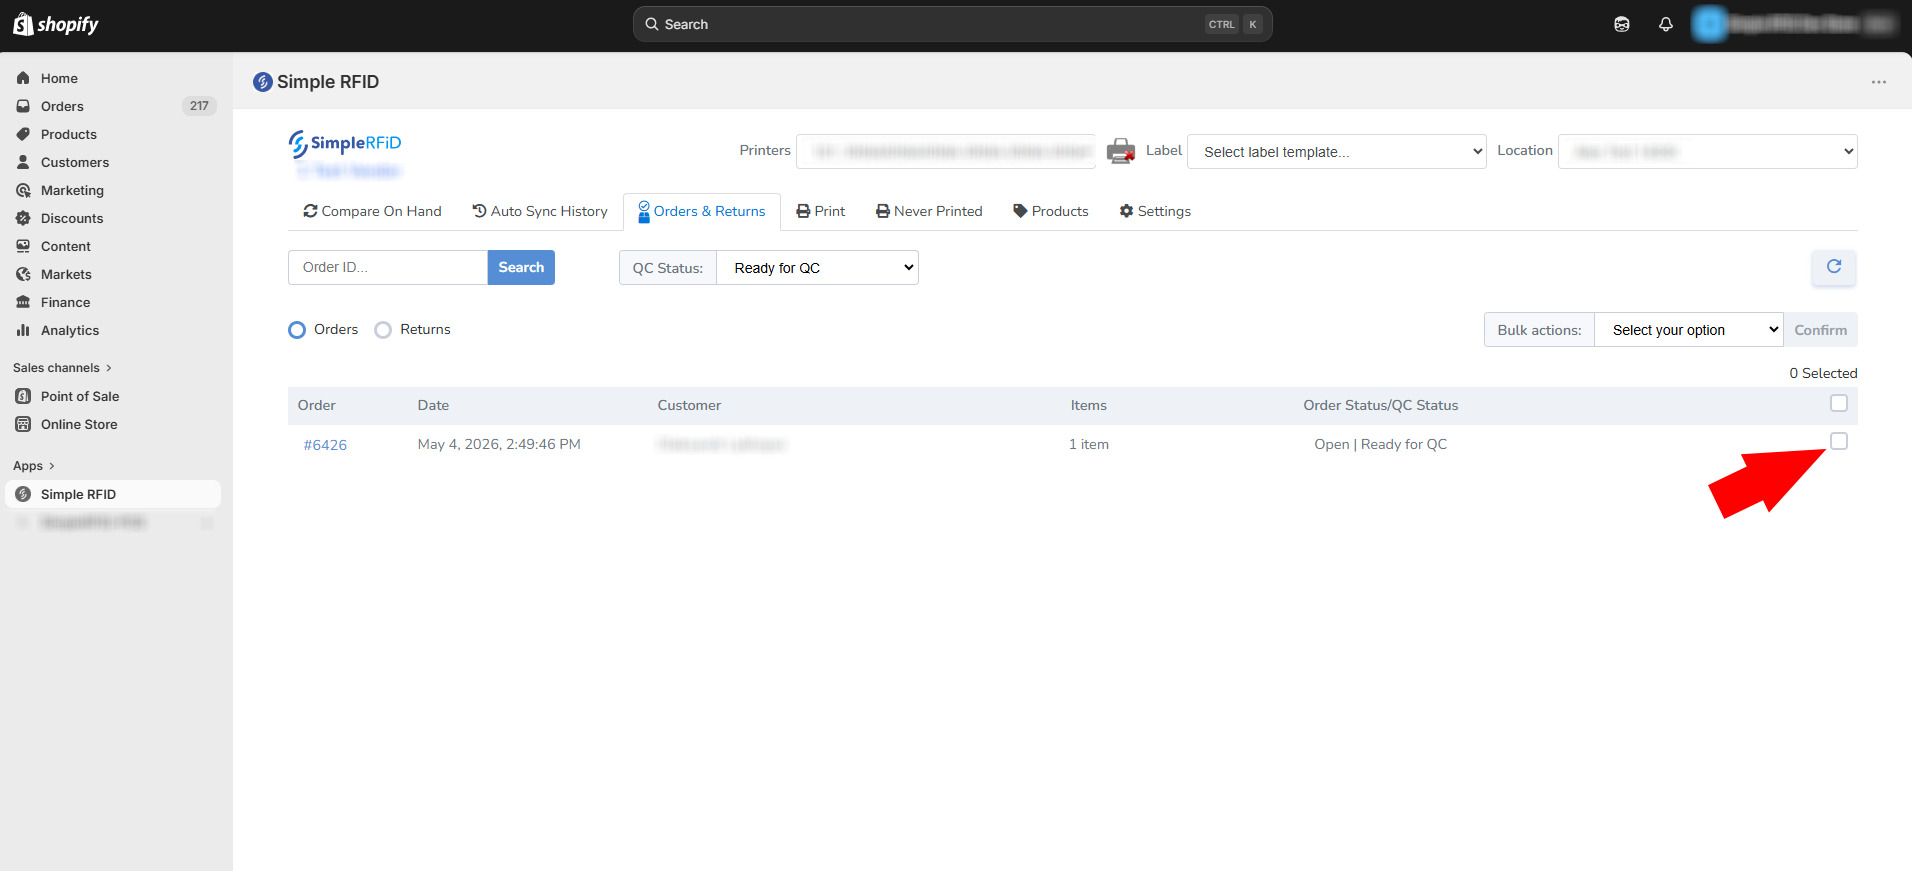
Select orders that need to be imported.
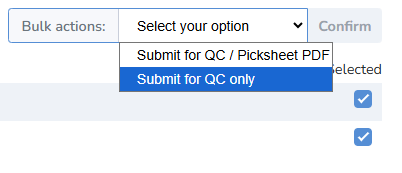
Select "Bulk Action" that is more suitable for your import process.
Submit for QC / Picksheet PDF will create a spreadsheet file that lists all the products included in the order.
Submit for QC only will simply submit the order to the review process.
Web Portal Sales Orders
Go to the web portal to see the new order under Orders tab.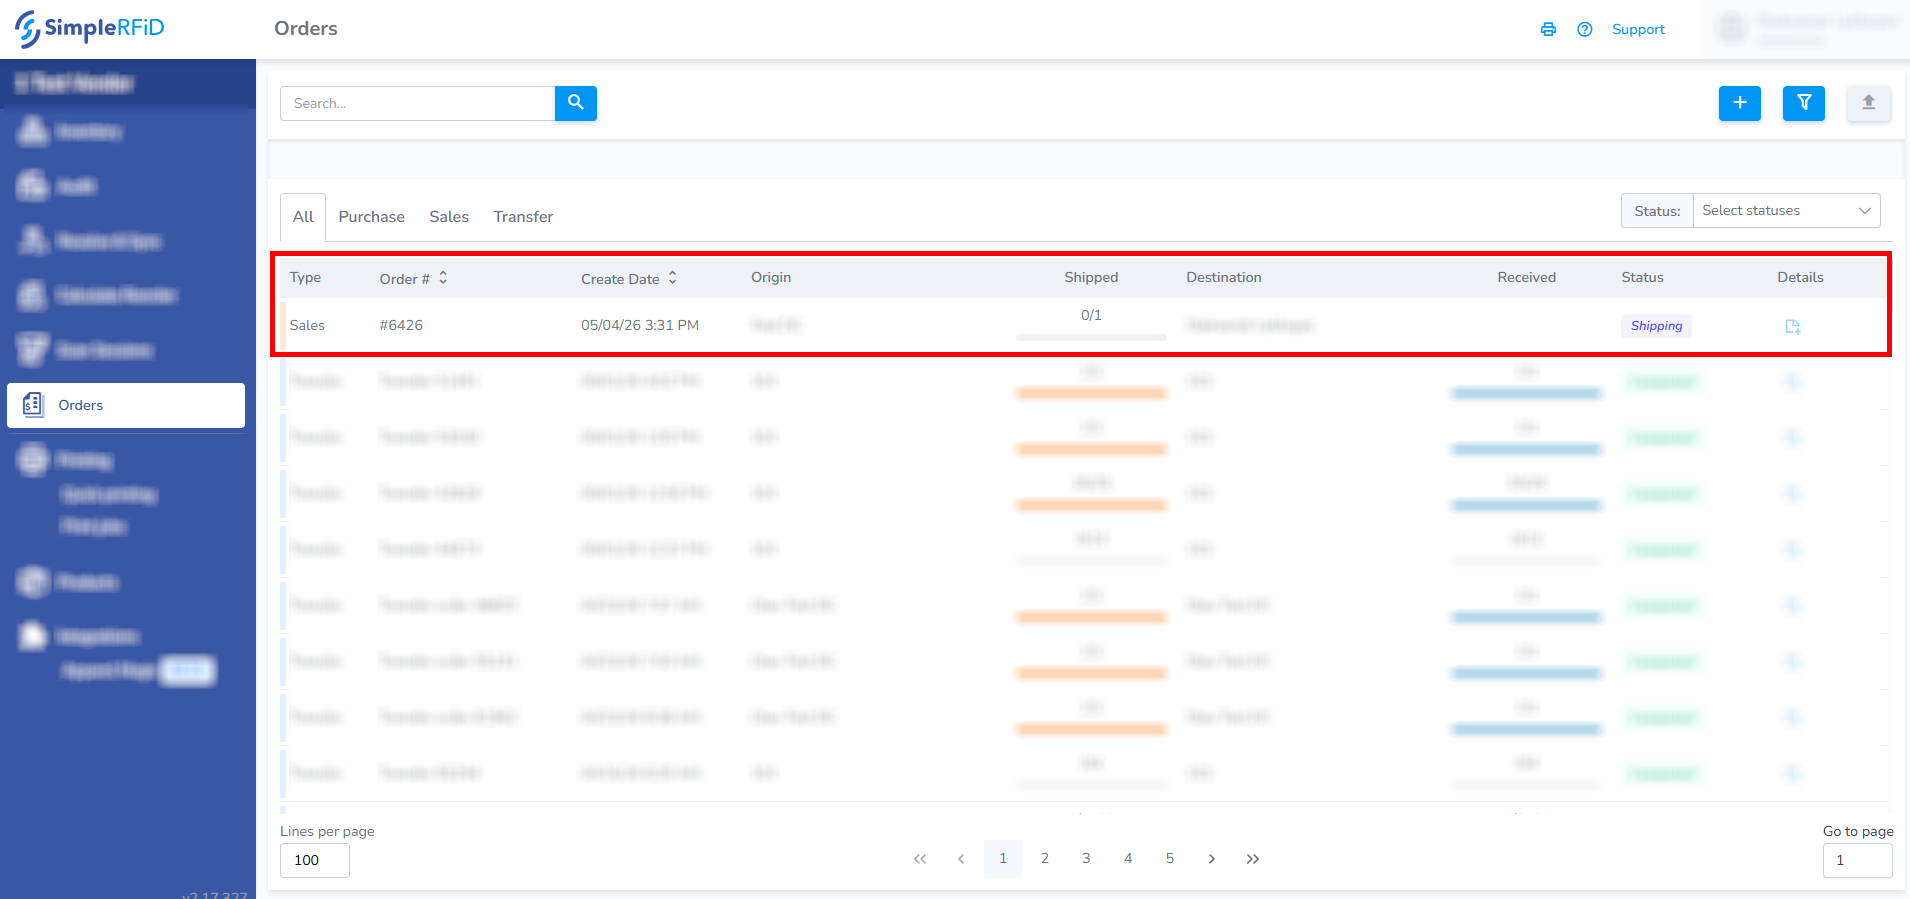
Integrations: Point of Sale Interface
Basic POS: Using the Point of Sale Interface
Access the Point of Sale interface here: beta.pos.simplerfid.com
The Point of Sale interface is in beta. Currently, the only function of this interface is to archive tags which are read by a connected scanner in HID mode, such as a Keonn AdvanPay.
Further integration with third-party point of sale software, such as Shopify and Square, is planned but not implemented yet.
Logging in
Log in using the same credentials you use for the Simple RFID web portal and mobile app.

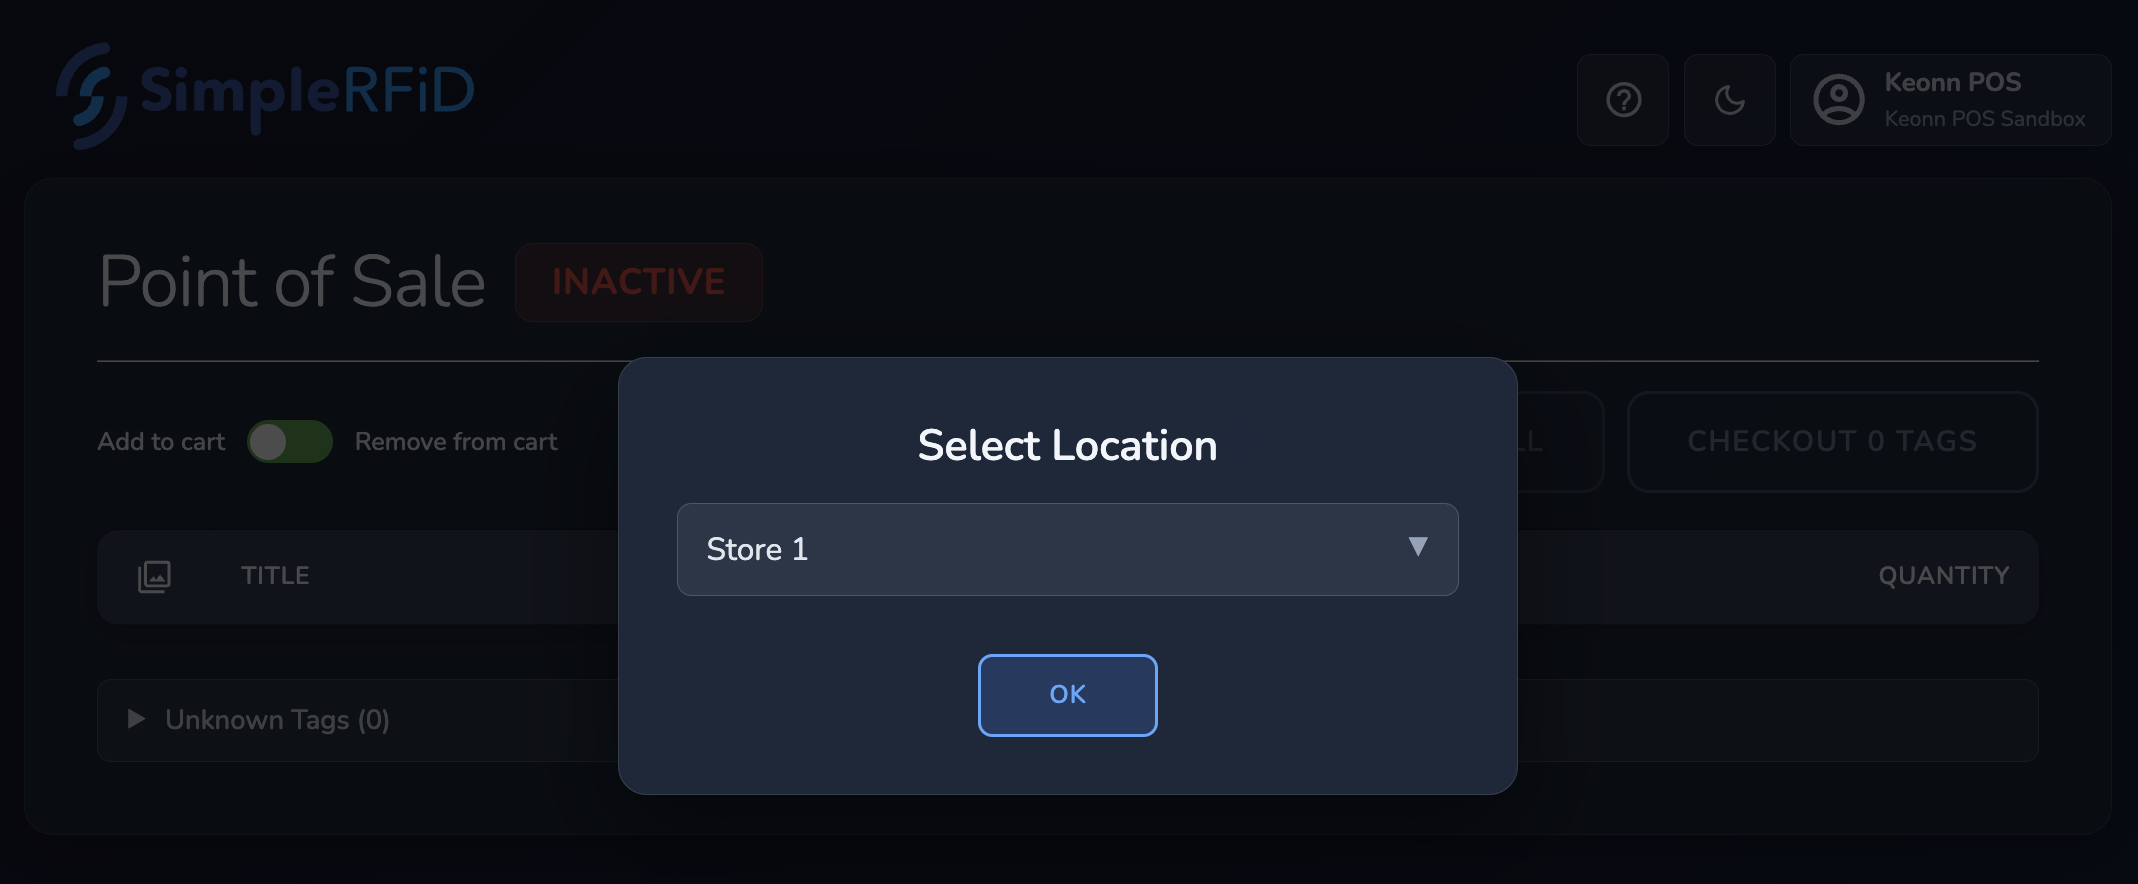
When you first log in, you'll be asked to select a location. Select the location where the scanner should be removing tags from.
Using the app
- Scan Items
- Make sure the app is open and active (the scanner works like a keyboard).
- Use the Add to cart / Remove from cart switch:
- Add to cart: scan items to add them.
- Remove from cart: scan items to remove them if you scanned something by mistake.
- Always switch back to Add to cart when done removing.
- Scanned items will appear in the Scanned Items list.
- Check Out
- Press the Checkout x tags button to submit the scan session, which will archive (remove) the items from your inventory.
- You can add an optional comment, which will appear in the Scan Sessions history.
- Clear All
- Press Clear All to remove all scanned items from the cart.
- Warning: this cannot be undone. You will need to scan items again if cleared accidentally.
- View History
- Press the History button to see all scans for the current location, including POS and mobile scans.
- You can download reports from this page.
- Change Location
- Use the Admin Menu → Change Location to switch locations if moving the scanner between inventory areas.
- The current location is also shown in the Location Indicator at the top.
- Optional / Helpful Features
- Help Button: opens this guide in the knowledge base.
- Theme Switcher: toggle between Dark and Light mode.
- Receiving Data Indicator: shows when the scanner is sending data. Keyboard input may also trigger it, but only valid RFID tags will be recorded.
- Unknown Tags: shows any scanned tags that don’t match your product library—useful for troubleshooting.
Detailed overview
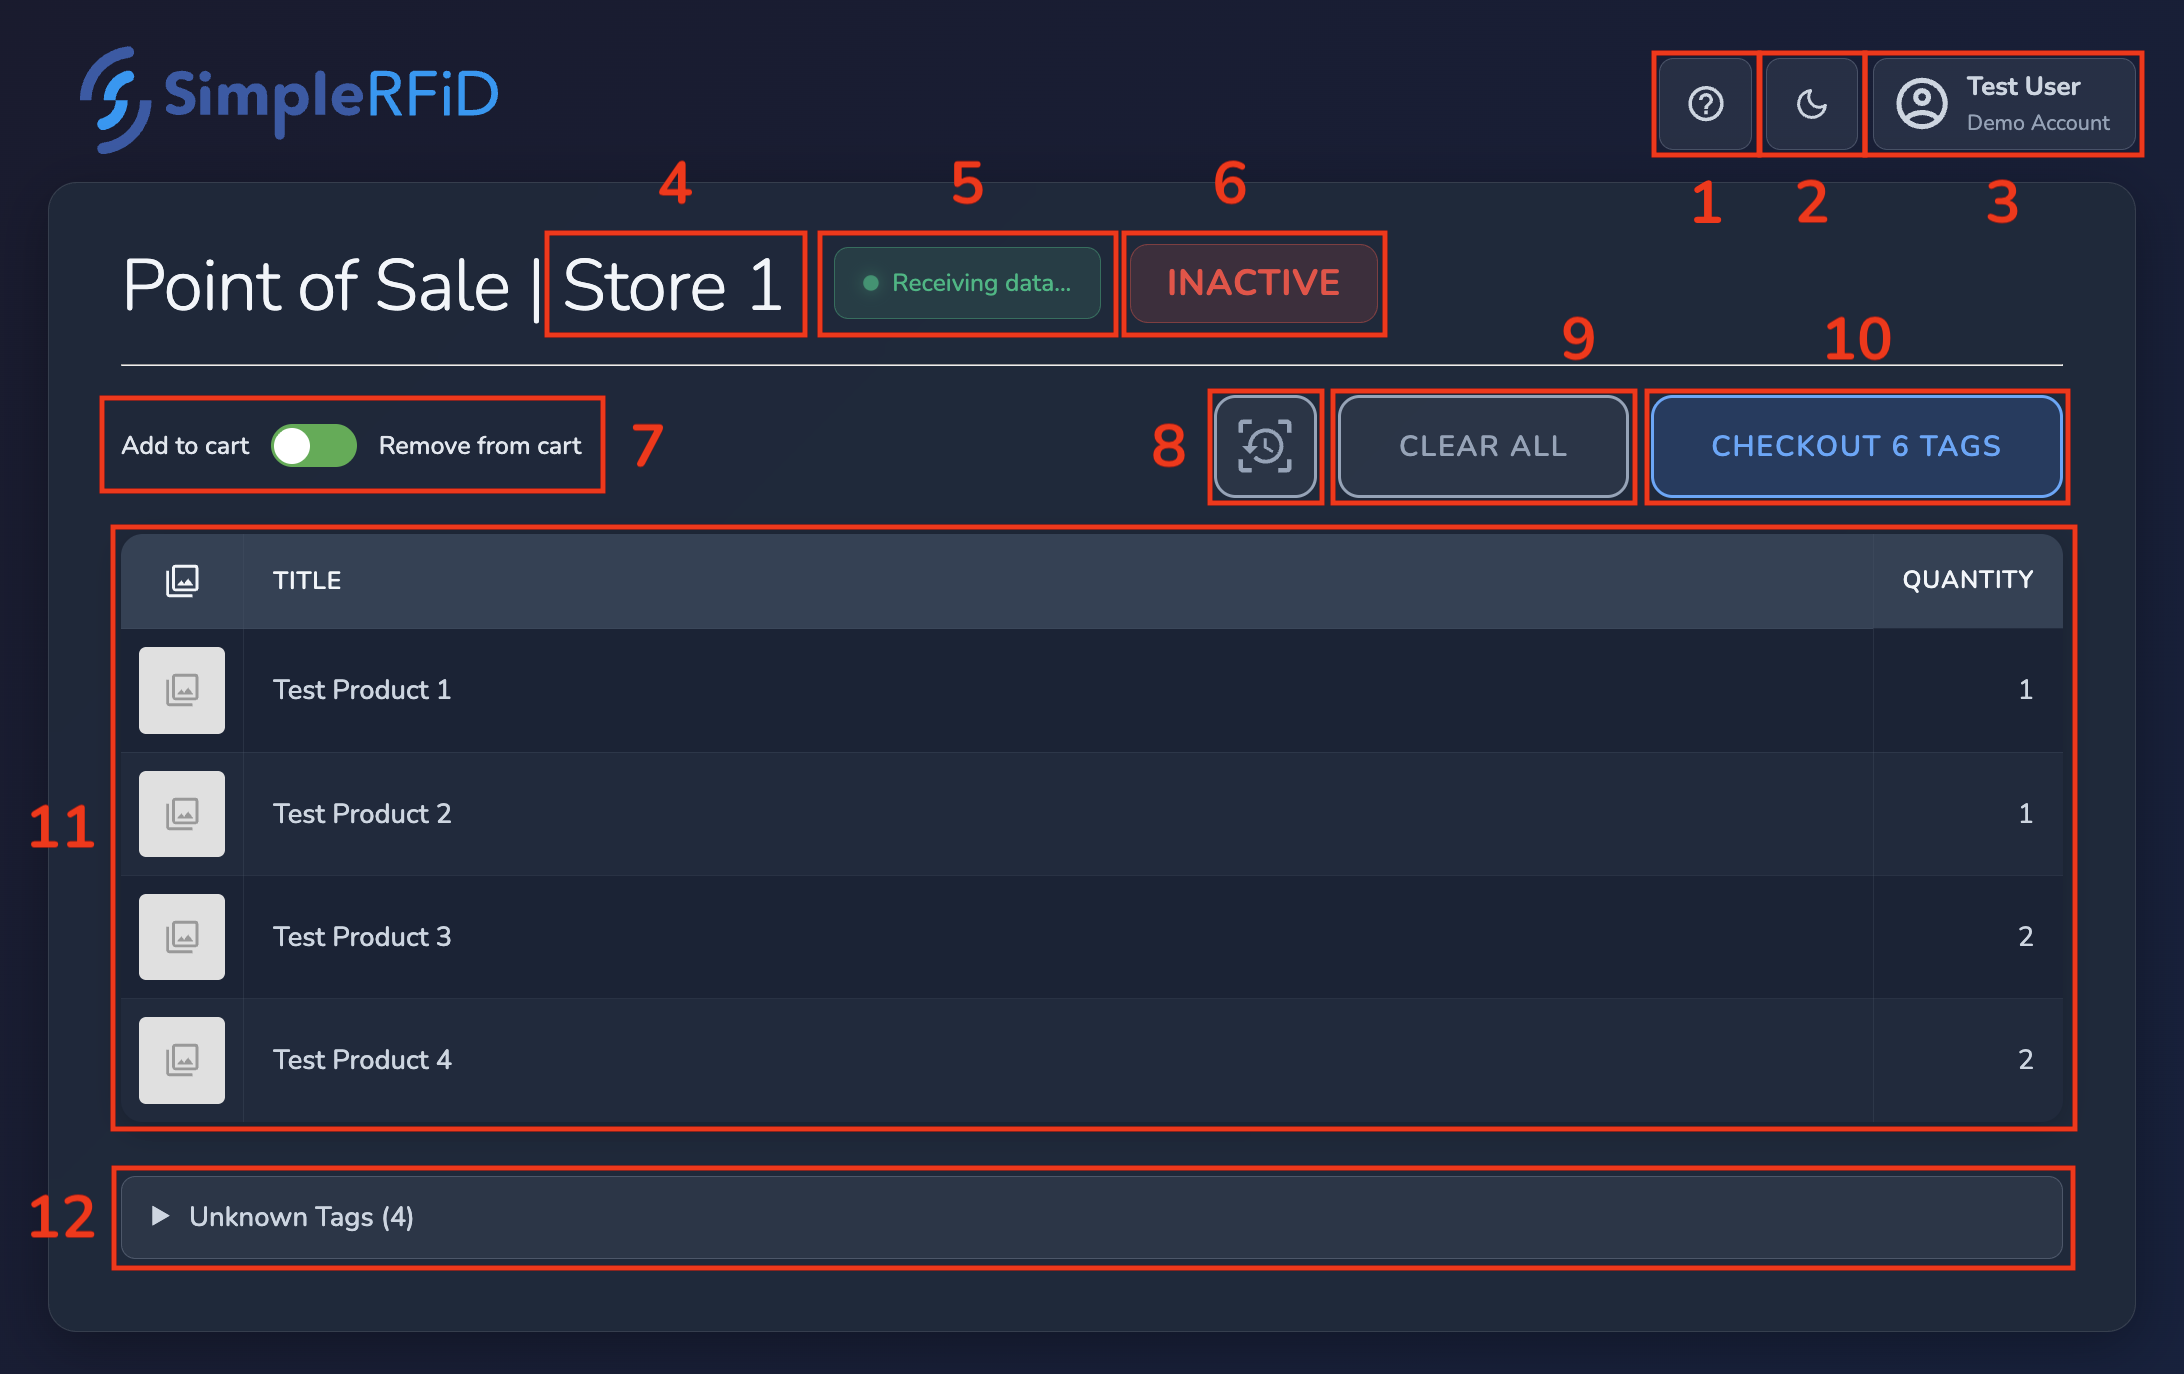
1. Help button 

2. Theme switcher
3. Admin menu
- Change location: switch between locations. If you move the scanner between inventory locations, use this option. Otherwise, the location should remain the same.
- Log out: log out of your Simple RFID account. Note: you may choose to use a dedicated user account for the point of sale.
4. Location indicator
Appearing as part of the title, this simply indicates which location is currently selected, and where the tags will be archived in Simple RFID.
5. Receiving Data indicator
This indicator will appear when the app is receiving keystrokes from a Human Interface Device (HID). Most of the time, this will be the RFID scanner, but because your keyboard is also a HID, you'll also see this indicator if you press any keys.
Any data that is not recognized as a valid EPC from an RFID tag will be discarded, so accidental key presses are usually not an issue. However, if you press any key(s) on your keyboard at the same time as scanning an RFID tag, you may need to re-scan the tag in order for it to register correctly.
6. Inactive indicator
This shows when the app isn’t focused (meaning the app isn't the one you’re currently using). The scanner sends keystrokes like a keyboard, so the app must be open and active to get the input. Otherwise, the keystrokes will go wherever you’re currently working.
7. Add/Remove switch
This switch is labeled Add to cart / Remove from cart and lets you switch between adding items and removing them.
For example, if you accidentally scan an extra item, switch to Remove from cart, then scan that item again to remove it. Items need to be scanned again to remove them because we use the serial number from the EPC to make sure the correct items are checked out.
Be sure to switch back to Add to cart before continuing to scan items!
8. History button
9. Clear All button
10. Checkout button
11. Scanned items
This is a list of all known tags that have been scanned into the cart. The table displays the image (if one exists), the Title (Category | Name | Color | Size), and the Quantity that have been scanned.
12. Unknown tags
This is an expandable list of tags that were scanned, that were unable to be matched with a product from your library. You'll see the EPC of the tag, as well as the Company Prefix, Item Reference, and Serial Number decoded from the tag. This is mostly useful for troubleshooting purposes; these tags will not be included in the submitted scan session.
Advanced POS: Article Coming Soon
ApparelMagic
ApparelMagic: Setting up the integration
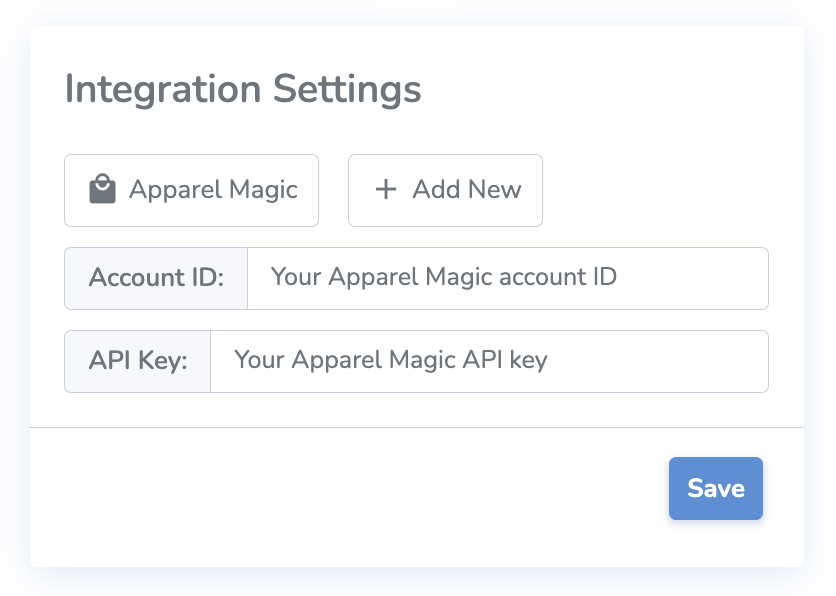
To connect Simple RFID to ApparelMagic, you'll need your account ID and an API Key from ApparelMagic.
1. Determine your Account ID
When logged into ApparelMagic, your Account ID makes up the first part of the URL as shown here:

2. Generate an API Key
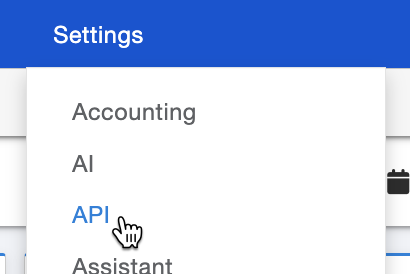
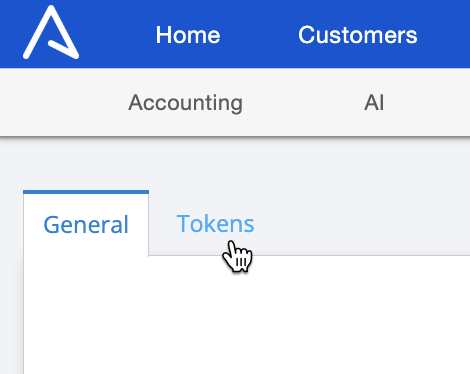
In the top-left of the page, open the Tokens tab, then press + New at the bottom-left:

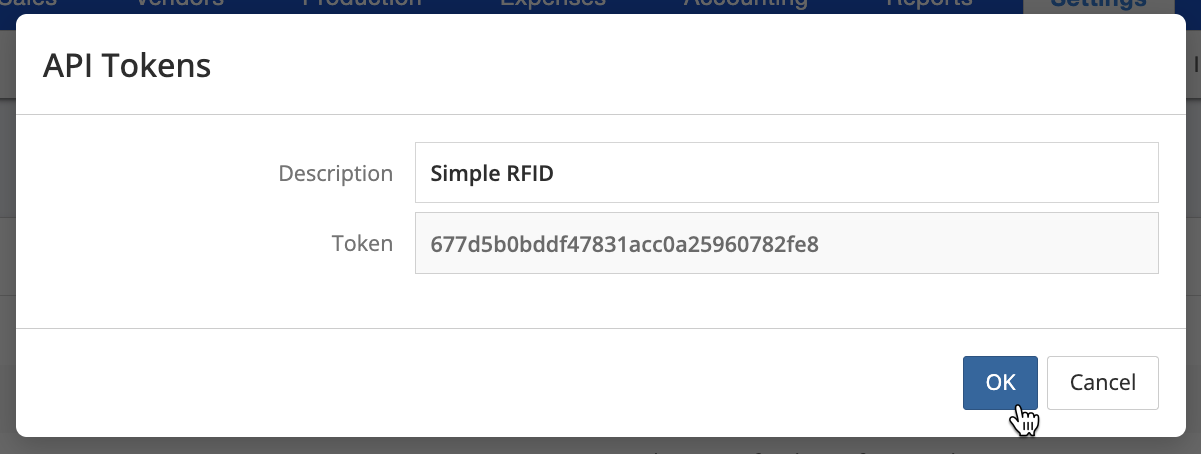
Give the token a description, like "Simple RFID". Make a note of the Token (you'll enter this in Simple RFID) then press OK.
Last, make sure to press Save at the bottom-right of the page.

3. Enter your Account ID and API Key
With this information collected, enter your ApparelMagic Account ID and API key in the Customer Profile page in Simple RFID, then press Save:
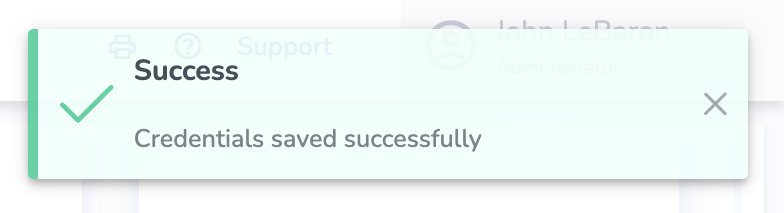
You should see a message that the credentials saved successfully, then you will see the ApparelMagic page appear under Integrations in the side navigation.
ApparelMagic: Products
If you haven't connected ApparelMagic with Simple RFID yet, follow the instructions here: ApparelMagic: Setting up the integration
Overview
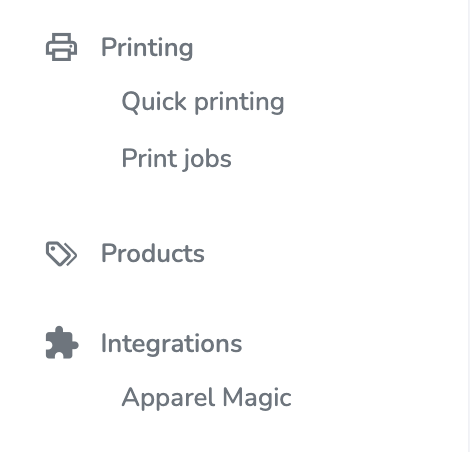
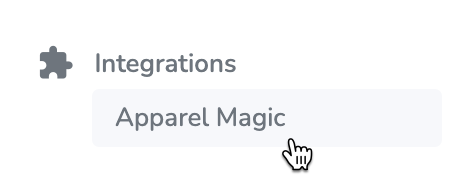
Access the ApparelMagic integration from the navigation sidebar:
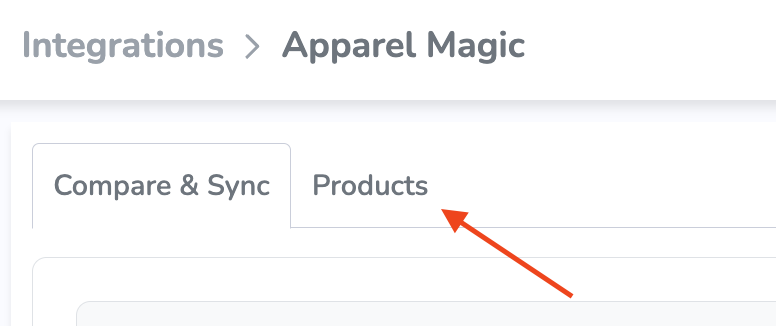
By default, you'll see the Compare & Sync view. To import products, open the Products tab at the top of the page:
In the Products tab, you'll see your ApparelMagic products listed. From here, you can search by style name (full match) to find specific products:

Parent SKUs can be expanded to show variants, and relevant information such as SKU, Name, Color, Size, Price, and Sync Status.

Sync Status describes the import status of each variant.
- New means the variant has not been imported yet.
- Existed means the variant already exists and is up to date in Simple RFID, so there's no need to import.
- NeedUpdate means that some product information has changed, so the product needs to be imported again with the new info.
Import Products
There are a couple of different approaches you can take to import products.
Import All
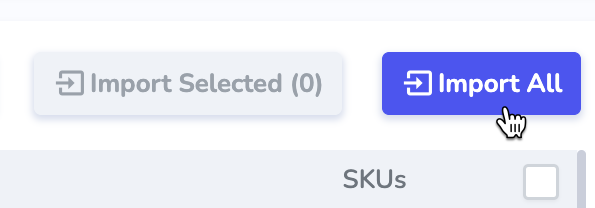
Using the Import All button will attempt to import all of your products from ApparelMagic to Simple RFID. This is generally recommended when first setting up the integration rather than copying products individually.
Import Selected
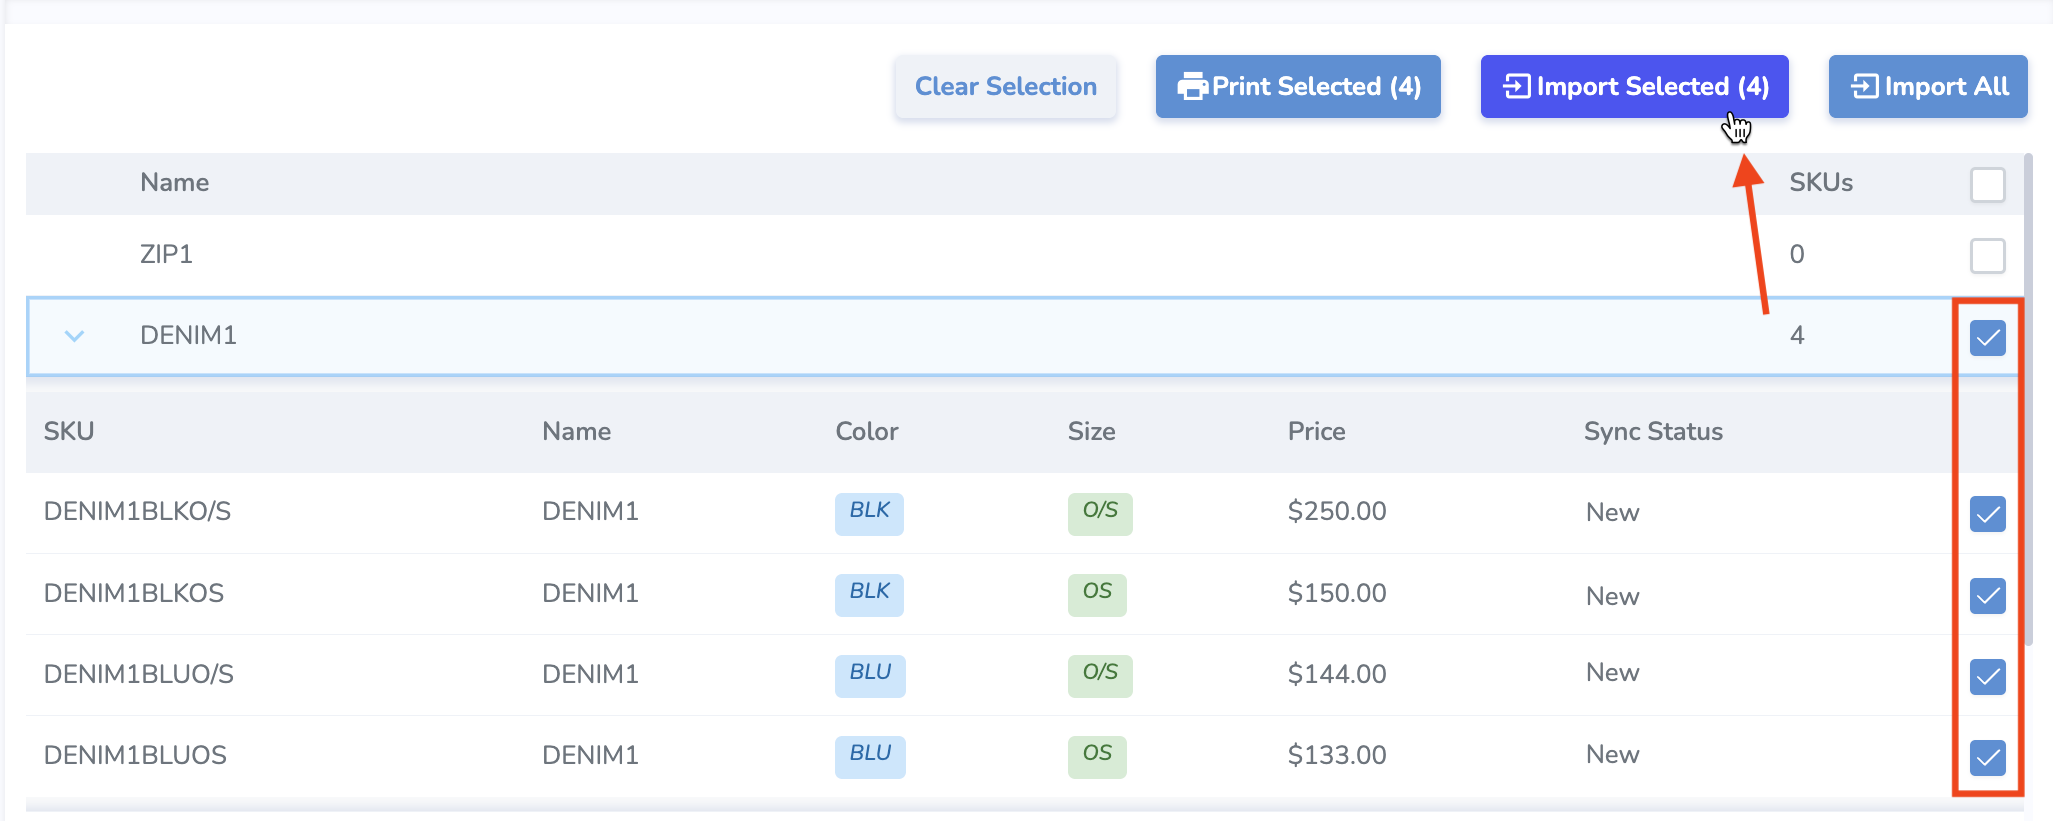
You may also wish to select a specific product or variant to import, especially after making changes to the product information in ApparelMagic. Use the checkboxes on the right side of the products/variants to select one or more items. You may select a parent SKU to include all its variants, or specific variants individually. Press the Import Selected button to import those items.
Printing tags for products
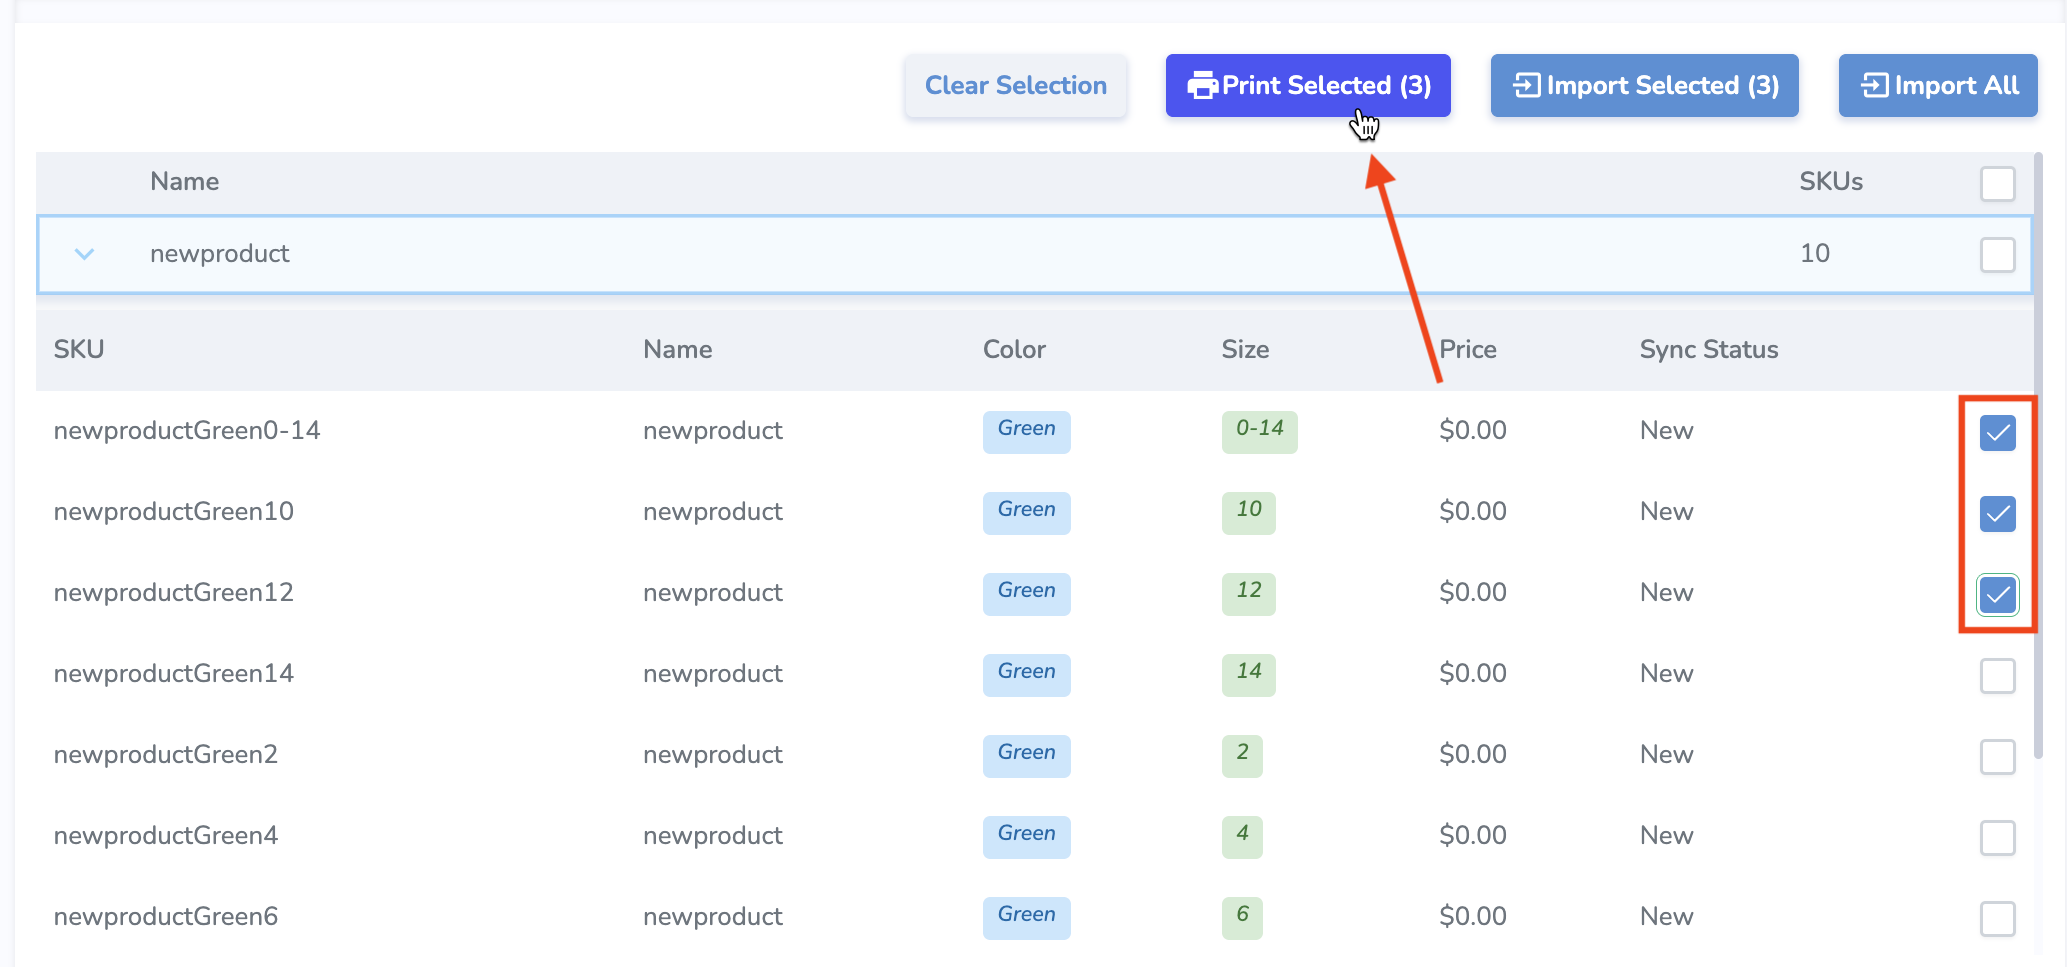
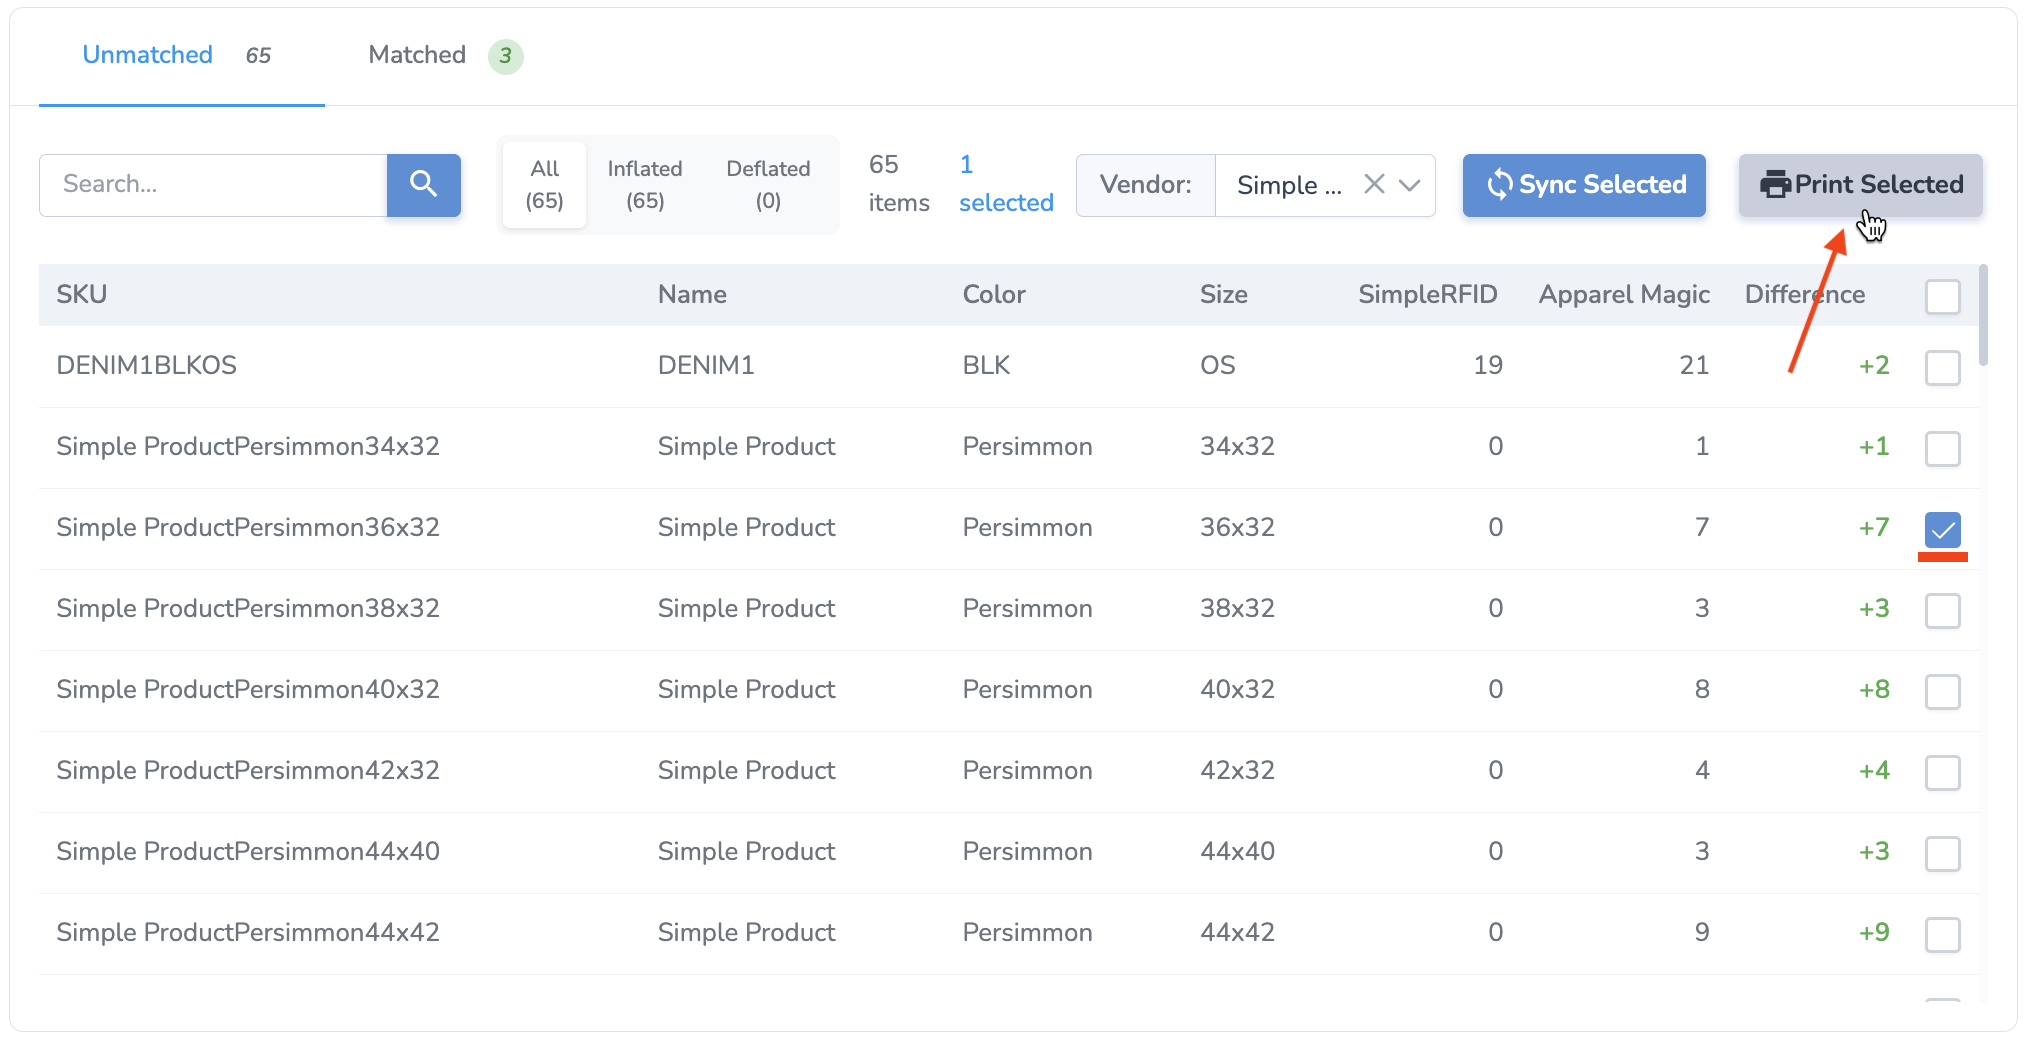
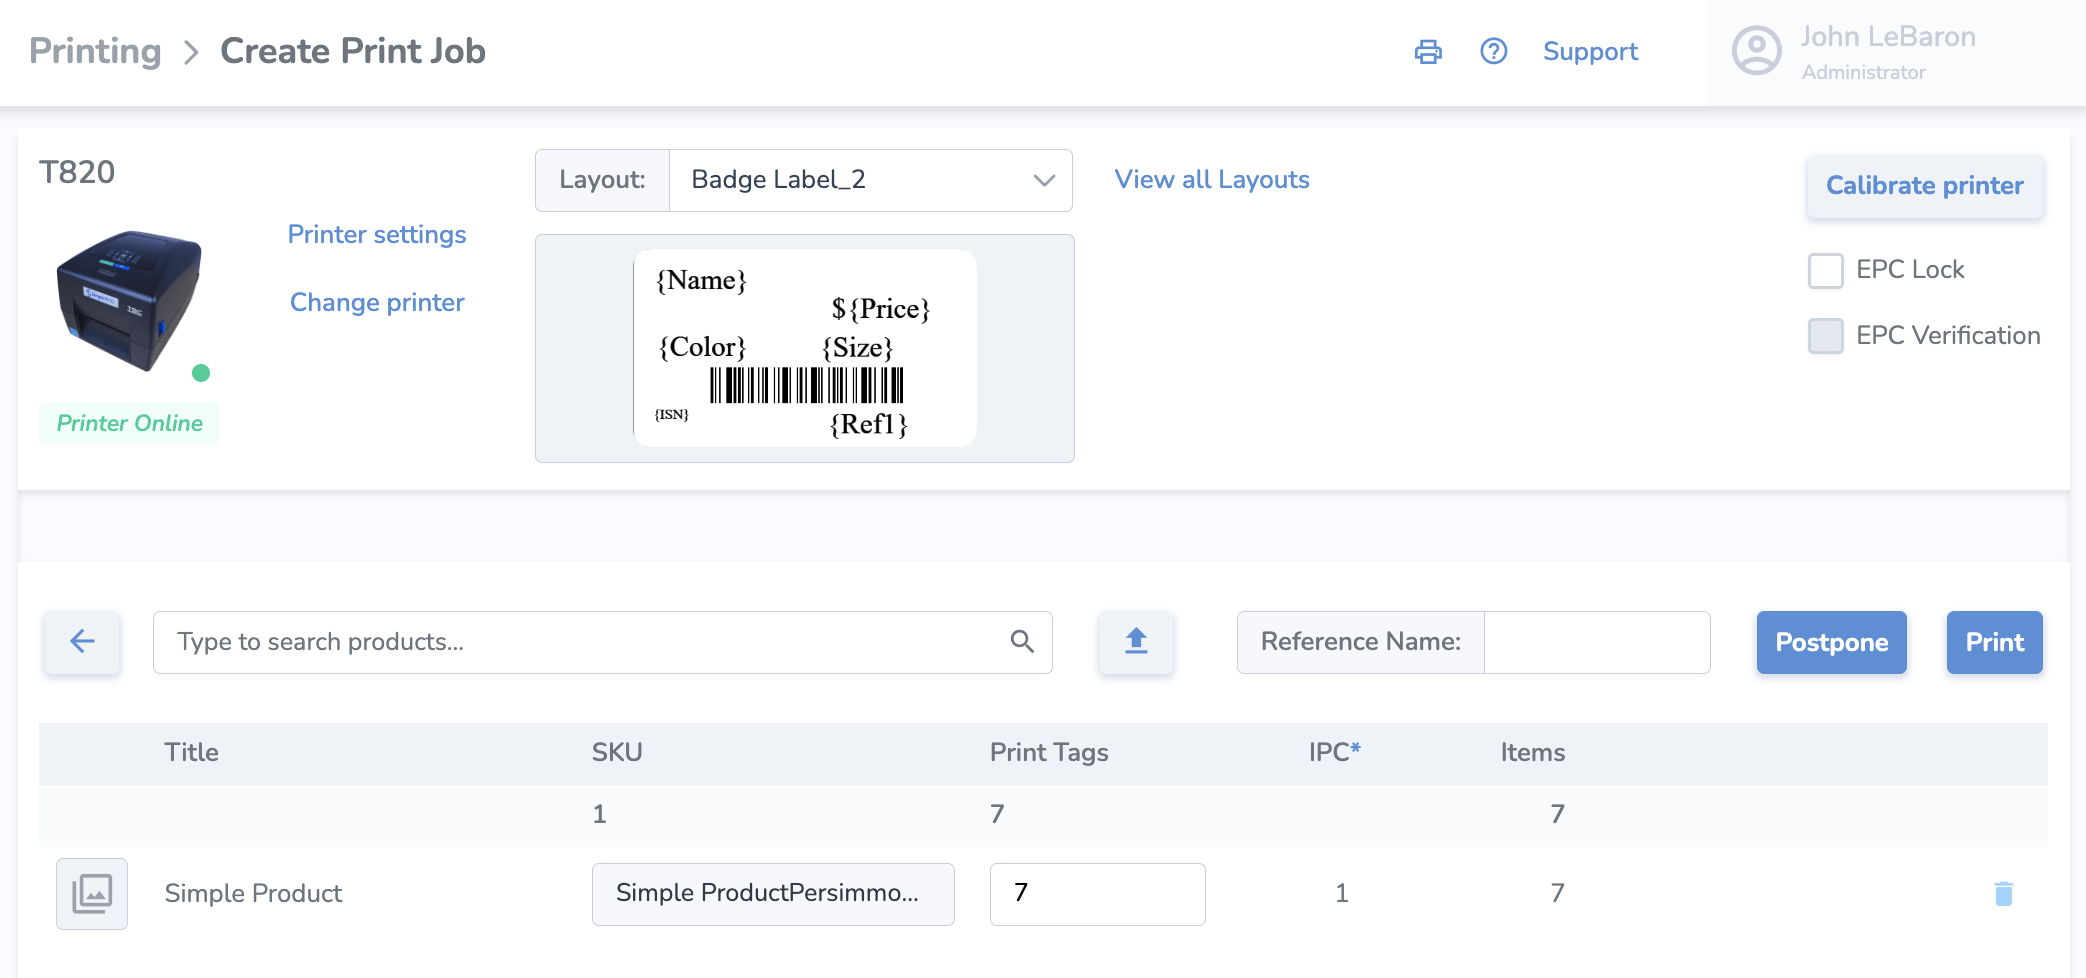
From the Products tab, you can also select specific products or variants and print tags for those products. Pressing Print Selected will bring you to the Print Jobs page where you can specify quantities, select a printer and label layout, and print or postpone the job.
You can also print from the Compare&Sync tab.
NOTE: Property mappings
Currently we have hardcoded the following properties for product import. We plan to implement configurable mapping in the future.
Simple RFID Property | ApparelMagic Property |
Color | attr_2 |
Size | size |
Price | label_price (fallback: price) |
Category | category |
Name | style_number |
Sku | sku_alt (fallback: sku_concat) |
Barcode | upc_display |
ApparelMagic: Compare and Sync
If you haven't connected ApparelMagic with Simple RFID yet, follow the instructions here: ApparelMagic: Setting up the integration
Overview
Access the ApparelMagic integration from the navigation sidebar:
The Compare & Sync page allows you to sync your Simple RFID inventory counts to ApparelMagic.
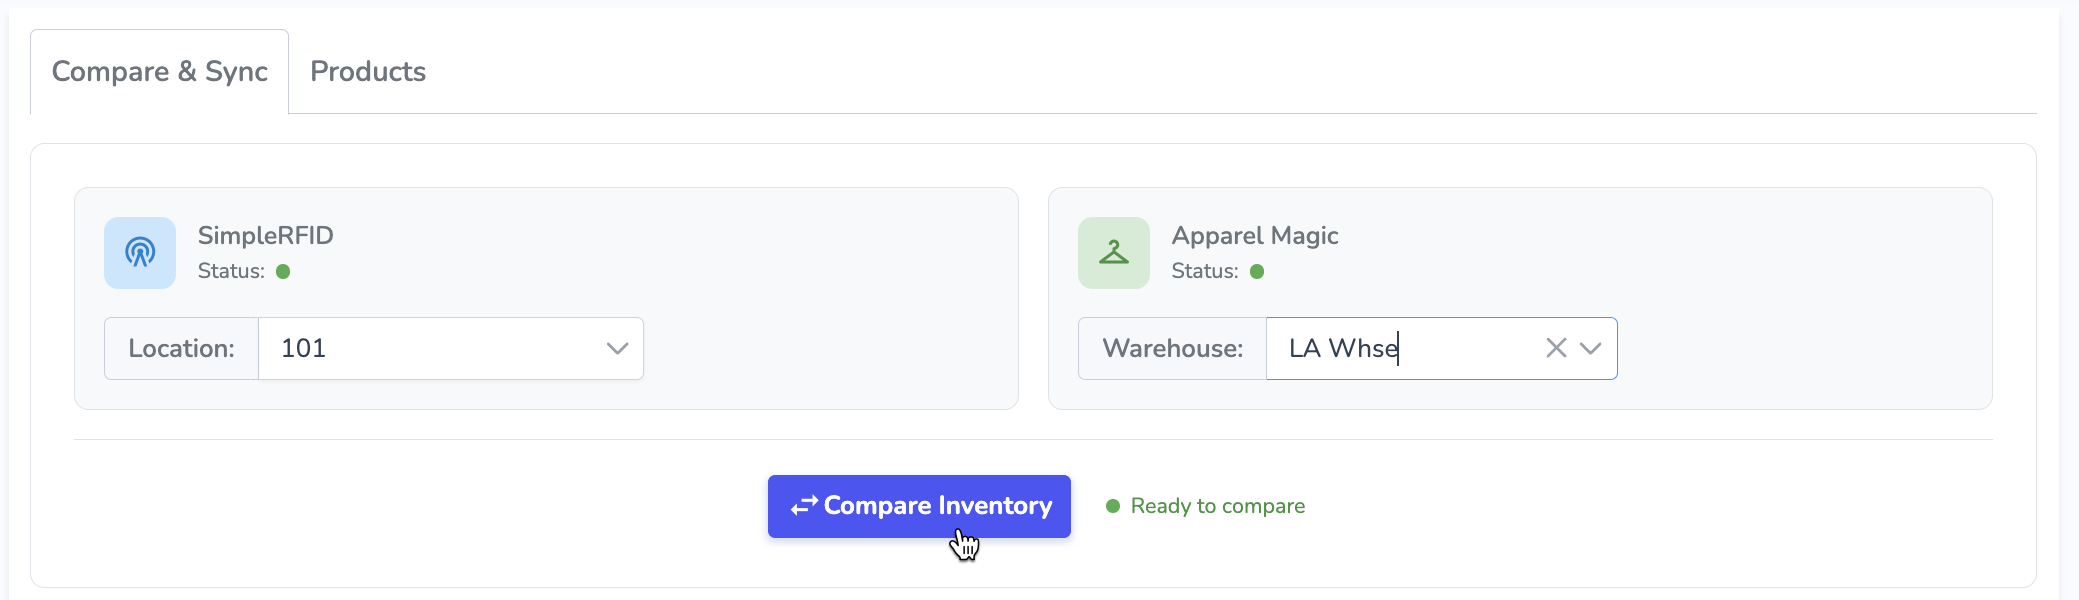
First, select the locations you want to compare: your Simple RFID location on the left, and your ApparelMagic warehouse on the right. Then, press Compare Inventory to load inventory counts from both systems and populate the comparison.
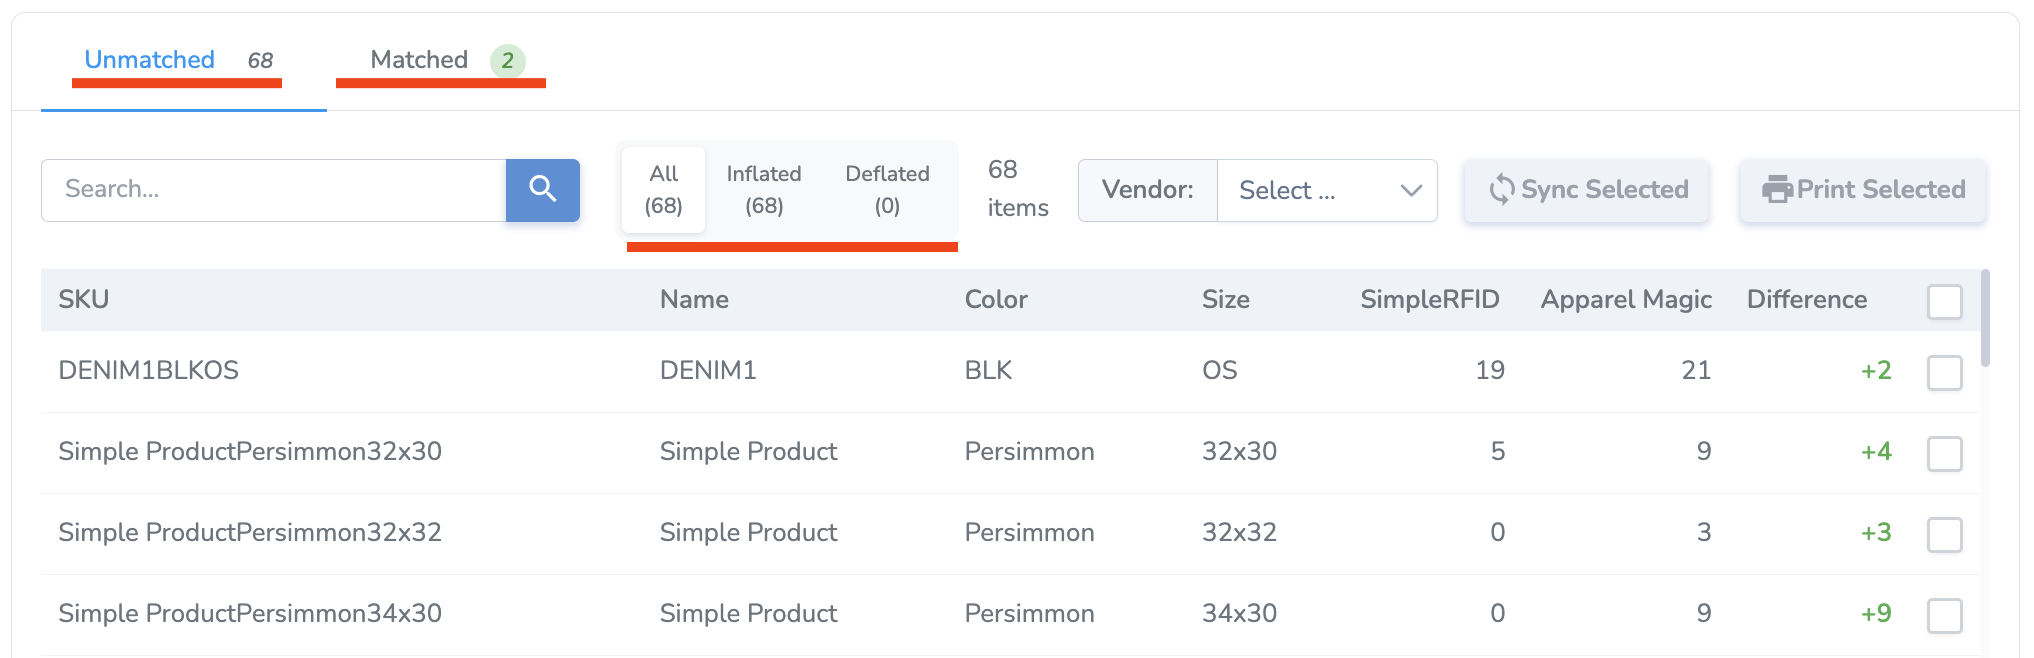
The results are split into two main categories:
- Unmatched - Products whose quantities are not the same between Simple RFID and ApparelMagic. This category is split further into two subcategories:
- Inflated - Products whose quantities in ApparelMagic are higher than those in Simple RFID.
- Deflated - Products whose quantities in ApparelMagic are lower than those in Simple RFID.
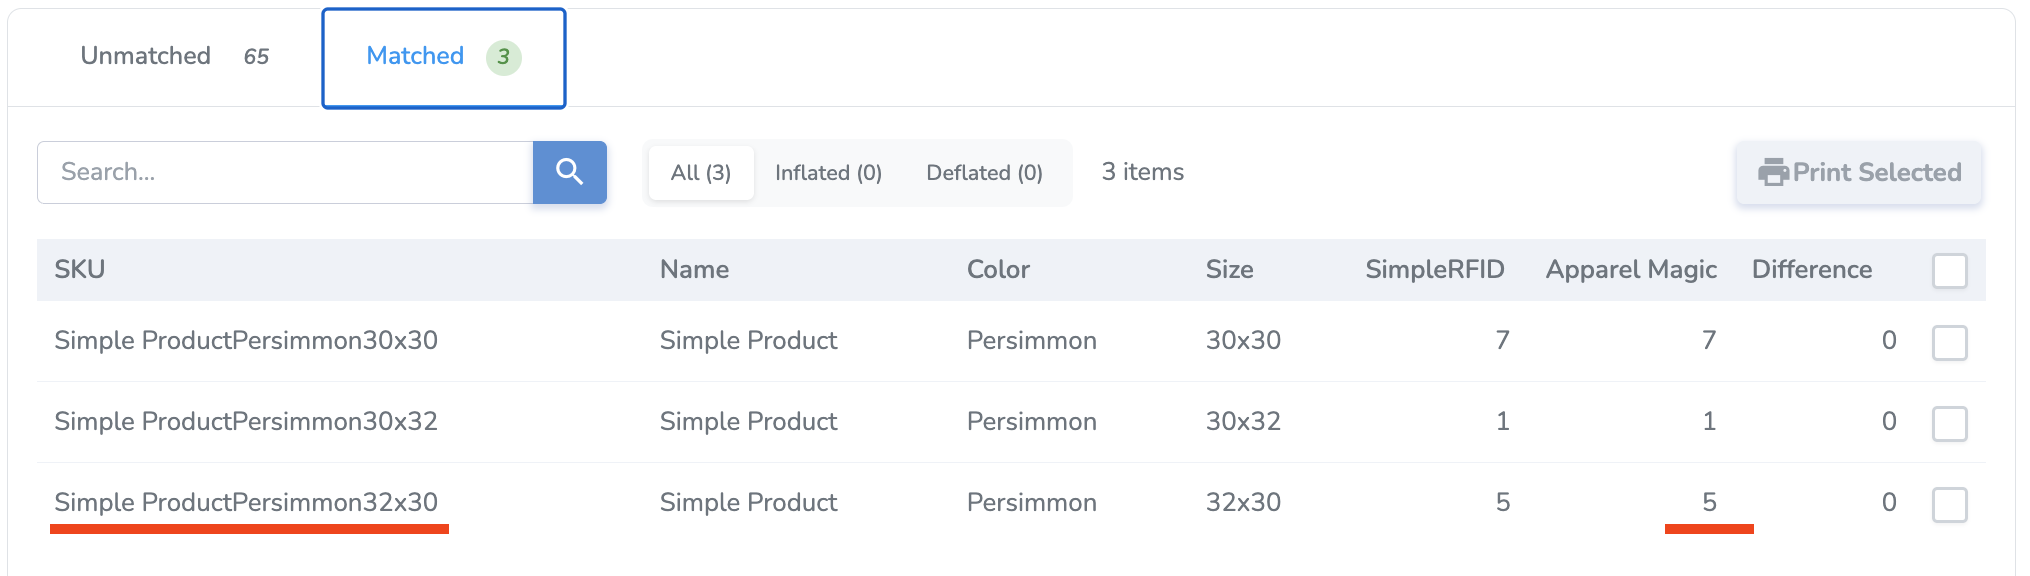
- Matched - Products whose quantities are the same between Simple RFID and ApparelMagic and are not equal to 0. These products have no action to be taken since they already match.
Sync
Any product in Unmatched status can be "synced" to ApparelMagic, meaning the ApparelMagic quantity will be updated to match the Simple RFID quantity.
Syncing creates a Receiver in ApparelMagic. The Vendor name identifies the source of goods. It must be set in order to create the Receiver, so you must select a Vendor from the drop-down menu next to the Sync Selected button.
You can sync any or all of the products in the Unmatched list by selecting the check boxes on the right side, then pressing Sync Selected.
NOTE: The Difference value describes the ApparelMagic total in relation to the Simple RFID total. When you sync, the opposite value will be applied, e.g. if an Inflated product has a difference of +4, the inventory in ApparelMagic will be adjusted by -4.
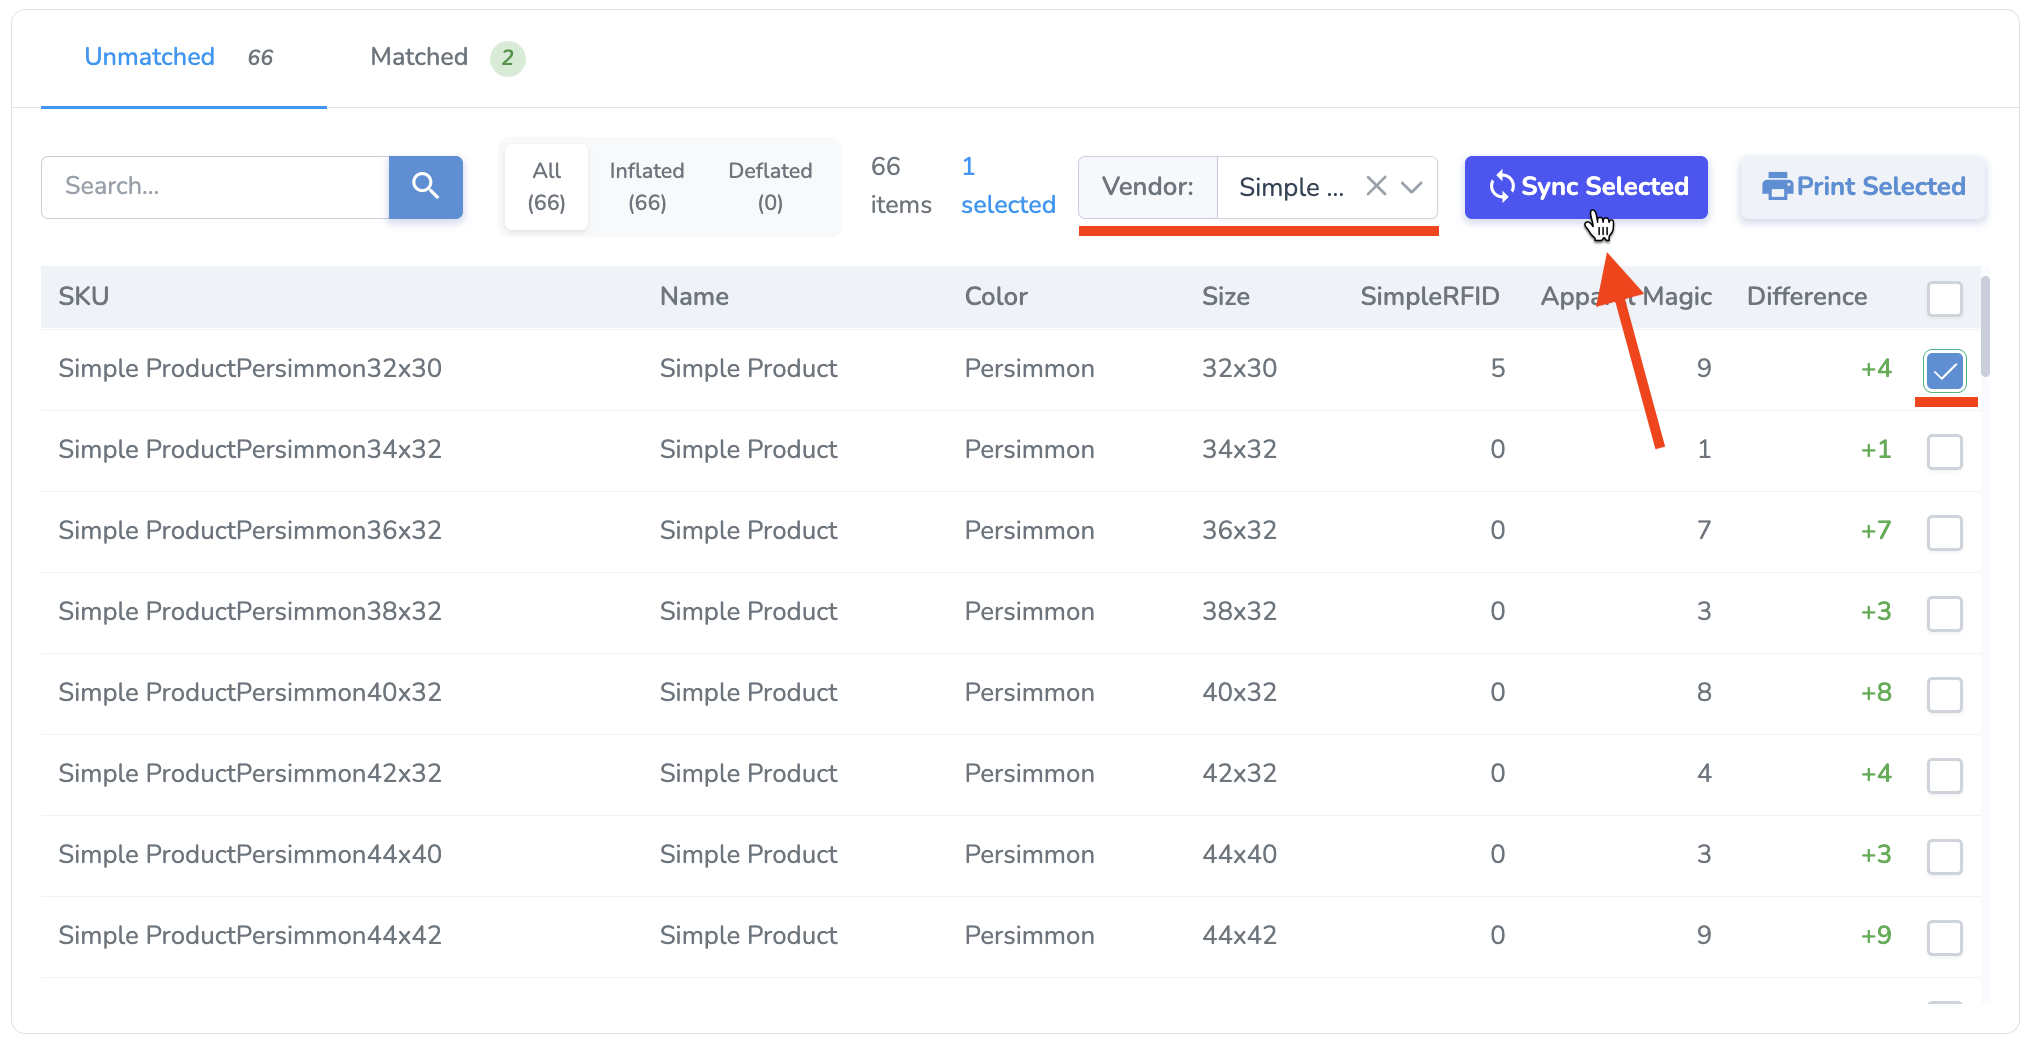
After you Sync, the comparison will be reloaded, and those products will be in Matched status.
For inflated products, you also have the option to print tags for missing items. For example, if you discovered that some items were physically present but weren't RFID tagged, this is a quick way to print the difference.
You'll be brought to the Print Jobs page with your products and quantities automatically populated, and ready for you to print or postpone.
No integration available?
If no integration currently exists for your platform you can use our spreadsheet compare tool to quickly identify discrepancies and generate a spreadsheet containing corrections which can be uploaded back into your software.
To learn how checkout our Spreadsheet Compare Tool article.
Jonas
Import Inventory to Jonas
Download Simple RFID Inventory Report
Login to Simple RFID
Navigate to the Simple RFID web portal. Enter your credentials to log in to your account
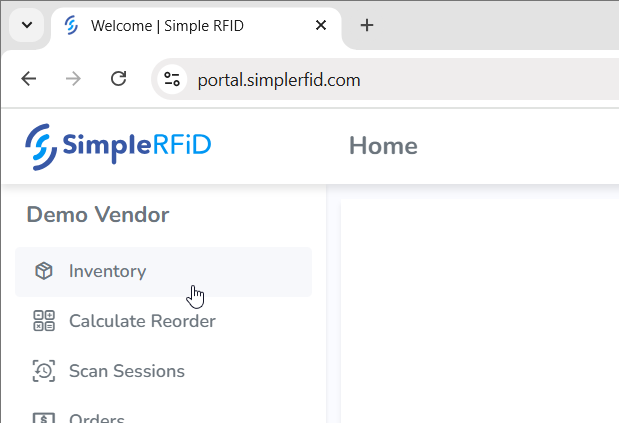
Navigate to Inventory
Once logged in, click on the Inventory link in the main navigation menu to access your inventory data
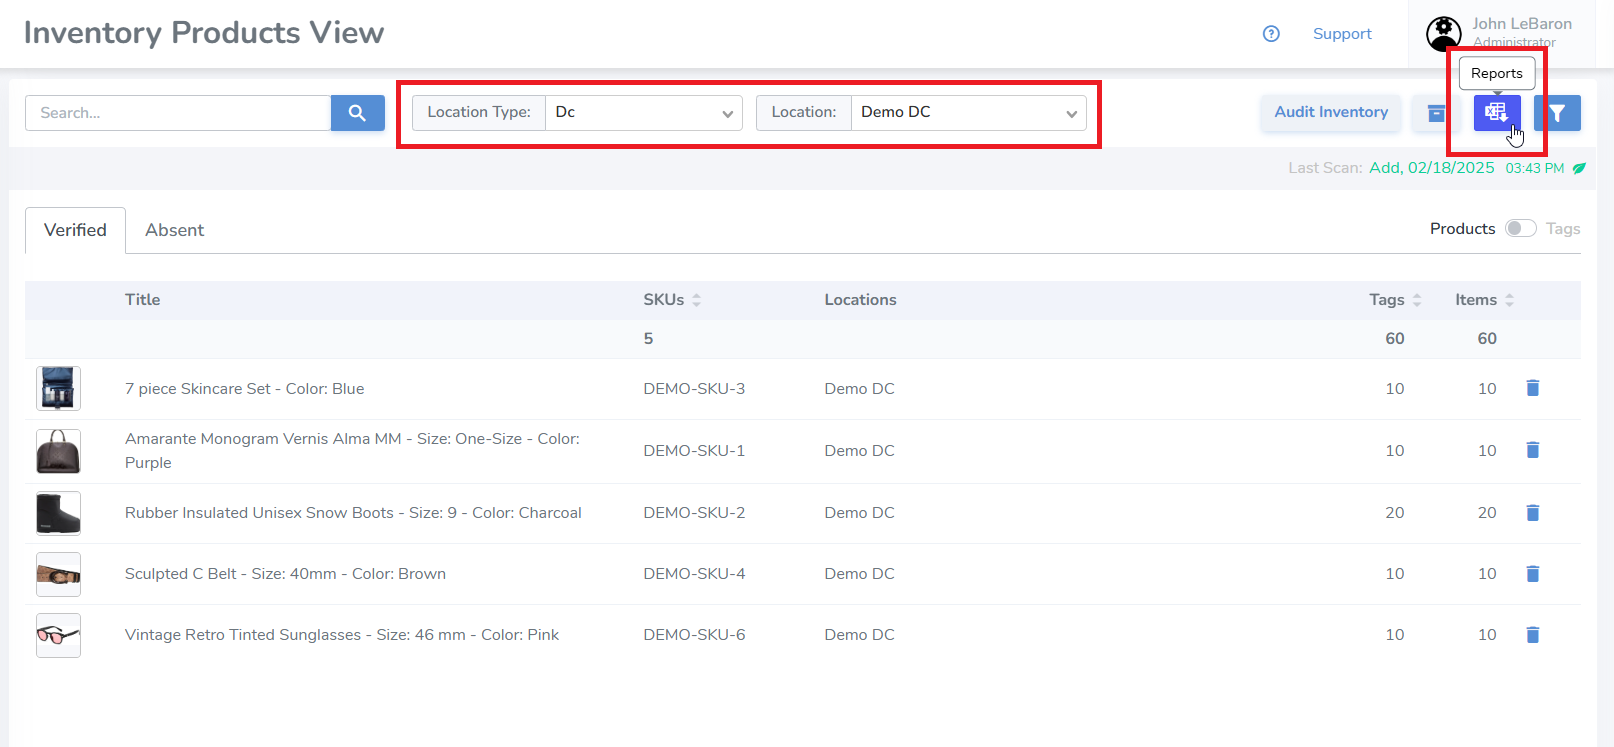
Open the Reports View
Select the Location Type and then the Location that you would like to export. Then click on the Reports button near the top right of the page
Make sure you only select one location, not All
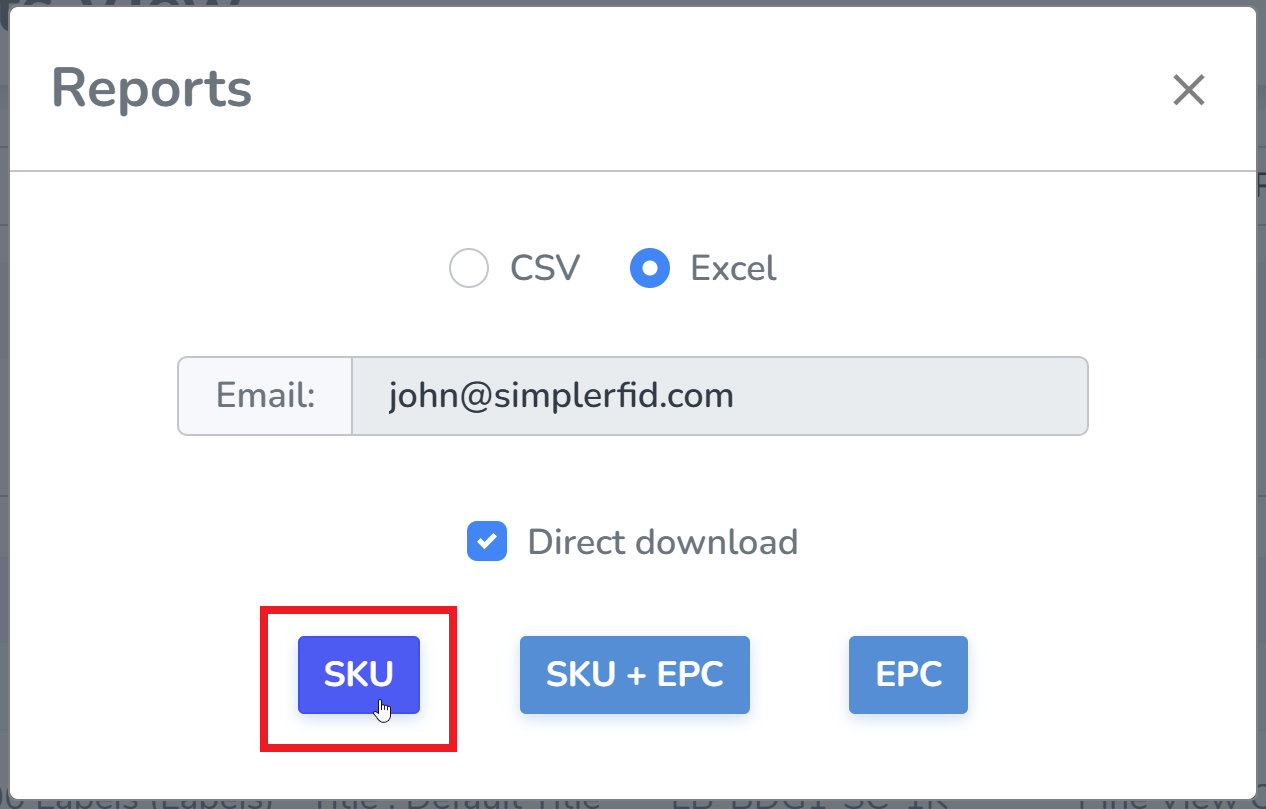
Download the Report
Click the SKU button to download the inventory report. The report will be saved to your default download location, based on your browser settings
Convert Report
Navigate to Simple RFID Inventory Converter
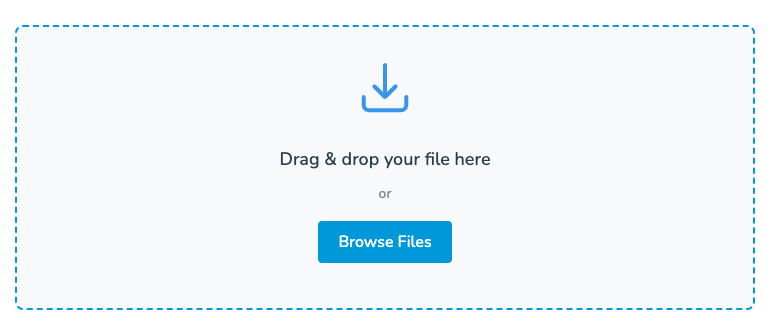
Input your Report
Drop the report file, or select it from the file explorer
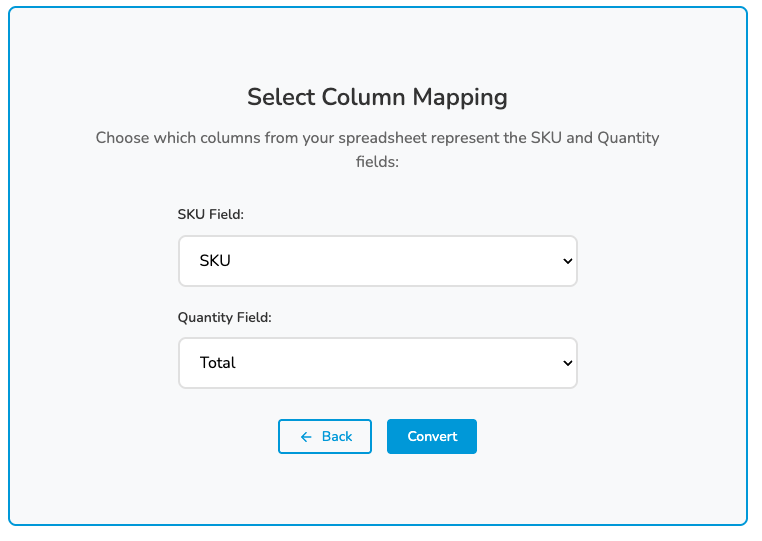
Select Column Mapping
In the SKU Field, use the unique identifier for products (i.e. SKU, Barcode, etc.)
In the Quantity Field, select Total
Download Text File
Select Download Text File. The new report will be saved to your default download location, based on your browser settings as a text file
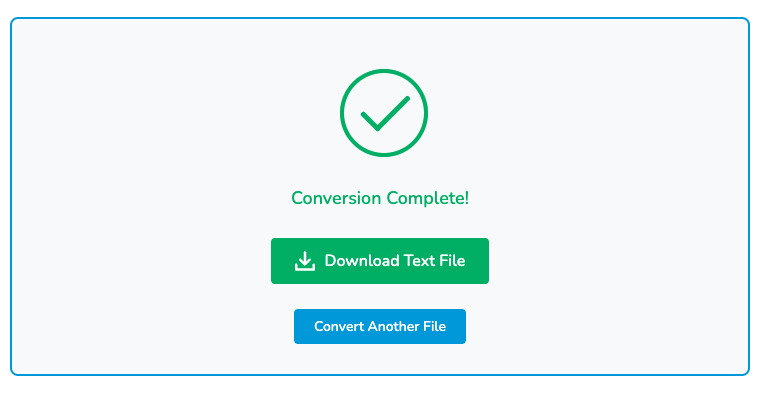
You can now upload this report straight into Jonas
Clubessential
Clubessential | Import Inventory Report
Download Inventory Report from Simple RFID
On the Simple RFID Web Portal, navigate to the Inventory page

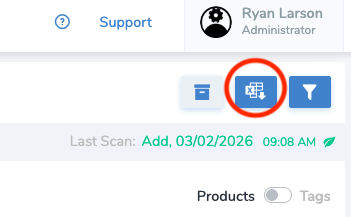
On the top right of the page, select the Reports button
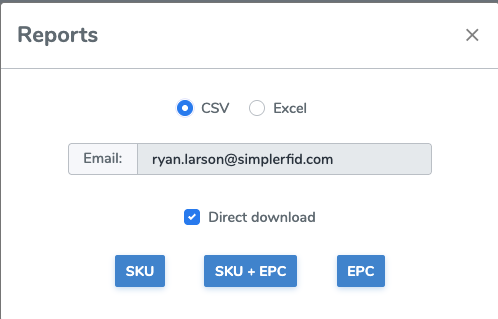
Select CSV and SKU. This will download a report in your default download location. It will have the extension .csv
Format Report for Clubessential
Open the downloaded report in a spreadsheet program such as Excel
Delete the Name column
Rename the Total column to Counted Quantity
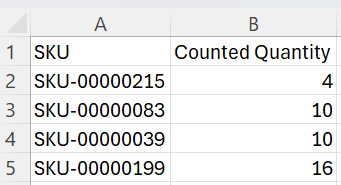
If your unique identifier is the UPC, you will need to rename the SKU column to UPC and select the UPC column and make them Numbers.
Import into Clubessential
On Clubessential, navigate to Items then Inventory Count Wizard
Select Import Counts from Scanning Device (*.csv)
Upload the CSV file that you formatted
You will need to lock the count sheet prior to uploading
Senitron Tags
This article describes putting Senitron information into a Customer Profile to support scanning Senitron tags
Prerequisets:
You will need the Senitron tag information for your products. The values that we want are the Company Prefix Hex and the Asset # Length
Add to Simple RFID
Go to the Customer Profile, and under Senitron Company Prefixes, input the Hex number from the tag information, and the Asset # bit length.

Save this and when you upload products, ensure that the Company Prefix(Simple RFID) is the Hex prefix(Senitron) , and the Item Number(Simple RFID) is Asset #(Senitron).