To use this upgrade method, your printer ****must be connected to your network****. If a network connection is unavailable, [****update the firmware via a USB flash drive****](https://kb.simplerfid.com/books/printers/page/printronix-updating-firmware-via-flash-drive).
#### Requirements: - A device with a web browser, on the same network (LAN) as your printer - This device must be able to download and upload files. - An RJ-45 Ethernet cable to connect your printer to the network (unless you have a Wi-Fi enabled printer) ### Step 1: Download the latest firmware file Choose the appropriate file for your printer model: - [T800 firmware (T820, T830)](https://dl.simplerfid.dev/T800%201.52E%20P302271.prg) - [T4000 firmware (T4204)](https://dl.simplerfid.dev/T4000%20V1.46H.prg) - [T6000e firmware (T6304, T6604)](https://dl.simplerfid.dev/T6000e%20V1.42E.prg) ### Step 2: Connect the printer to your networkMake sure ****all**** ****USB cables**** are disconnected from the printer before continuing.
Using an Ethernet cable with RJ-45 connectors, or Wi-Fi on supported models, connect the printer to your network. 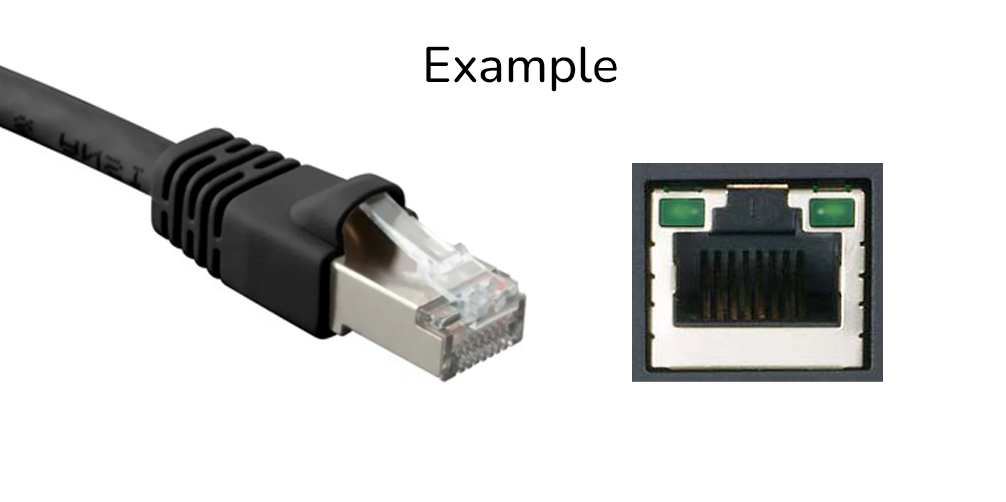 When the printer is connected to the network, you will see its IP address at the top-left of the screen: [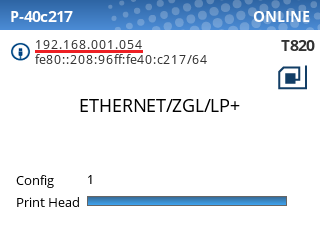](https://kb.simplerfid.com/uploads/images/gallery/2025-07/printronix-ip-address.png) (If you don't see this screen, you may need to unpause the printer using the green pause button \[ ****I I**** \]. ### Step 3: Navigate to the printer's web page Type the printer’s IP address into a web browser. You can omit leading zeros in each octet: 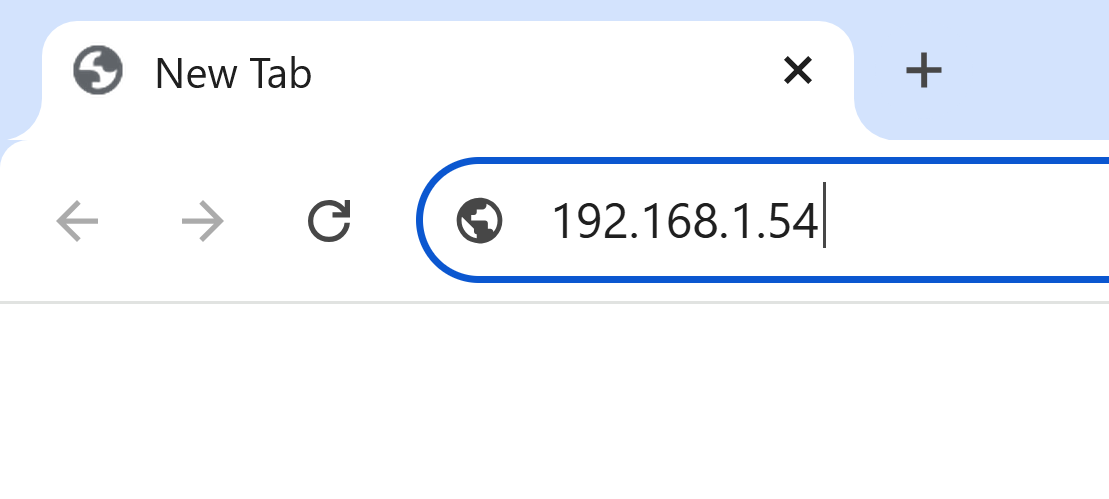 You should be greeted with the printer's home page: [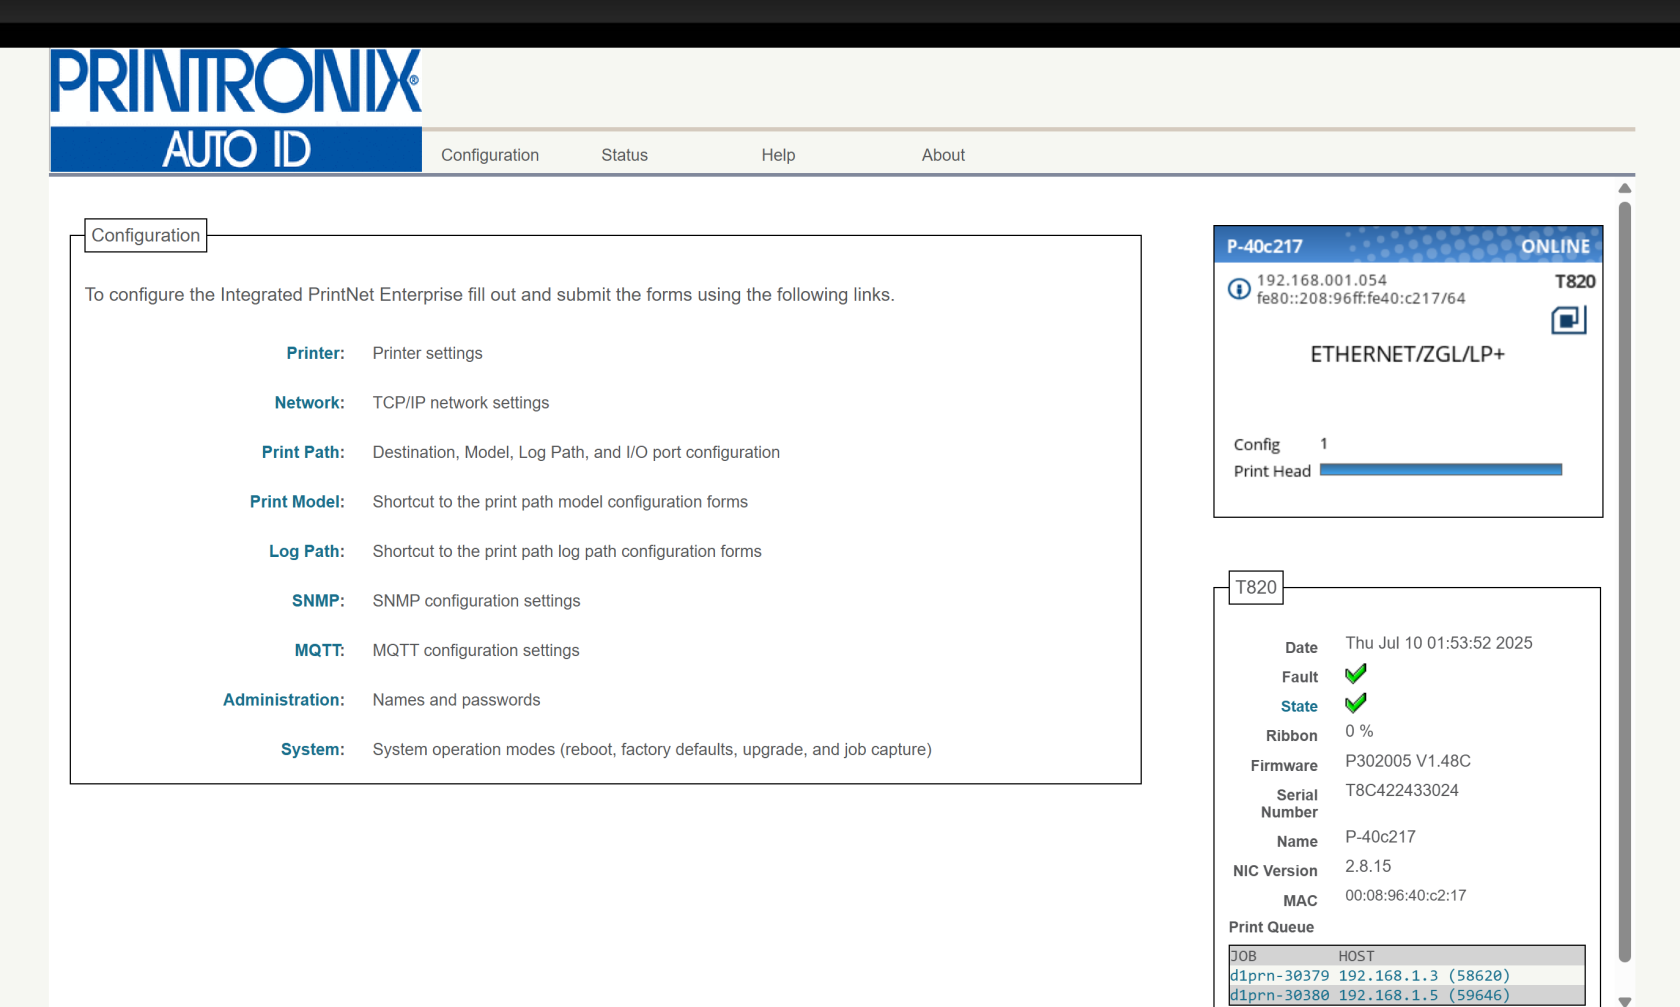](https://kb.simplerfid.com/uploads/images/gallery/2025-07/7Gwimage.png)If you see a page asking you to set a password, we recommend setting it to ****Print123!**** to remain consistent with other guides. If you set the password to something else, make sure you store the password somewhere it can be retrieved later.
### Step 4: Capture the printer's current configuration When you upgrade the firmware, the printer's current settings (including calibration, print intensity, vertical/horizontal shift, and more) will be lost. We will save the printer's current configuration to a file so we can restore it after the upgrade is complete. Click the ****Printer**** link at the top of the Configuration list.You may be prompted for a username and password at this point. The username is ****root**** and the password is ****Print123!**** or whatever you set it to in the previous step. If ****Print123!**** doesn't work, try leaving the password field blank.
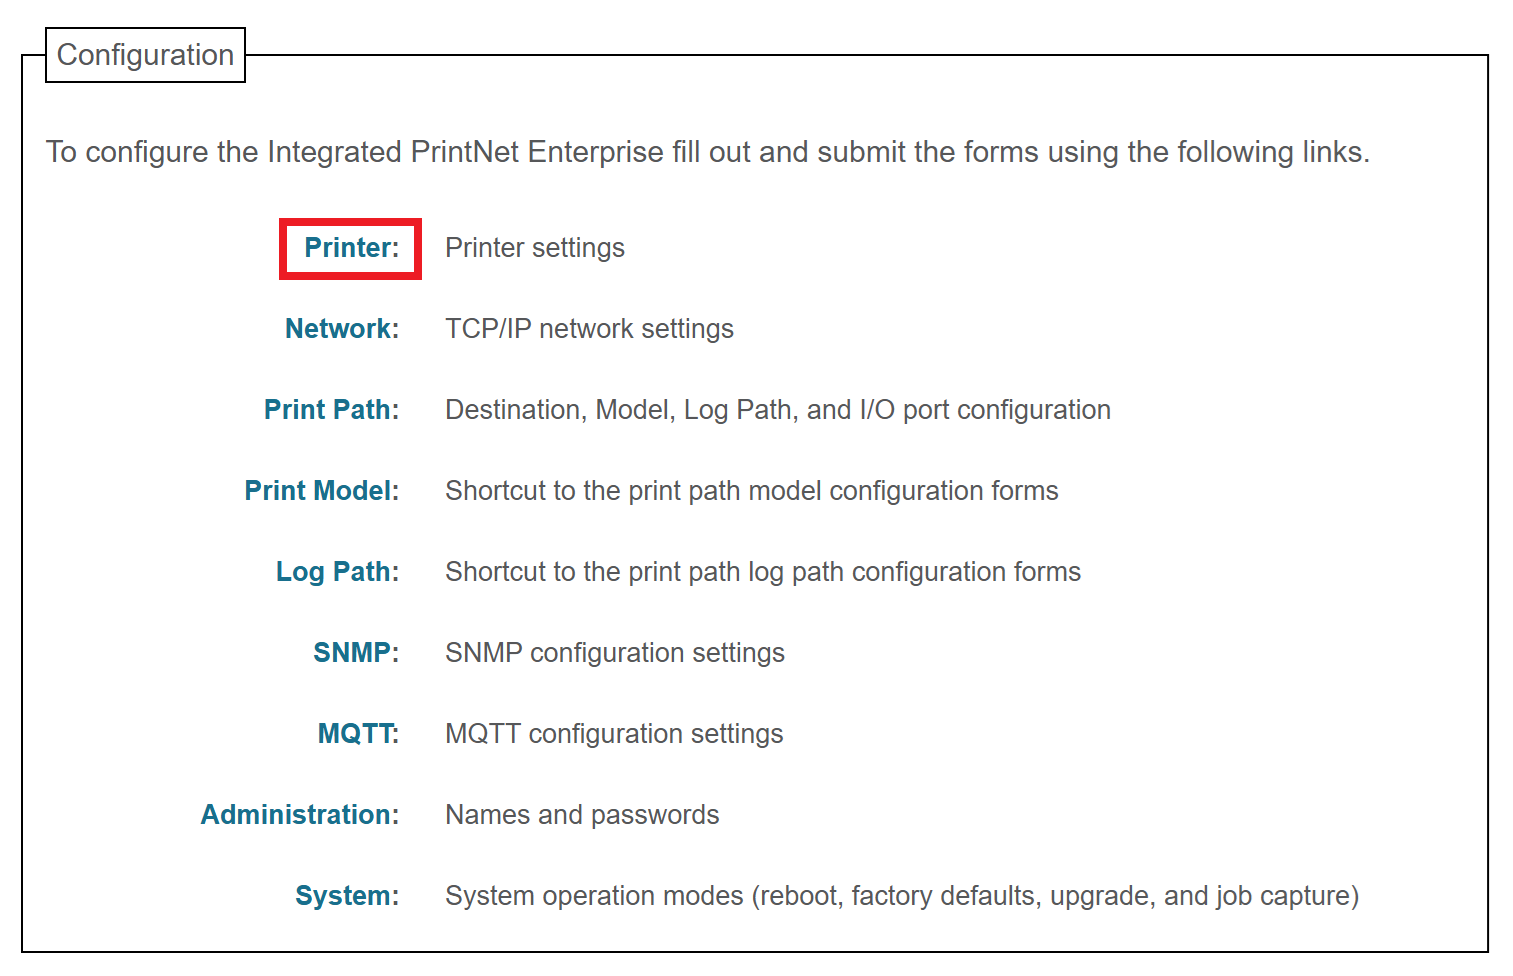 Click the ****Configuration Management**** link near the top of the page: 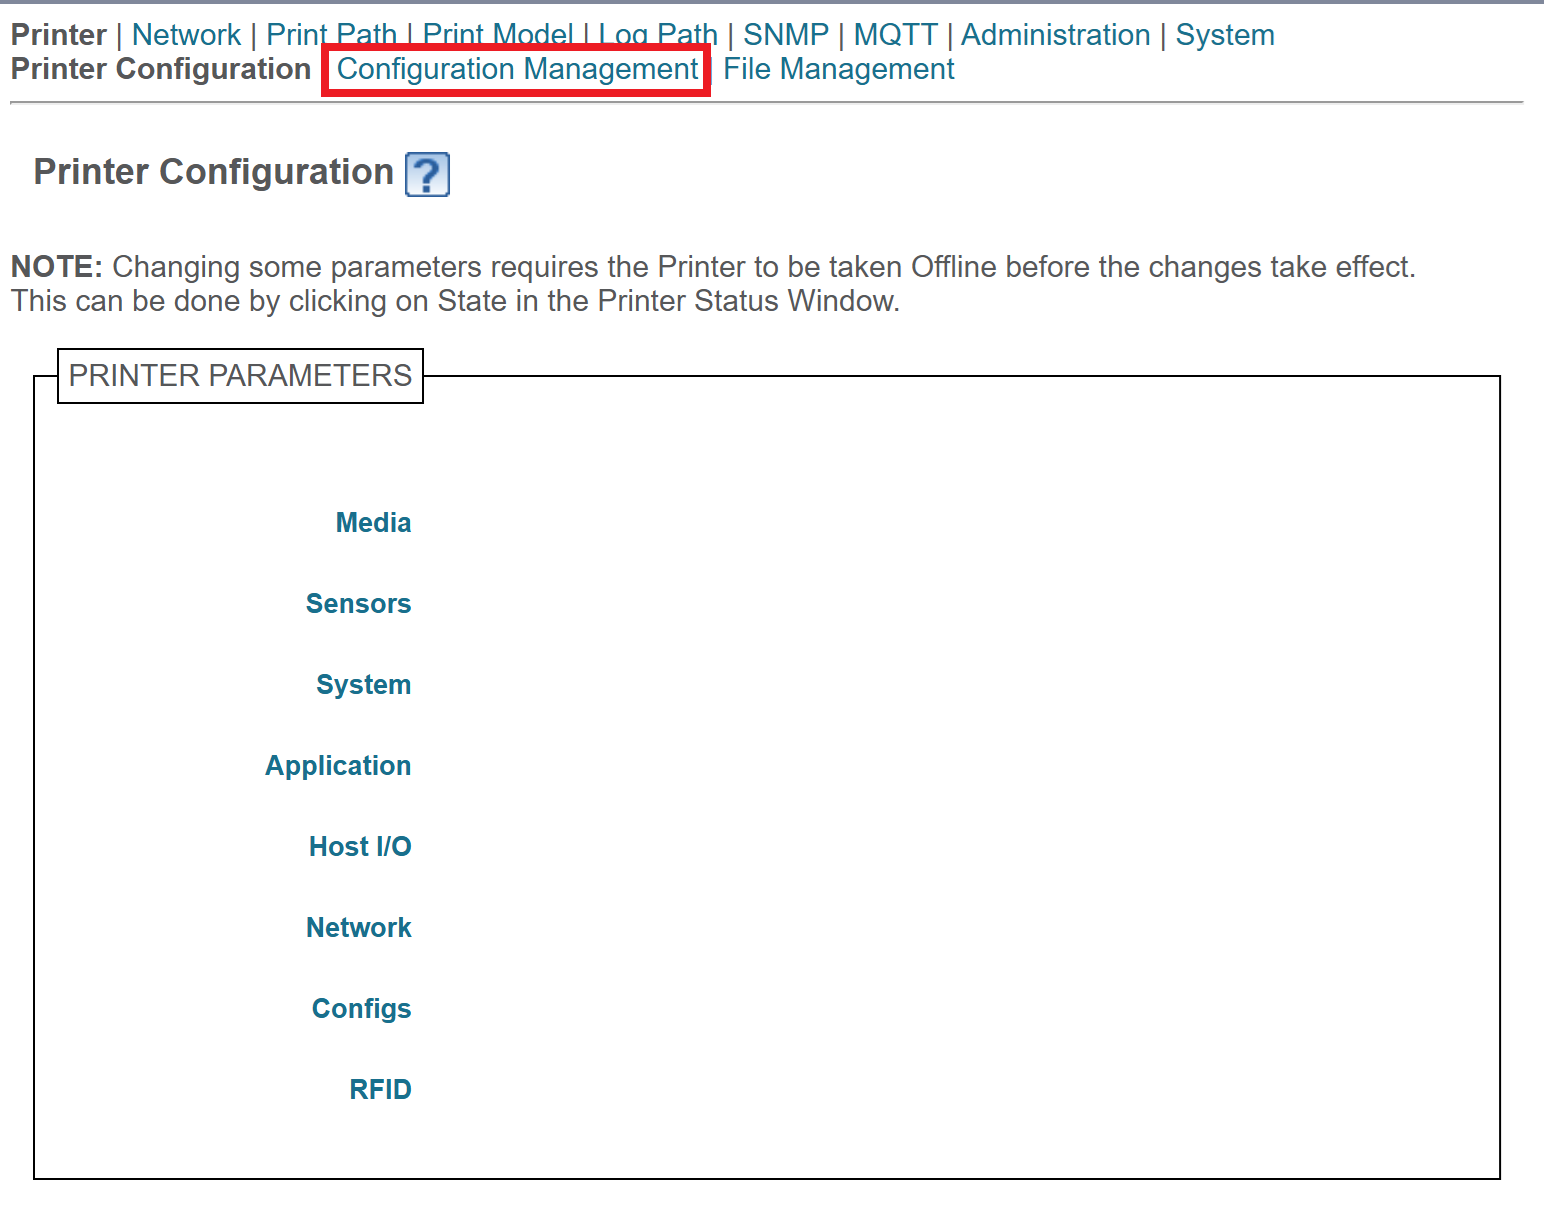 Click the ****Upload**** button. This will download a file containing the printer's current configuration. Save this file; we'll use it later to restore the configuration. If you see a message like ****Insecure download blocked****, make sure to Keep the download.
### Step 5: Perform the upgrade Click the ****Configuration**** link at the top of the page: [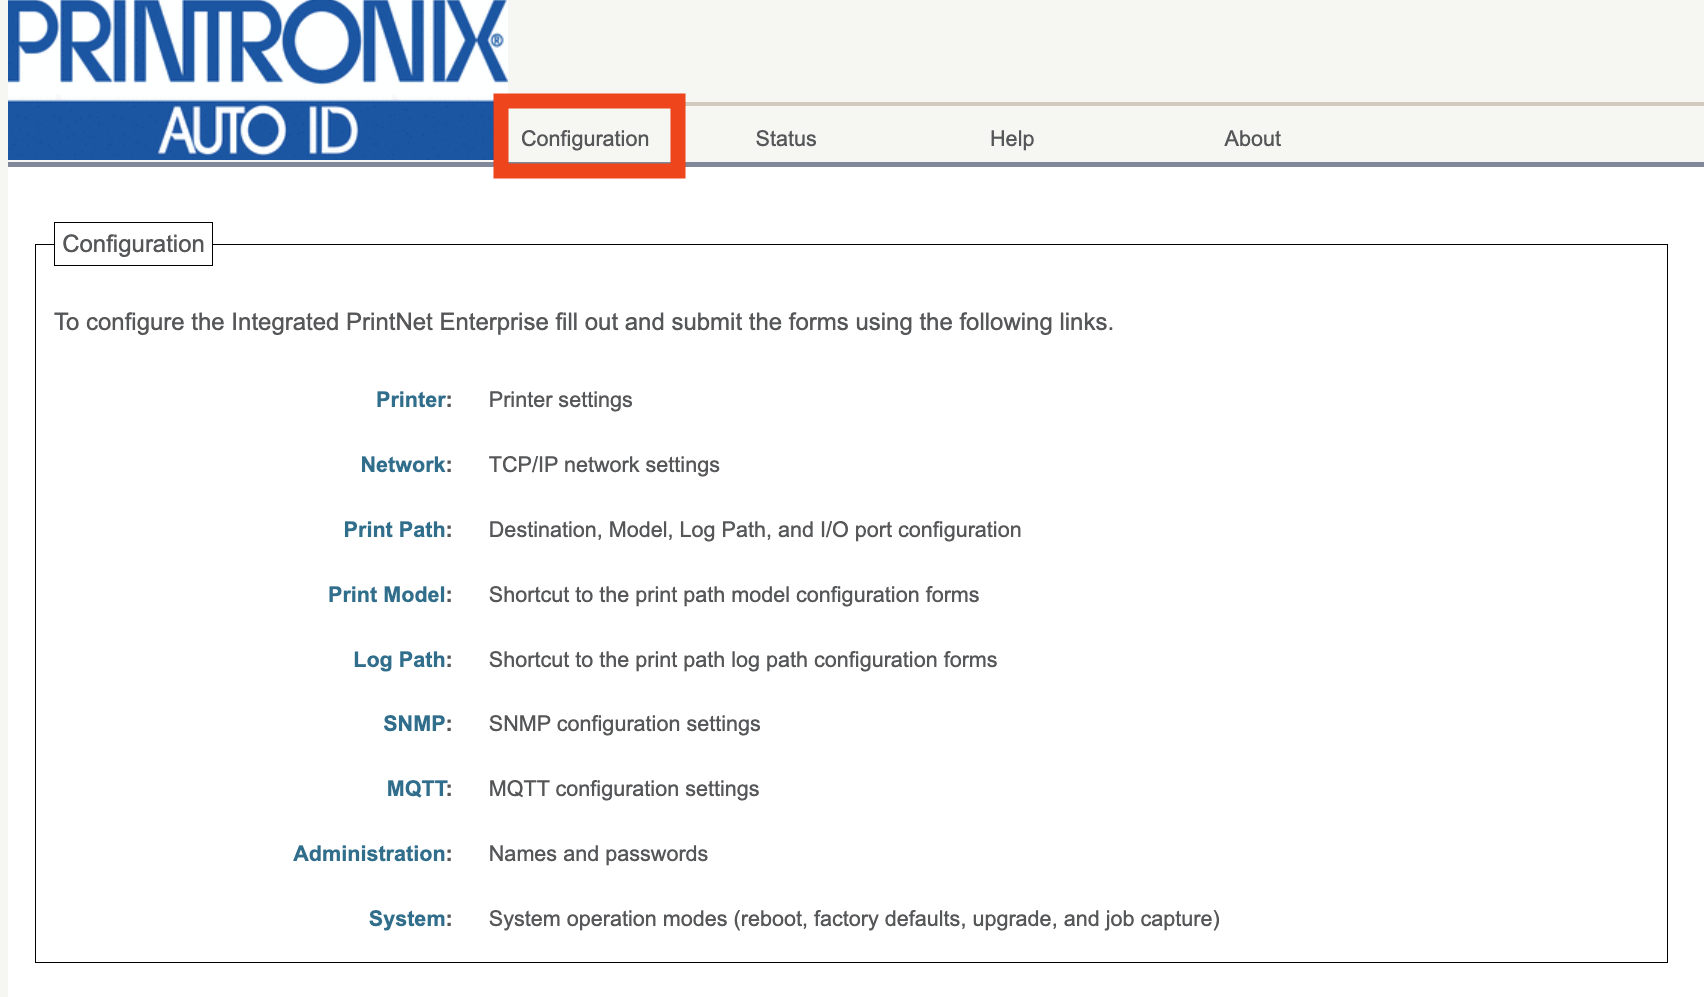](https://kb.simplerfid.com/uploads/images/gallery/2026-01/t96image.png) Click the ****System**** link at the bottom of the Configuration list: 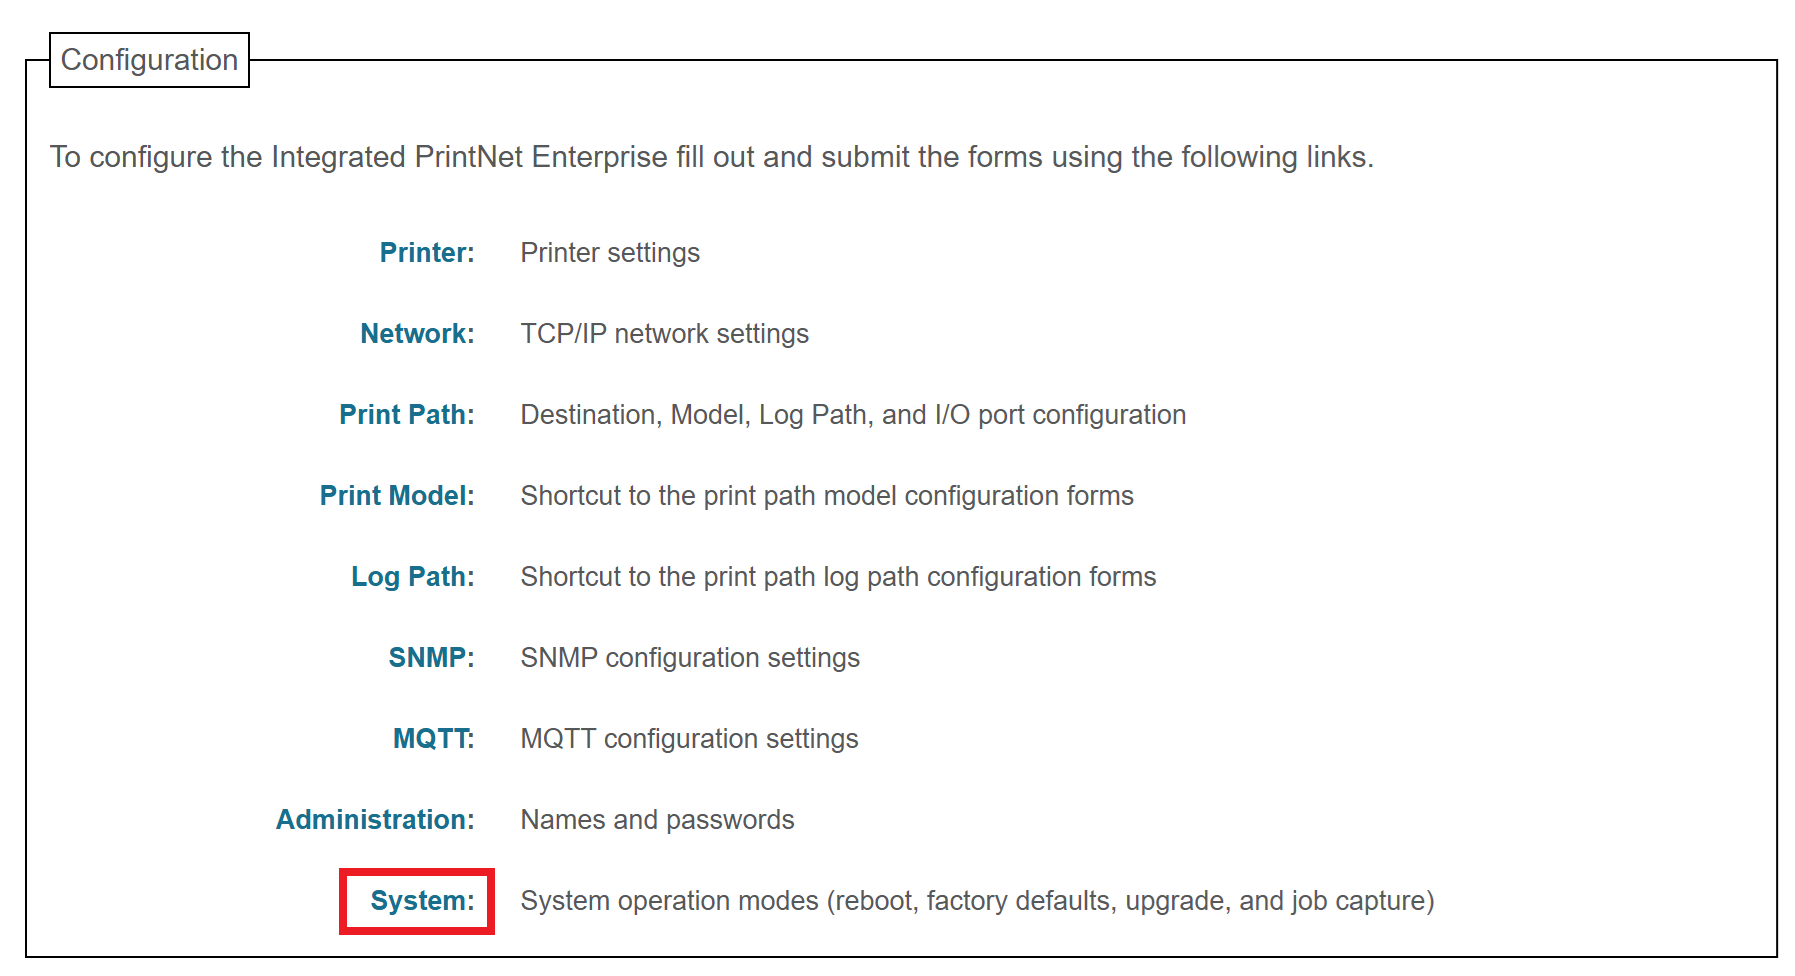You may be prompted for a username and password at this point. The username is ****root**** and the password is ****Print123!**** or whatever you set it to in the previous step. If ****Print123!**** doesn't work, try leaving the password field blank.
Next, click the ****Upgrade**** button in the System menu: 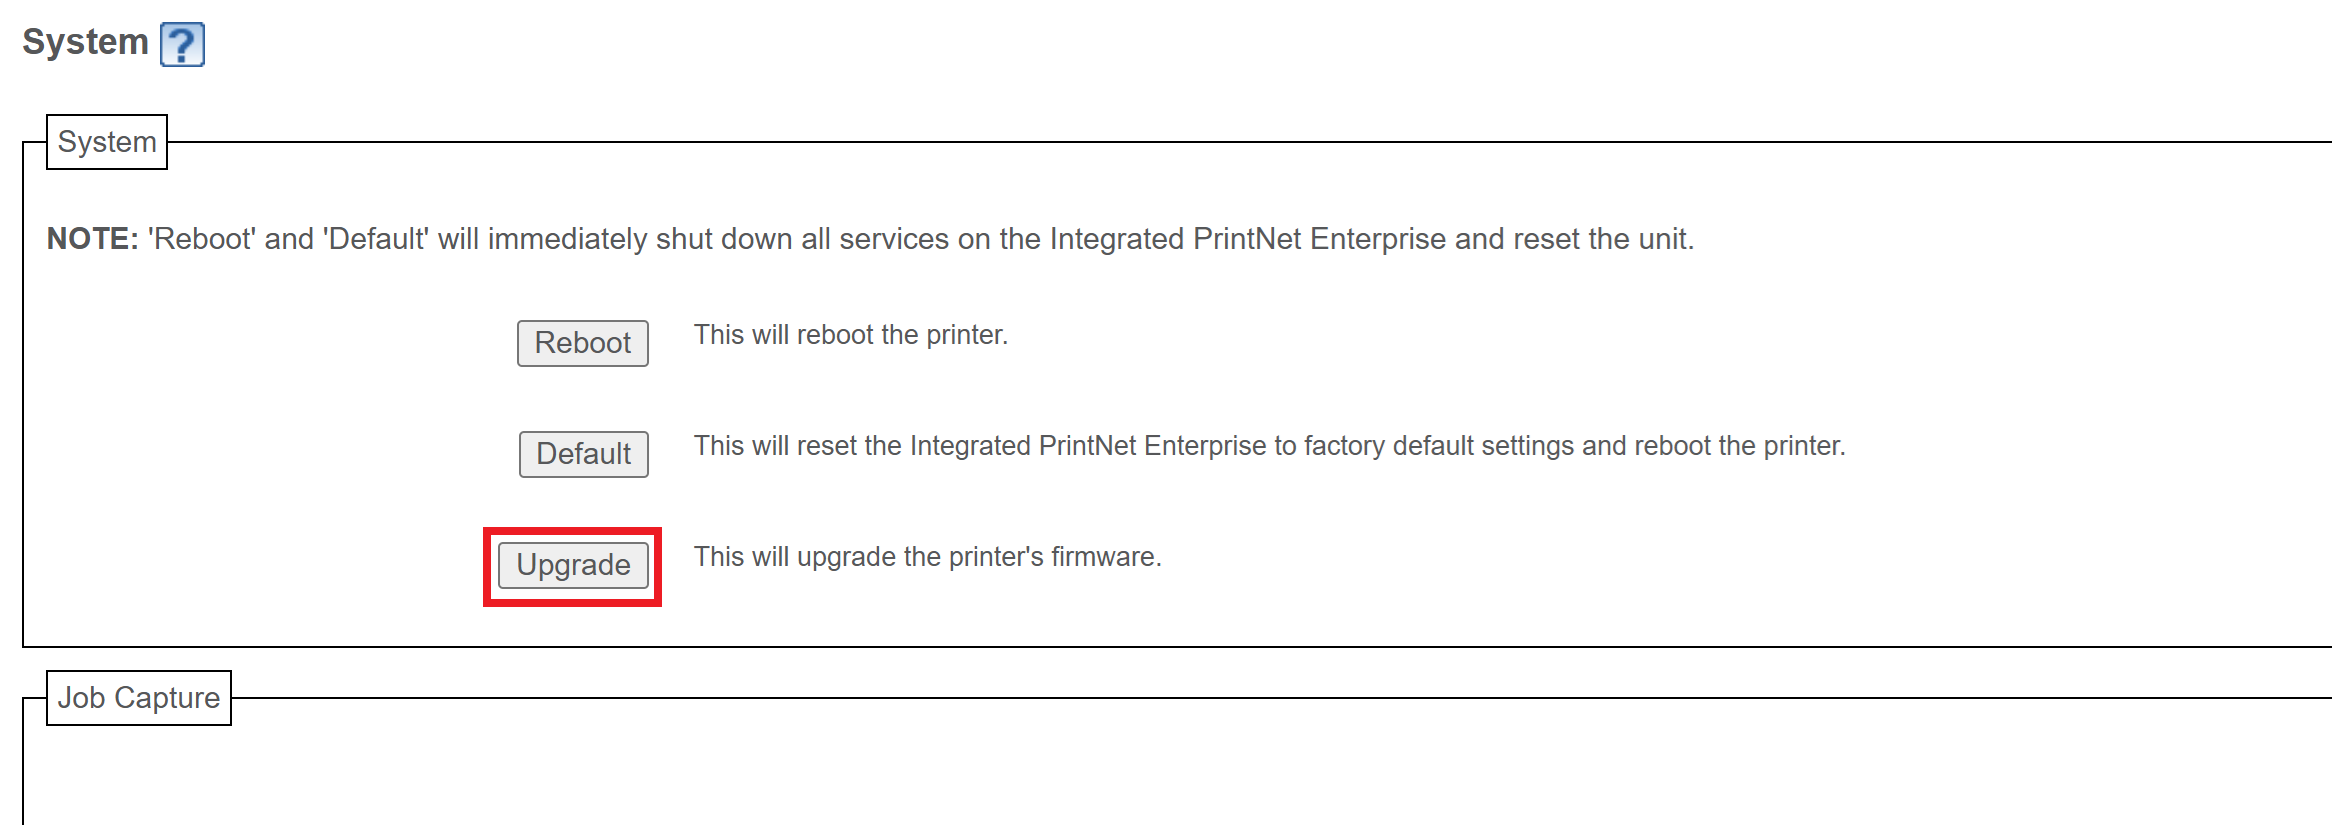 Click ****Choose File****, then choose the ****.prg**** firmware file you downloaded earlier. After selecting the file, you'll see its name listed next to the button. 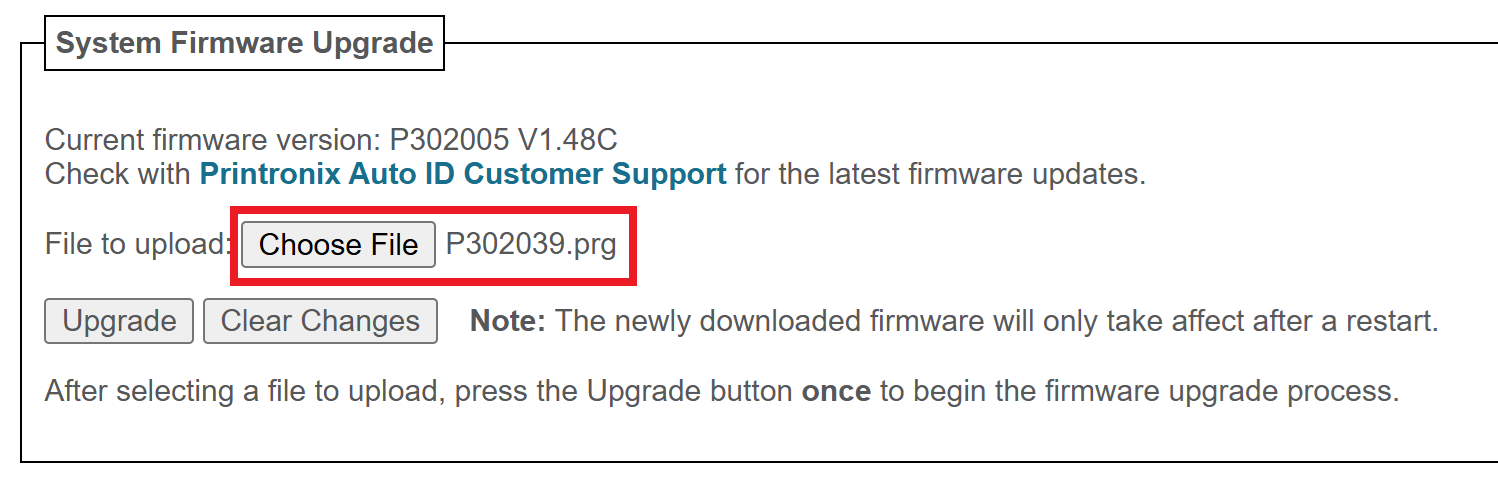 Click the ****Upgrade**** button. You'll be asked to confirm the operation: click ****OK****. 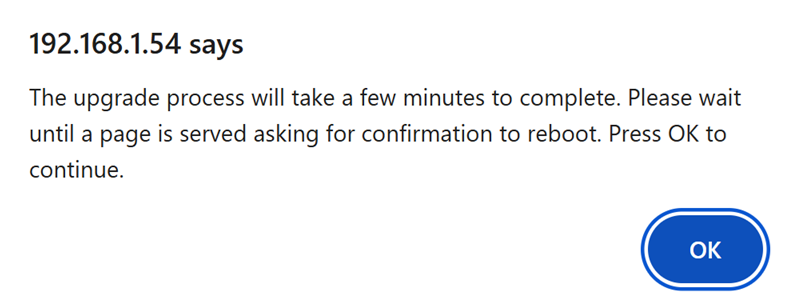 The firmware will now be downloaded to the printer. You should see a message on the printer stating that the Download is in progress: [](https://kb.simplerfid.com/uploads/images/gallery/2025-07/ZNPimage.png) When the printer has downloaded the firmware, the web page will prompt you to perform a restart. Click ****Yes****.  After a few minutes, the printer will reboot itself and apply the update. During this time, the web page will be unresponsive. After ****~2-3 minutes****, the upgrade will be complete. ### Step 6: Restore your previous printer config Refresh the web page so you're back at the Configuration page.If you see a page asking you to set a password, we recommend setting it to ****Print123!**** to remain consistent with other guides. If you set the password to something else, make sure you store the password somewhere it can be retrieved later.
Click the ****Printer**** link at the top of the Configuration list.  Click the ****Configuration Management**** link near the top of the page:  Click the ****Choose file**** button, and select the ****Printer.ptx**** configuration file we created earlier. Then, click the ****Download**** button. 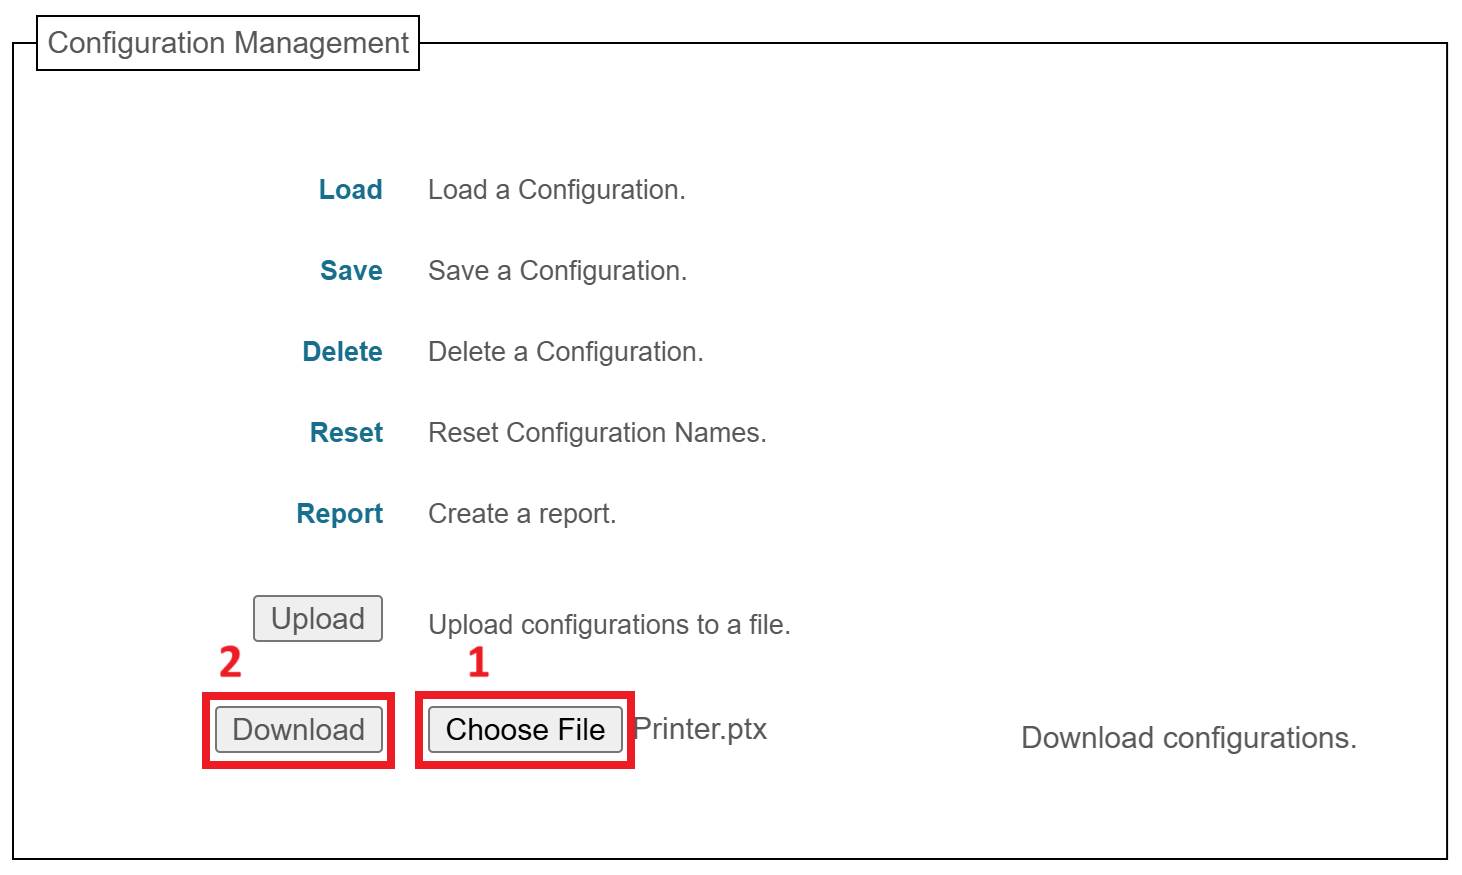 You'll see a message confirming that the configuration has been downloaded:  Wait for the page to be redirected, or refresh the page manually if it doesn't redirect within 15 seconds. Click the ****Load**** link at the top of the list. 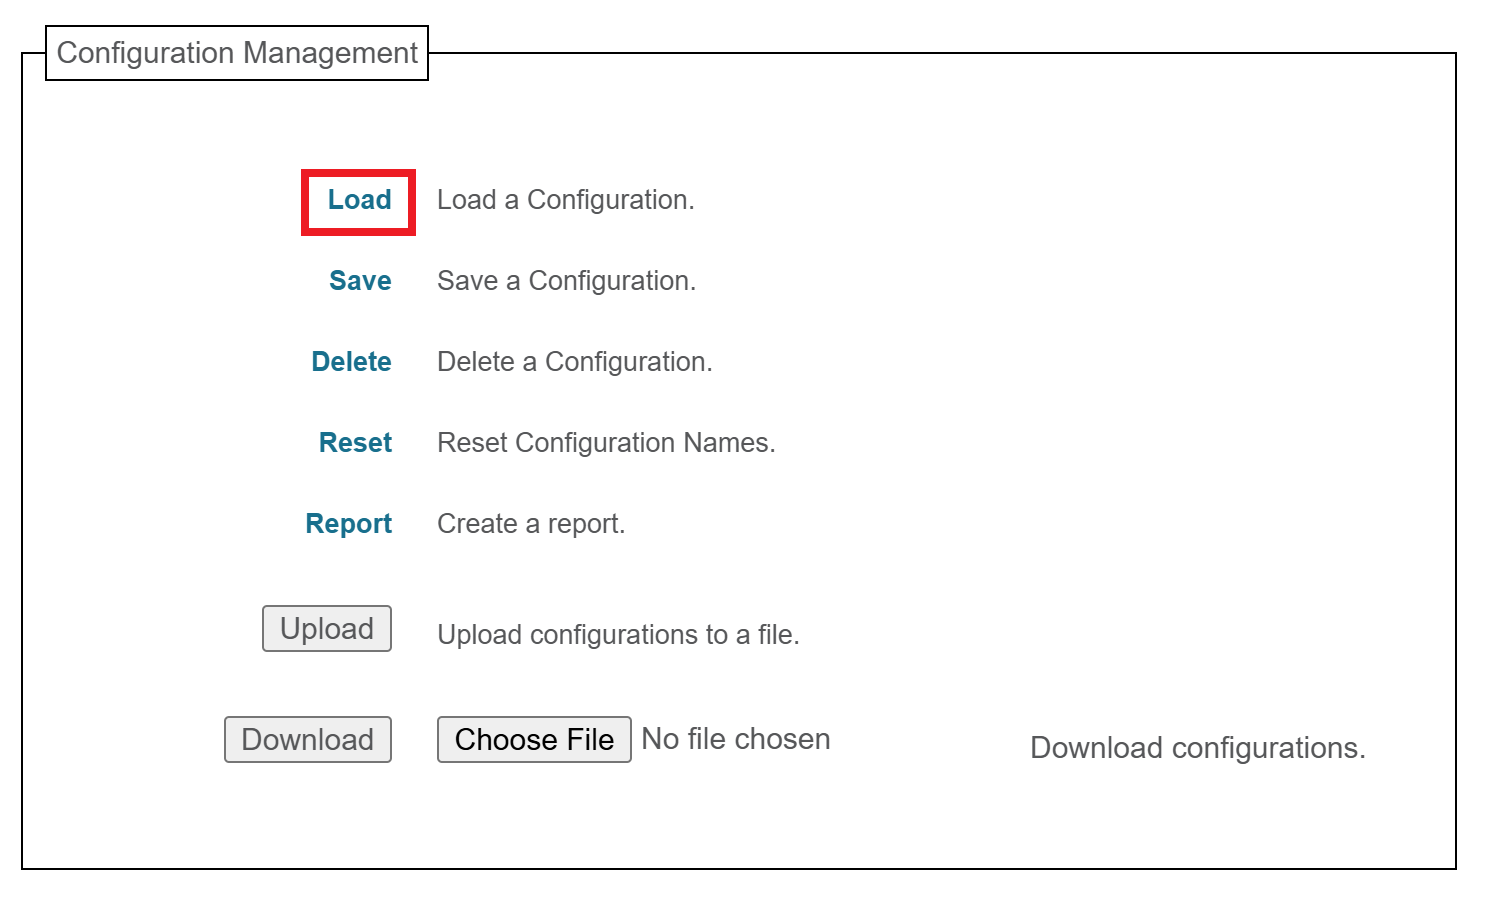 Make sure ****1**** is selected in the ****Load Config:**** dropdown, then click ****Submit****. 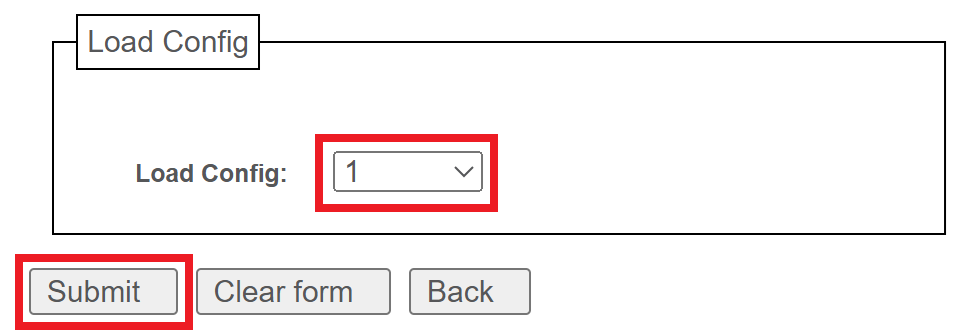 Your printer is now fully updated and configured; you can close the web page and use your printer as normal.If you have some issues configuring the printer, you can manually configure it: [Configuring Your Printronix Printer after a reset](https://kb.simplerfid.com/books/printer-set-up/page/configuring-your-printronix-printer-after-a-reset)