# Printronix: Change Interface
The ****Interface**** setting determines which interface the printer will be listening for print jobs on. It's important to have this set correctly, or your printer won't accept print jobs and may not even be detected by the Print Client.
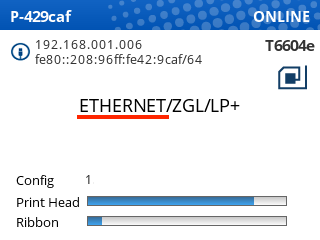
The current interface will show on the printer's Online screen:
[](https://kb.simplerfid.com/uploads/images/gallery/2026-03/dKoimage.png)
#### Changing the Interface setting
1. First, pause your printer.
2. Open ****Settings****
3. Navigate to ****Host I/O > Control****
4. Press Enter to edit the ****Interface**** setting
- If you see ENTER SWITCH LOCKED, follow these steps: [ENTER SWITCH LOCKED](https://kb.simplerfid.com/books/printers/page/printronix-enter-switch-locked)
5. Use the up/down arrow keys to scroll to ****Ethernet**** or ****USB**** depending on how the printer is connected
6. Press Enter to select the correct setting
7. Unpause the printer, and choose ****Save Permanently in Active Config****.
The printer should now display the correct interface.
Follow this [article](https://kb.simplerfid.com/books/printer-set-up/page/what-needs-to-be-plugged-into-a-printronix-printer) if you are not sure what needs to be plugged into a Printronix printer.