****Vertical Label Offset:**** Lower numbers shift everything higher on the label face. Inversely, higher numbers shift everything farther down on the label face, by the specified number of dots. ****Horizontal Label Offset:**** Lower numbers shift everything to the right on the label face. Inversely, higher numbers shift everything to the left on the label face, by the specified number of dots.
# Zebra ZD621R: Reset to Factory Defaults After starting the printer, use the touchscreen to click "Menu" [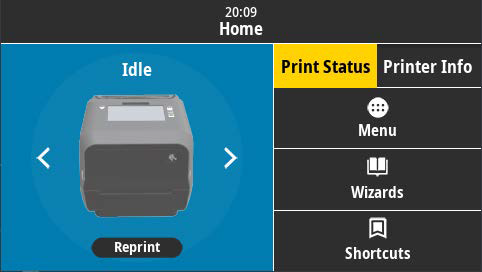](https://kb.simplerfid.com/uploads/images/gallery/2025-05/home-screen.png) On the left side of the screen, click "Settings" [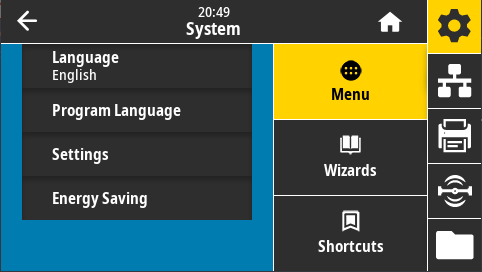](https://kb.simplerfid.com/uploads/images/gallery/2025-05/menu.png) Scroll down and click "Restore Defaults" Click on "Restore Printer" and accept the prompt [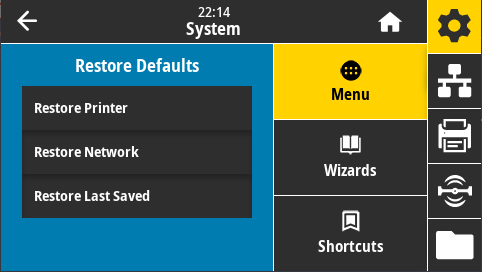](https://kb.simplerfid.com/uploads/images/gallery/2025-05/restore-defaults.png) This will reset the printer to factory defaults. # Zebra ZD621R: Calibrate from Printer's Interface****ATTENTION:**** We suggest ****first**** performing the [calibration from the website](https://kb.simplerfid.com/books/calibrate-printer/page/calibrate-from-the-web-portal). If the calibration fails, then follow these steps.
### Step 1: Media Calibration First, make sure media is properly loaded, the printer cover is closed, and printer power is ON. To perform a Media Calibration, press and hold PAUSE + CANCEL buttons for two seconds. [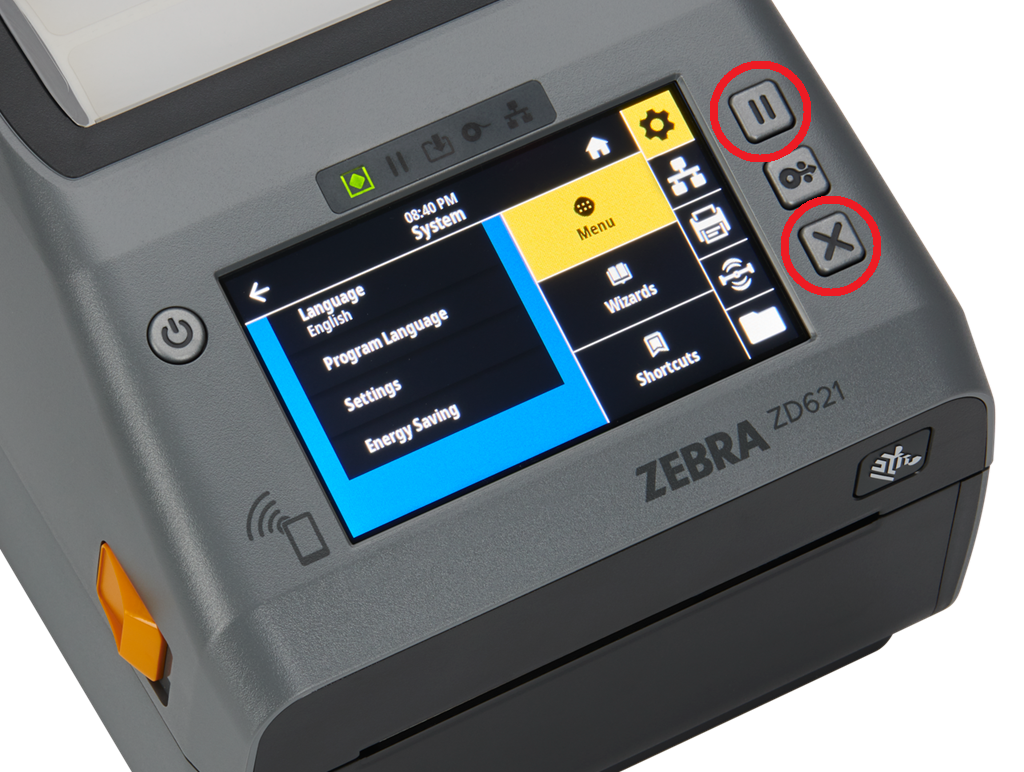](https://kb.simplerfid.com/uploads/images/gallery/2025-05/JmQimage.png) ### Step 2: RFID Calibration From the printer's Home screen, press the ****Menu**** button: [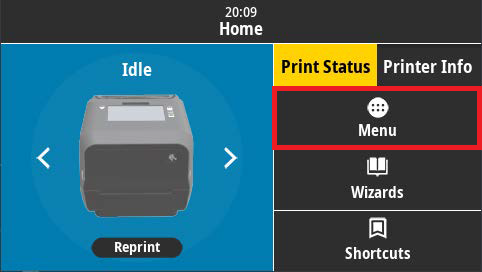](https://kb.simplerfid.com/uploads/images/gallery/2025-05/R9ahome-screen.png) Next, tap the ****RFID icon**** on the right side of the screen, then tap the ****RFID**** menu option: [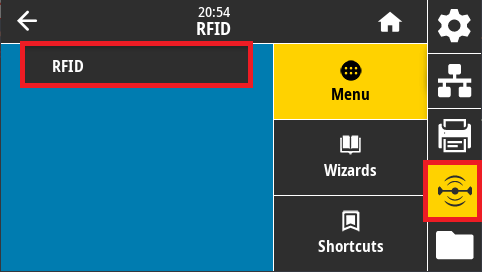](https://kb.simplerfid.com/uploads/images/gallery/2025-05/jTRrfid-menu.png) Tap ****RFID Calibrate****: [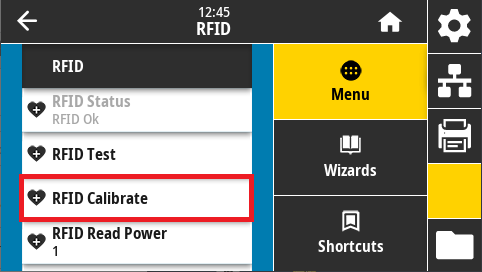](https://kb.simplerfid.com/uploads/images/gallery/2025-05/1Xjrfid-menu-options.png) Last, tap ****Start Calibration**** to perform the RFID calibration: [](https://kb.simplerfid.com/uploads/images/gallery/2025-05/9BFstart-rfid-calibration.png) # Zebra ZD621R: Adjust Darkness 1. Using your printer's touchscreen, navigate to Menu > Printer (icon) > Print Quality > Darkness: [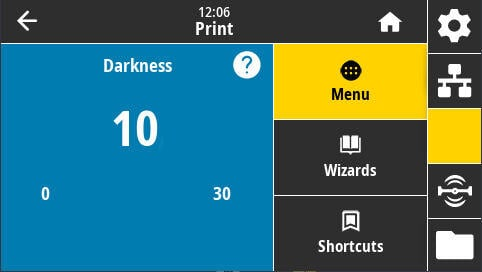](https://kb.simplerfid.com/uploads/images/gallery/2025-09/OYtimage.png) 2. Use the plus buttons, or slide the slider to increase or decrease the darkness setting. 3. If you are using resin ribbon, and you usually use wax, you will need to increase this value by at least 10. 4. The setting will be automatically applied; press the Home button to return to the Idle screen. # Zebra ZD621R: Setup Wireless Connection (WiFi) This setup guide ensures your printer is properly configured for network printing with secure WiFi connectivity. --- ## Prerequisites Before starting the setup, please make sure that your station has the "Show network printers" option set in your Print Station settings. Contact your Manager if you need assistance. --- ## Connection Setup Steps ### 1. Launch Wizards On the printer home screen, tap **Wizards**. ### 2. Select Connection Tap **Connection** and then **Start Connection**. ### 3. Configure Network Settings #### Wi-Fi Configuration - **Select** *Wi-Fi* > **Tap ✓** - **Set** *IP Port* to `6101` - **Set** *IP Alternate Port* to `9100` > **Tap ✓** - **Set** *Wired IP Protocol* to `All` > **Tap ✓** #### Wireless Network Settings - **Set** the *country* > **Tap** **✓** - **Select** *WPA PSK* > **Tap ✓** - In *Pre-shared Key,* **enter** your WiFi password > **Tap ✓** - **Tap** *Set All* > **Tap ✓** #### Network Name and Protocol - In *ESSID*, **set** your WiFi name > **Tap ✓****Note: Case sensitive - must match exactly as shown in other devices' WiFi lists. Example: `Wifi_Network_Name12345`**
- **Set** *WiFi IP Protocol* to `All` > **Tap ✓** #### Bluetooth Configuration - **Set** *Bluetooth On/Off* to `Off` > **Tap ✓** - **Set** *Bluetooth Discovery* to `Off` > **Tap ✓** #### Security Settings - In *Friendly Name*, **Tap ✓** - In *Security*, set value to `3` > **Tap ✓** - In *Authentication PIN*, > **Tap ✓** - In *Bluetooth Bonding*, **set** to `Off` ### 4. Complete Setup **Tap** *End Wizard.* ## Verification You should see the message: **"Connection Wizard Complete"** After completion, observe the network indicator (right side of screen): - Will display **red** for approximately 1 second - Will then turn **green** (indicating successful connection) - Printer should appear as **Online** in Simple RFID Website [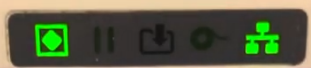](https://kb.simplerfid.com/uploads/images/gallery/2026-02/Gjuimage.png)