The printer configuration is now reset to the factory default values.
# ZD500R: Calibrate from Printer's Interface****ATTENTION:**** We suggest ****first**** performing the [calibration from the website](https://kb.simplerfid.com/books/calibrate-printer/page/calibrate-from-the-web-portal). If the calibration fails, then follow these steps.
### Step 1: Media Calibration Hold the PAUSE + CANCEL buttons for 2 seconds to start the media calibration. ### Step 2: RFID Calibration Press the menus ‘Home’ ([](https://kb.simplerfid.com/uploads/images/gallery/2025-05/zd500r-home.png)) button. Navigate to the ‘RFID’ ([](https://kb.simplerfid.com/uploads/images/gallery/2025-05/zd500r-rfid.png)) menu button and press the ‘Select’ ( ****—**** ) button. Use the ****Left**** and ****Right**** navigation arrows to browse to the RFID CALIBRATE procedure. Press the select button ( ****—**** ) below the ****START**** on the lower right hand of the display. The printer will slowly feed a label while adjusting the location and RFID read/write communication settings for your chosen RFID tag/label. The printer will feed an additional label in some cases when calibration has completed successfully with the display message reading: READY At this point, you can open the printer and roll the excess labels back inside. Then, close the printer, unpause it, and you will be ready to print. # ZD500R: Alignment #### Adjusting the vertical print position on your labels From the main screen, press the ****Home**** button (house icon). [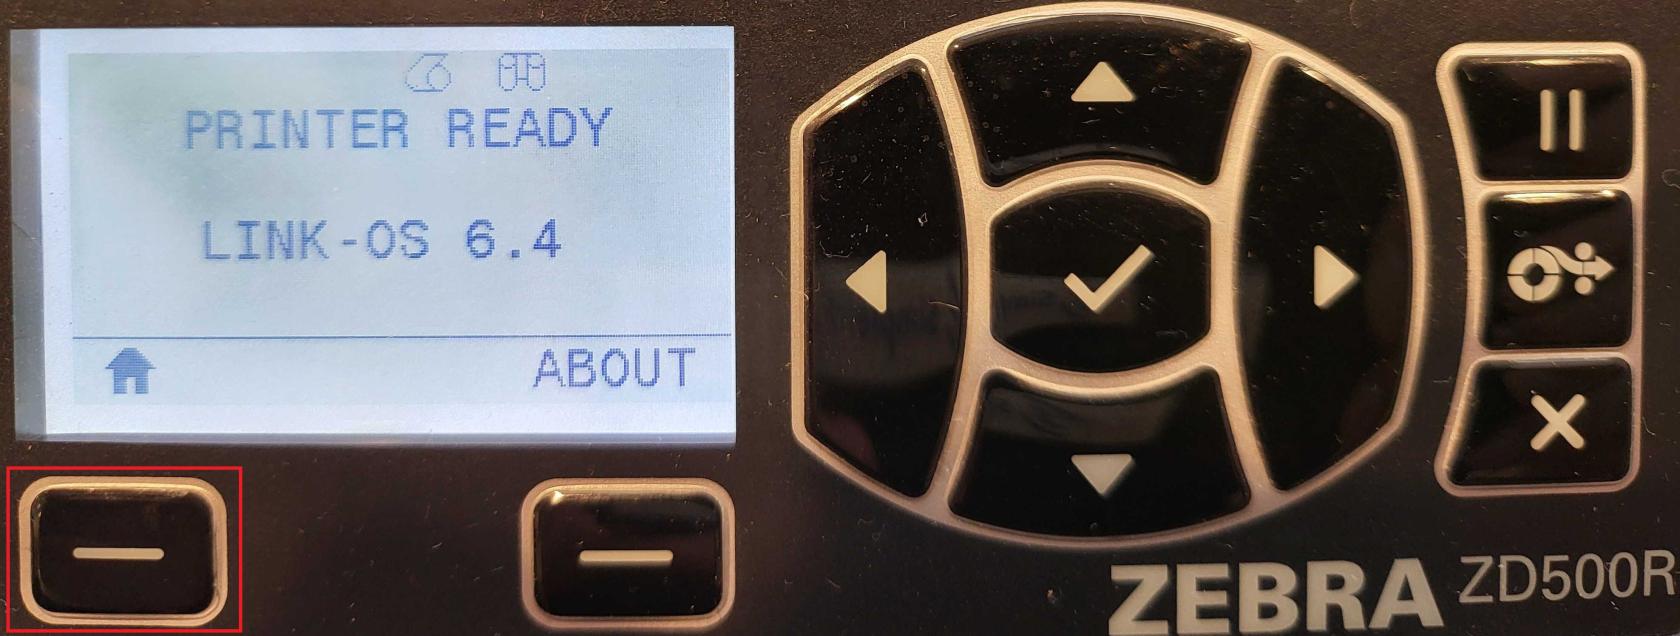](https://kb.simplerfid.com/uploads/images/gallery/2025-06/1.jpg) Select ****Settings**** (gear icon). [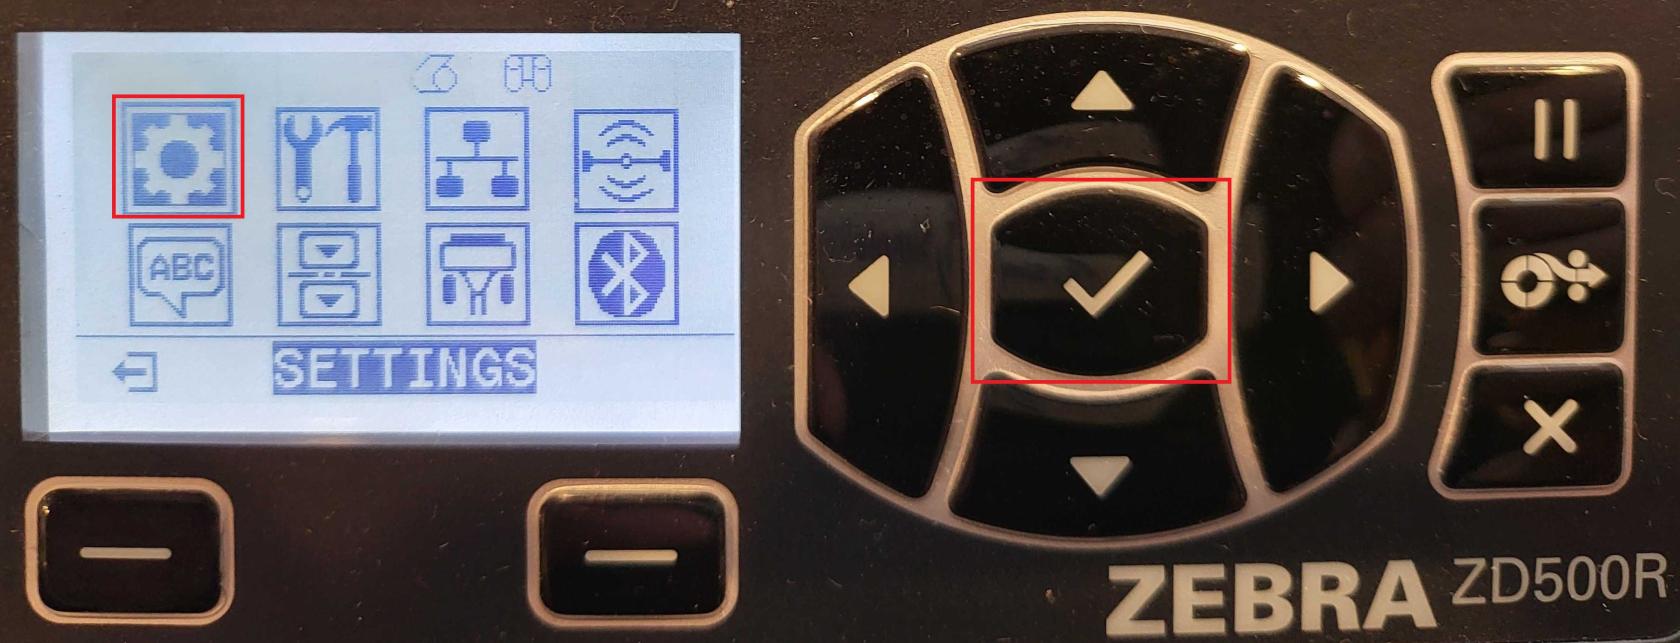](https://kb.simplerfid.com/uploads/images/gallery/2025-06/2.jpg) Use the ****right arrow**** on the navigation buttons until you reach ****LABEL TOP****. [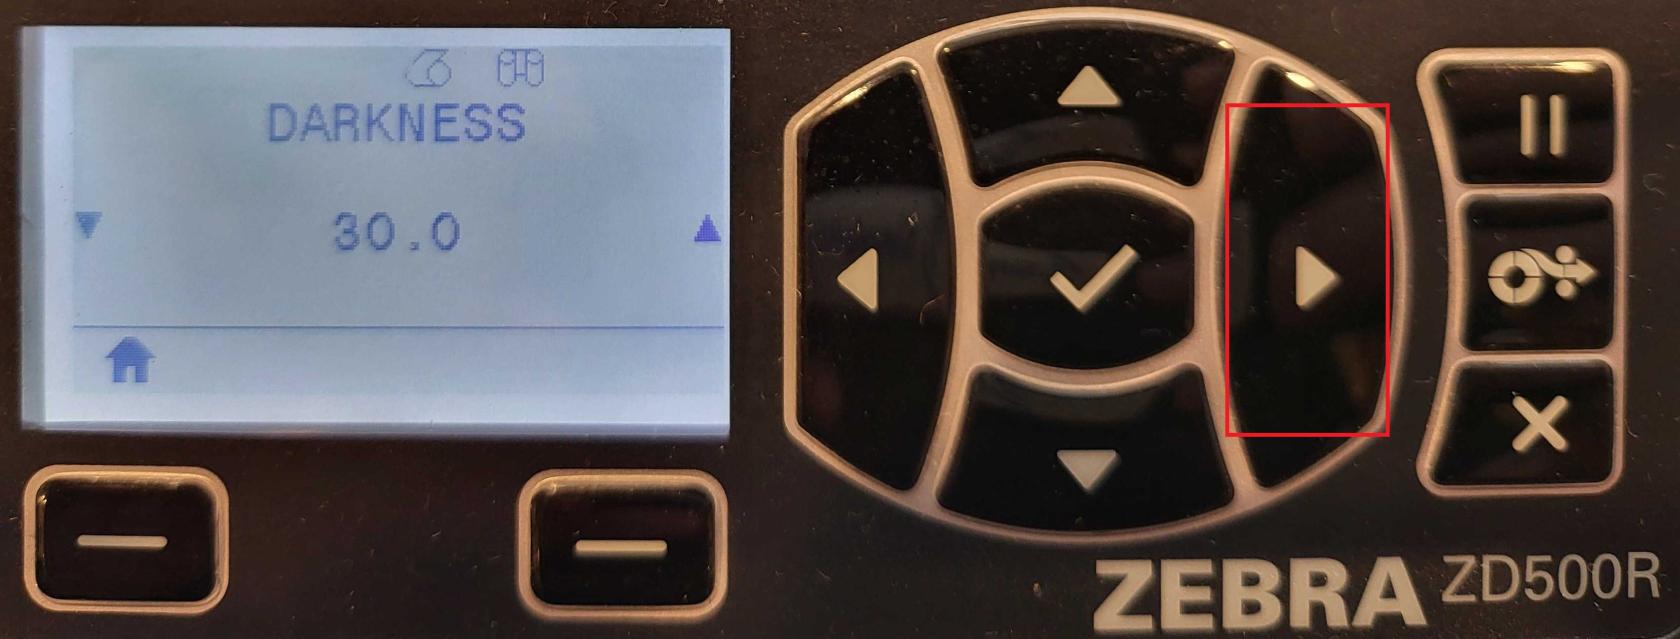](https://kb.simplerfid.com/uploads/images/gallery/2025-06/6Lu3.jpg) Use the ****up/down arrows**** to adjust the value: [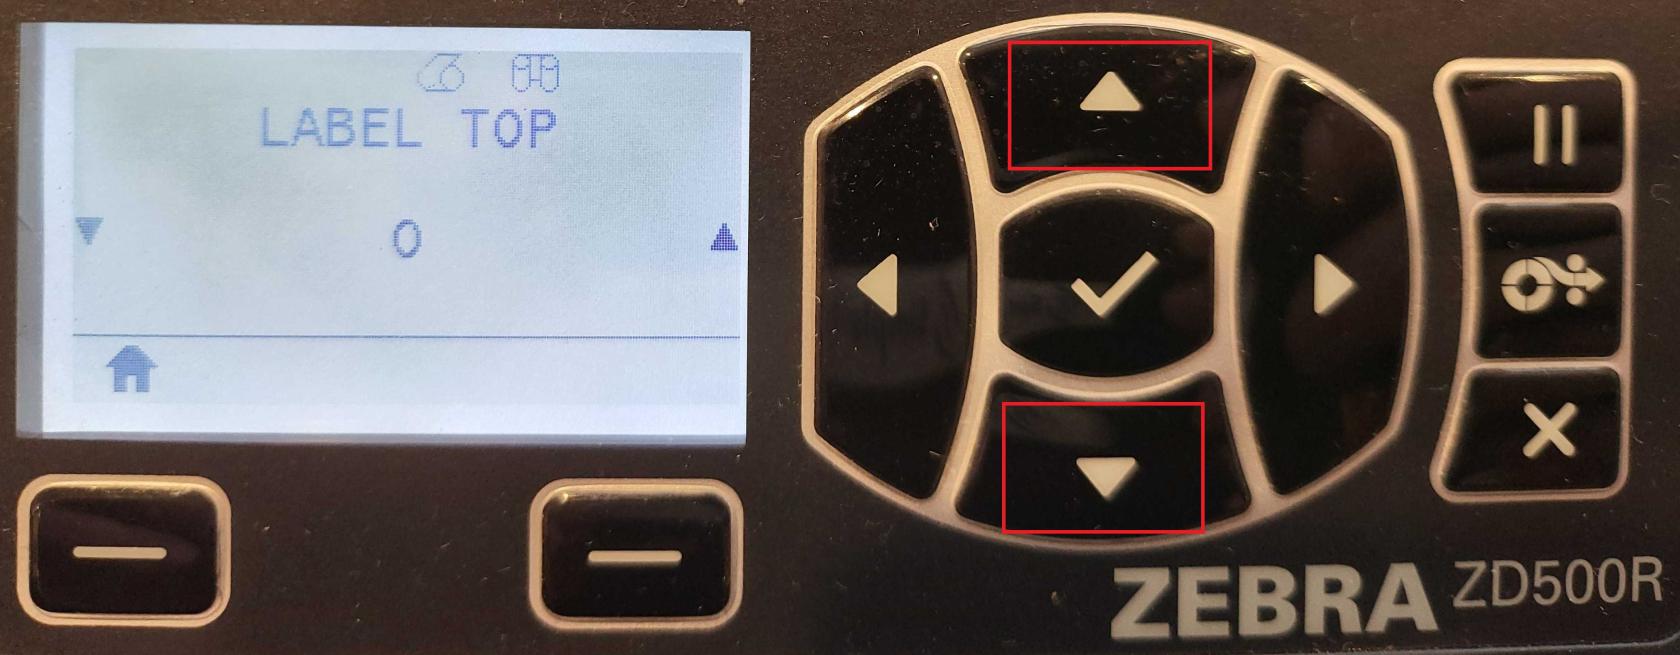](https://kb.simplerfid.com/uploads/images/gallery/2025-06/4.jpg) - Negative values move the print ****toward the top**** of the label. - Positive values move it ****away from the top****. - Accepted range: ****–120 to 120****.When you're done, press the ****Home**** button again. Your changes will be automatically saved.