To use this upgrade method, your printer ****must be connected to your network****. If a network connection is unavailable, [****update the firmware via a USB flash drive****](https://kb.simplerfid.com/books/printers/page/printronix-updating-firmware-via-flash-drive).
#### Requirements: - A device with a web browser, on the same network (LAN) as your printer - This device must be able to download and upload files. - An RJ-45 Ethernet cable to connect your printer to the network (unless you have a Wi-Fi enabled printer) ### Step 1: Download the latest firmware file Choose the appropriate file for your printer model: - [T800 firmware (T820, T830)](https://dl.simplerfid.dev/T800%201.52E%20P302271.prg) - [T4000 firmware (T4204)](https://dl.simplerfid.dev/T4000%20V1.46H.prg) - [T6000e firmware (T6304, T6604)](https://dl.simplerfid.dev/T6000e%20V1.42E.prg) ### Step 2: Connect the printer to your networkMake sure ****all**** ****USB cables**** are disconnected from the printer before continuing.
Using an Ethernet cable with RJ-45 connectors, or Wi-Fi on supported models, connect the printer to your network. 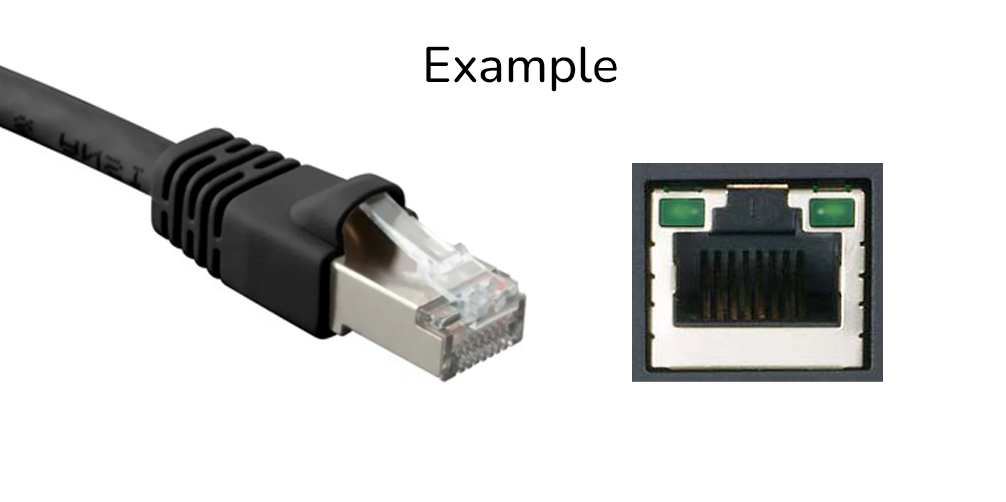 When the printer is connected to the network, you will see its IP address at the top-left of the screen: [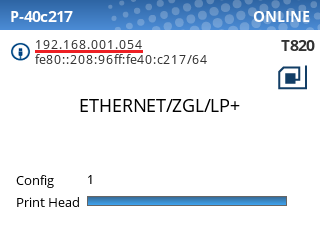](https://kb.simplerfid.com/uploads/images/gallery/2025-07/printronix-ip-address.png) (If you don't see this screen, you may need to unpause the printer using the green pause button \[ ****I I**** \]. ### Step 3: Navigate to the printer's web page Type the printer’s IP address into a web browser. You can omit leading zeros in each octet: 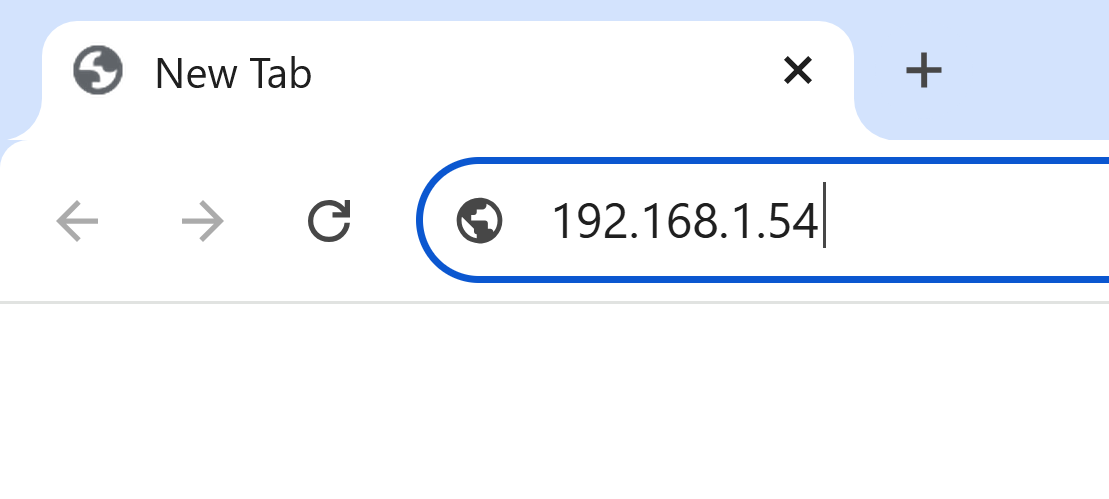 You should be greeted with the printer's home page: [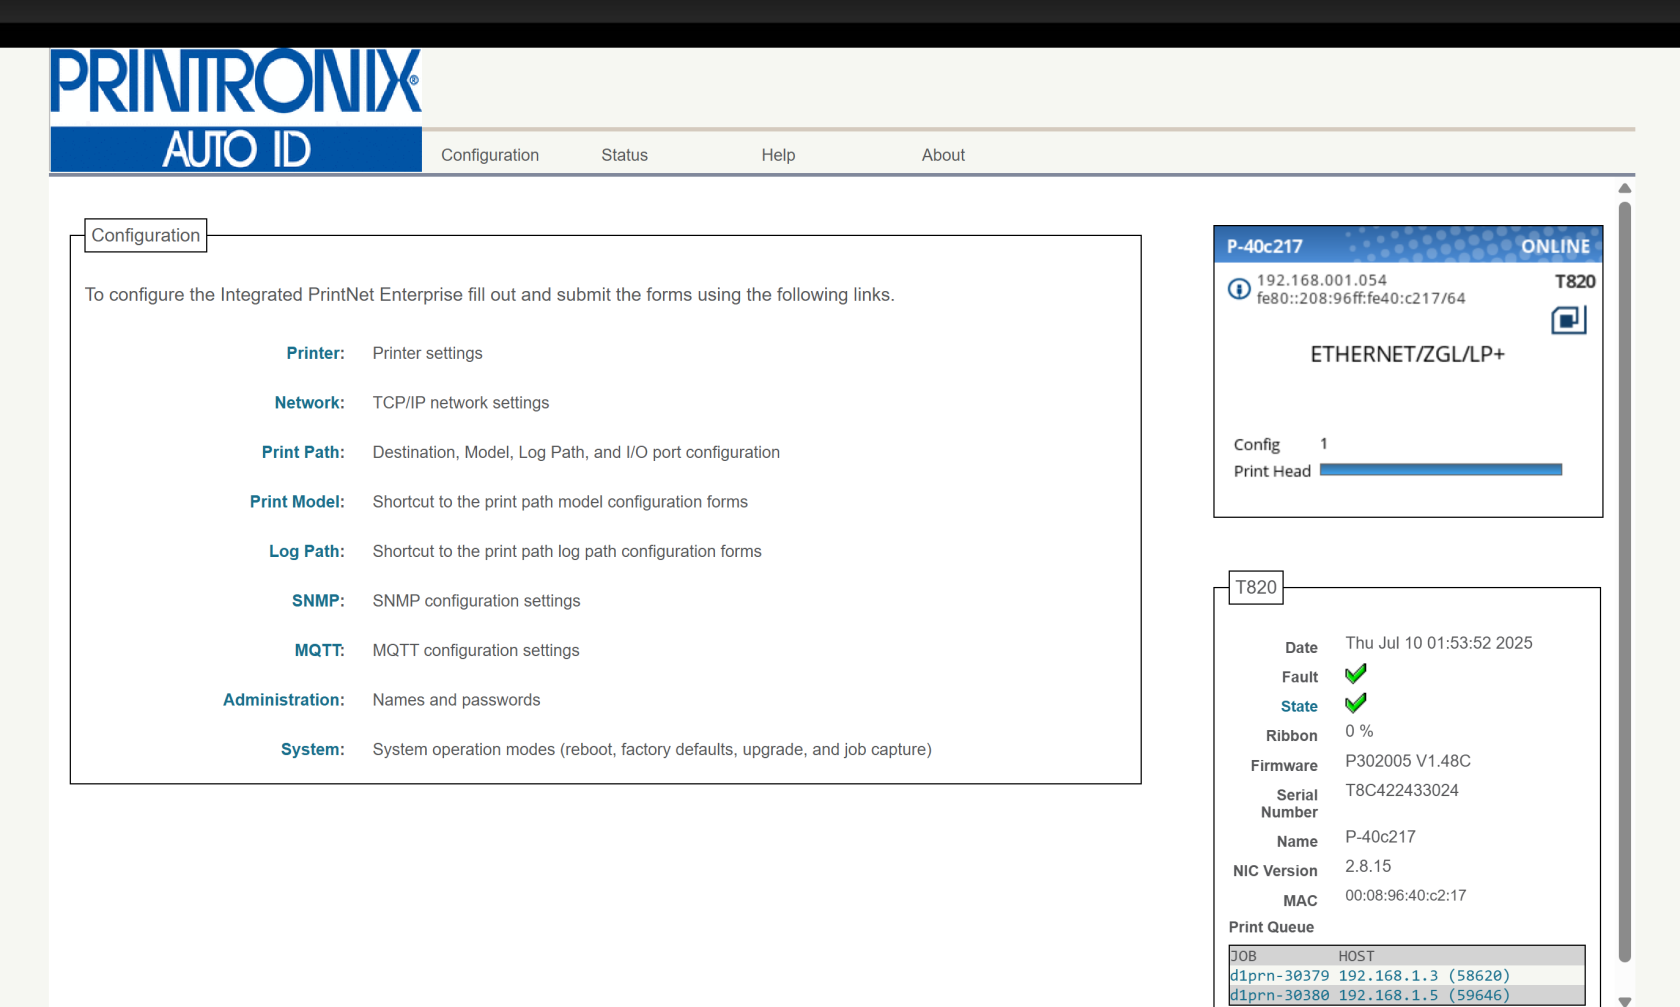](https://kb.simplerfid.com/uploads/images/gallery/2025-07/7Gwimage.png)If you see a page asking you to set a password, we recommend setting it to ****Print123!**** to remain consistent with other guides. If you set the password to something else, make sure you store the password somewhere it can be retrieved later.
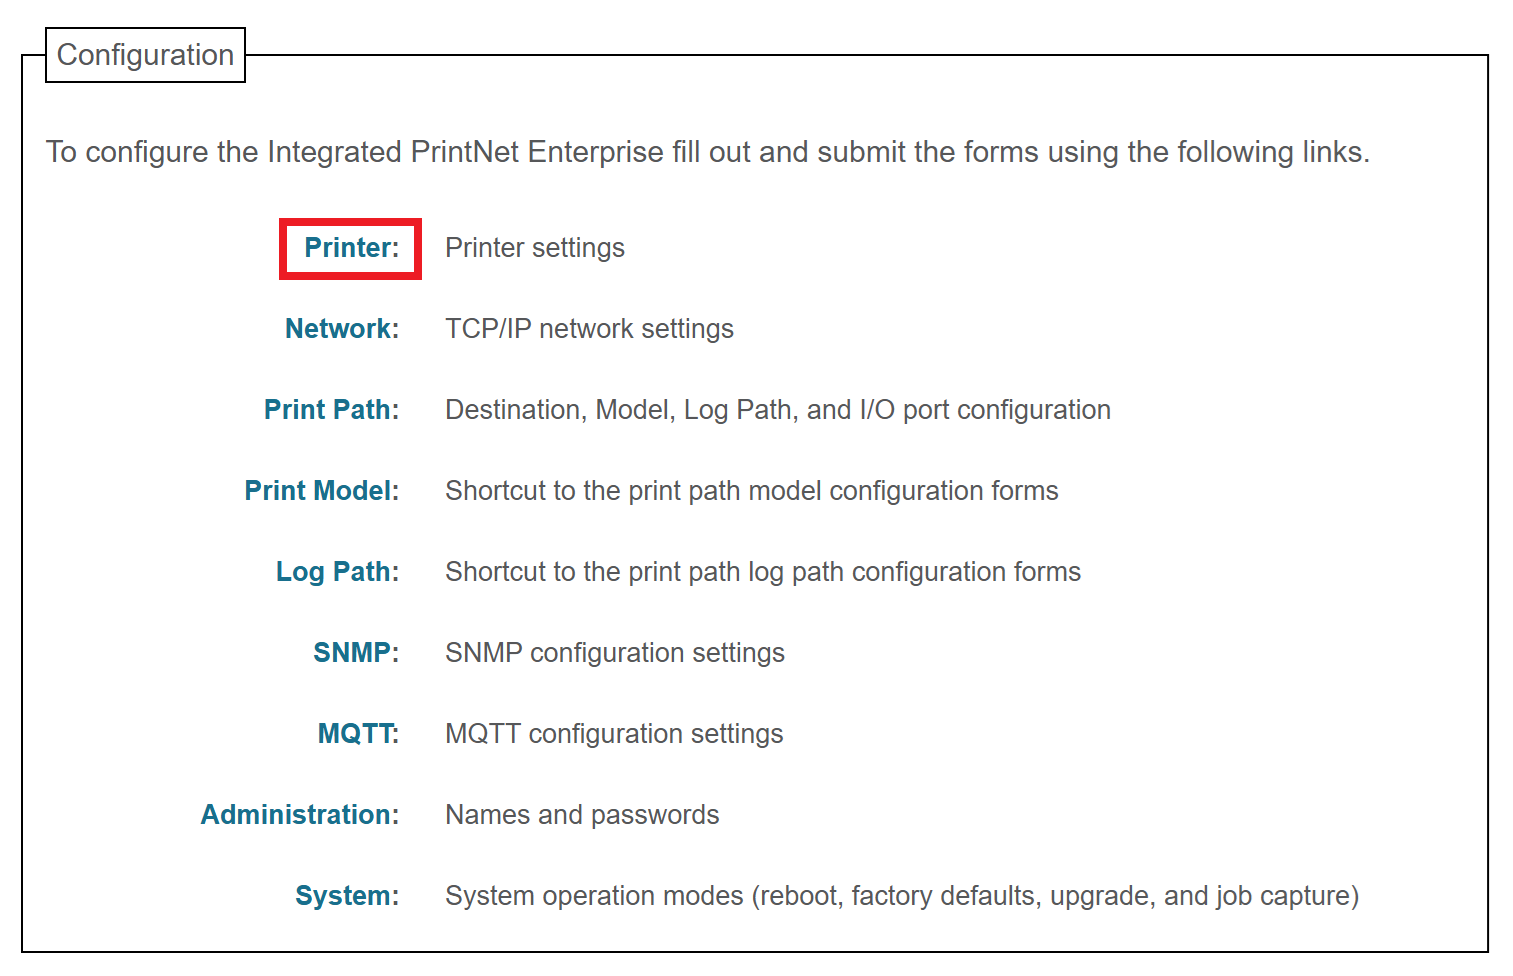
### Step 4: Capture the printer's current configuration When you upgrade the firmware, the printer's current settings (including calibration, print intensity, vertical/horizontal shift, and more) will be lost. We will save the printer's current configuration to a file so we can restore it after the upgrade is complete. Click the ****Printer**** link at the top of the Configuration list.You may be prompted for a username and password at this point. The username is ****root**** and the password is ****Print123!**** or whatever you set it to in the previous step. If ****Print123!**** doesn't work, try leaving the password field blank.
 Click the ****Configuration Management**** link near the top of the page: 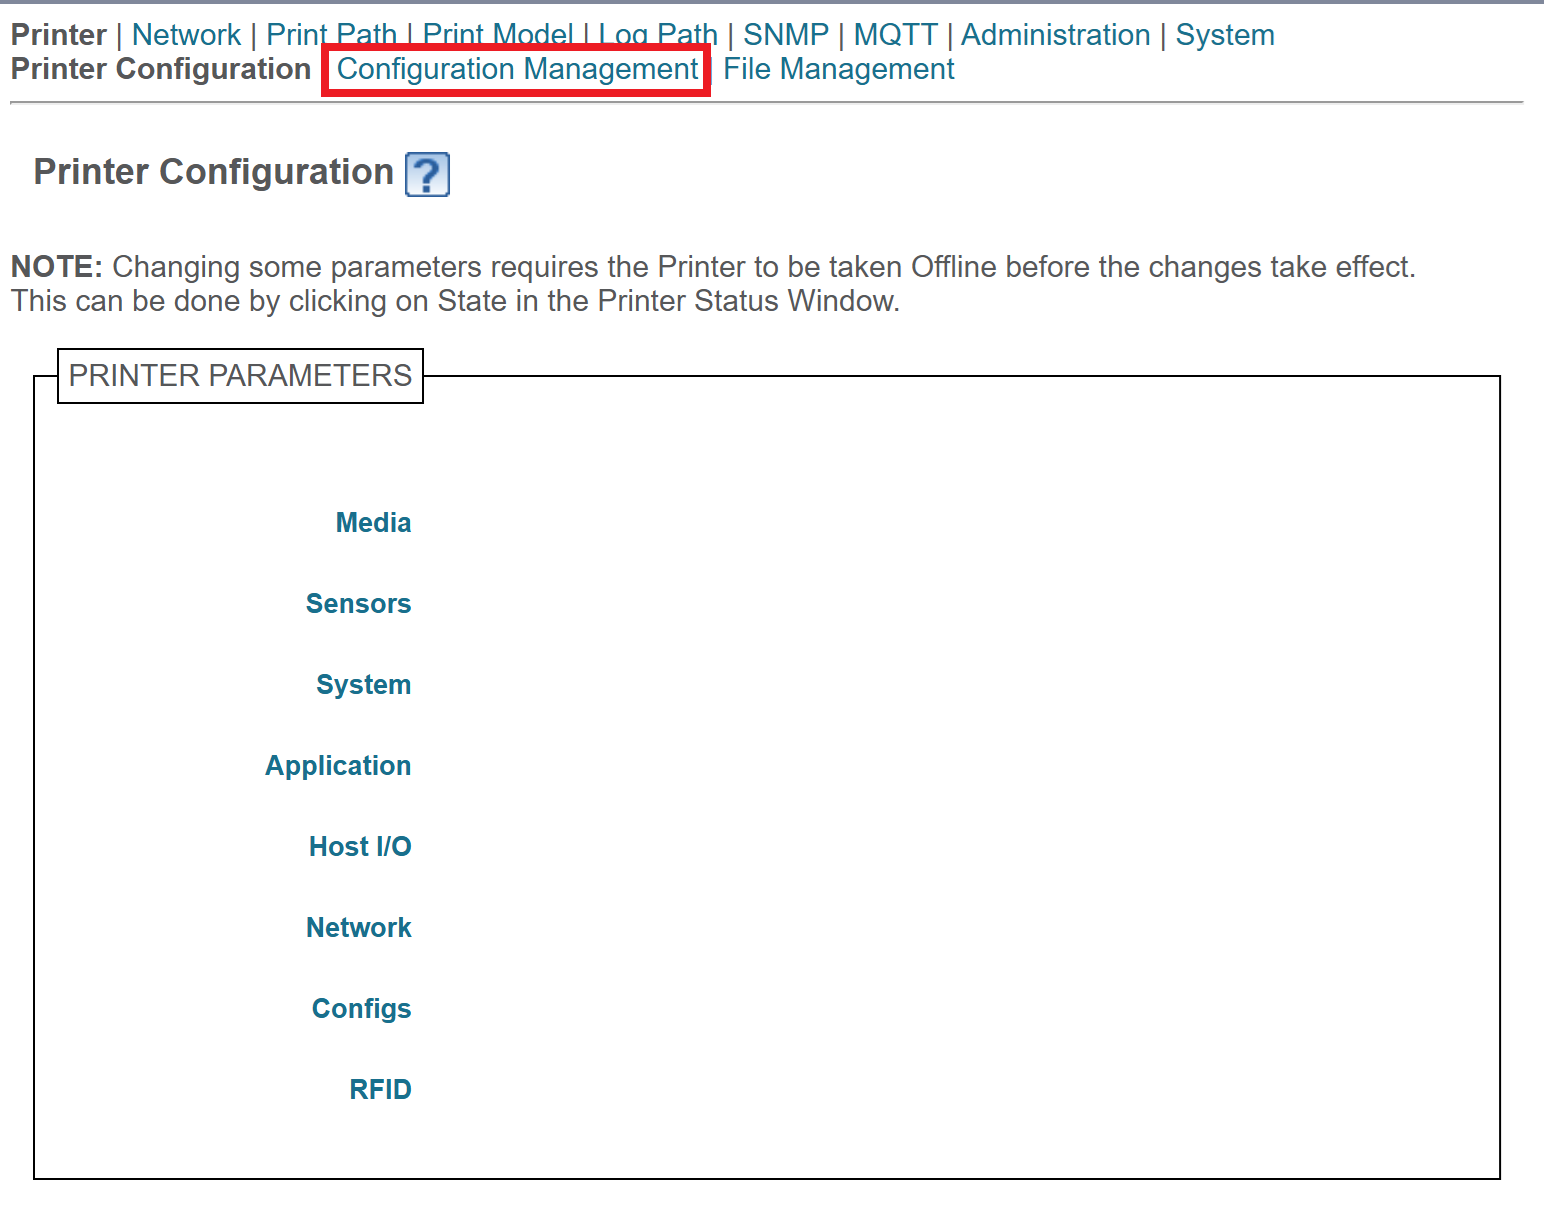 Click the ****Upload**** button. This will download a file containing the printer's current configuration. Save this file; we'll use it later to restore the configuration. If you see a message like ****Insecure download blocked****, make sure to Keep the download.
### Step 5: Perform the upgrade Click the ****Configuration**** link at the top of the page: [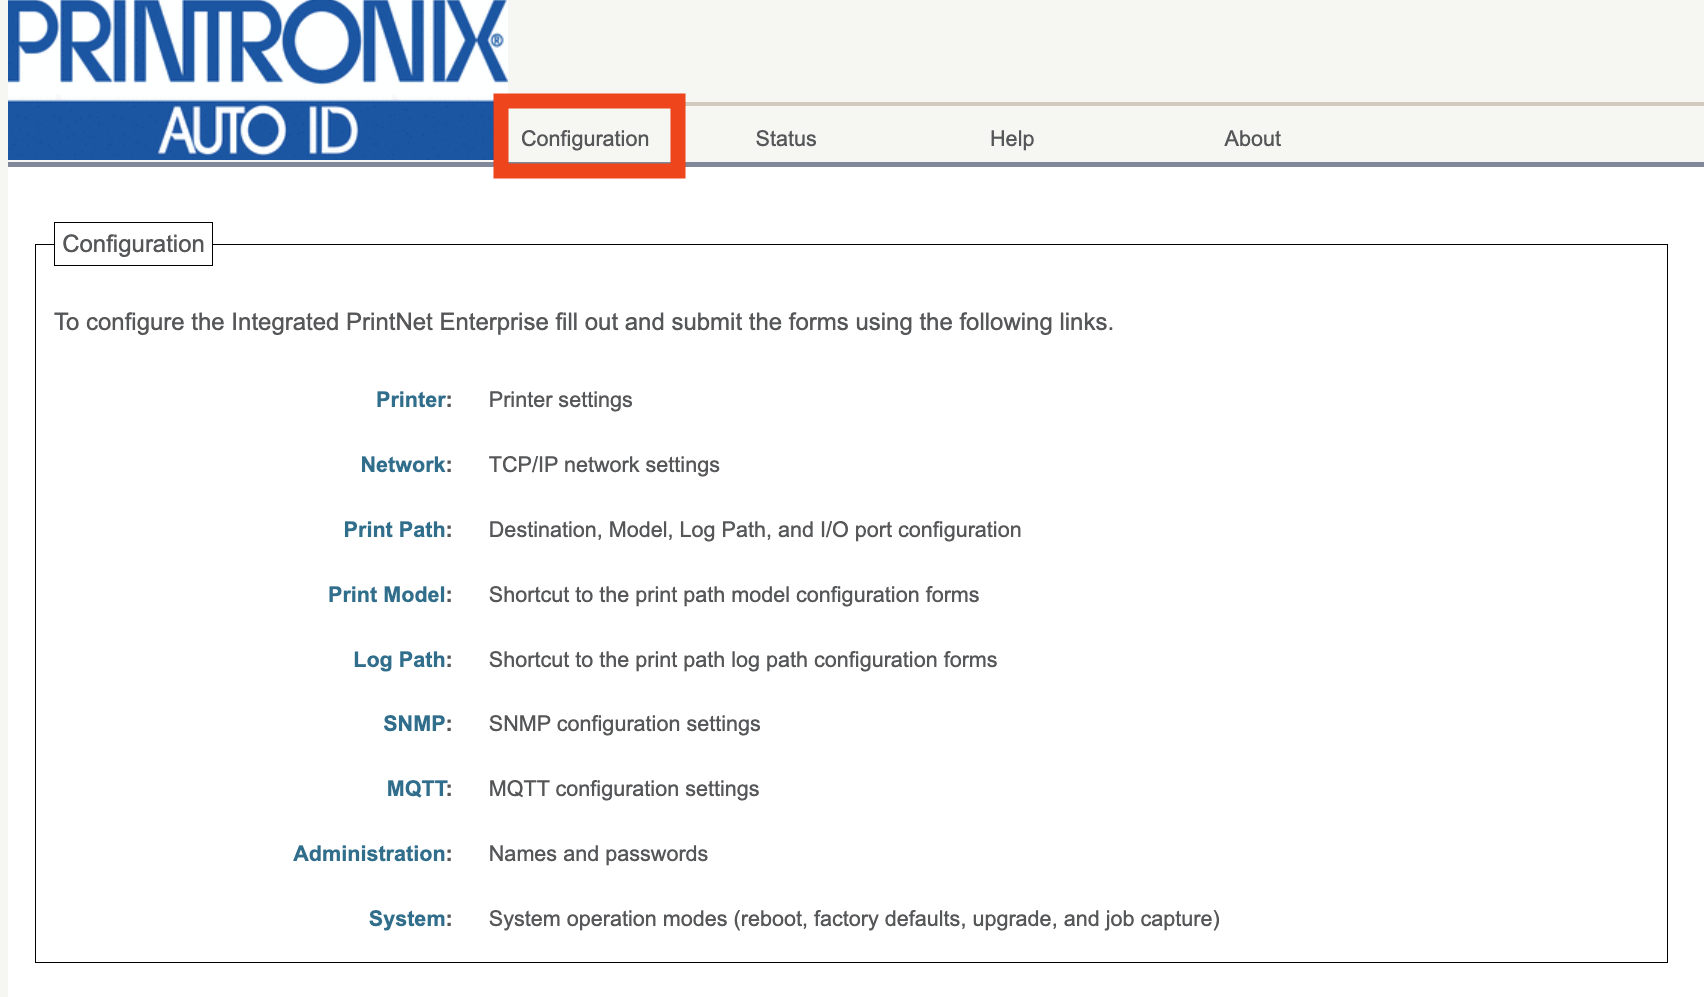](https://kb.simplerfid.com/uploads/images/gallery/2026-01/t96image.png) Click the ****System**** link at the bottom of the Configuration list: 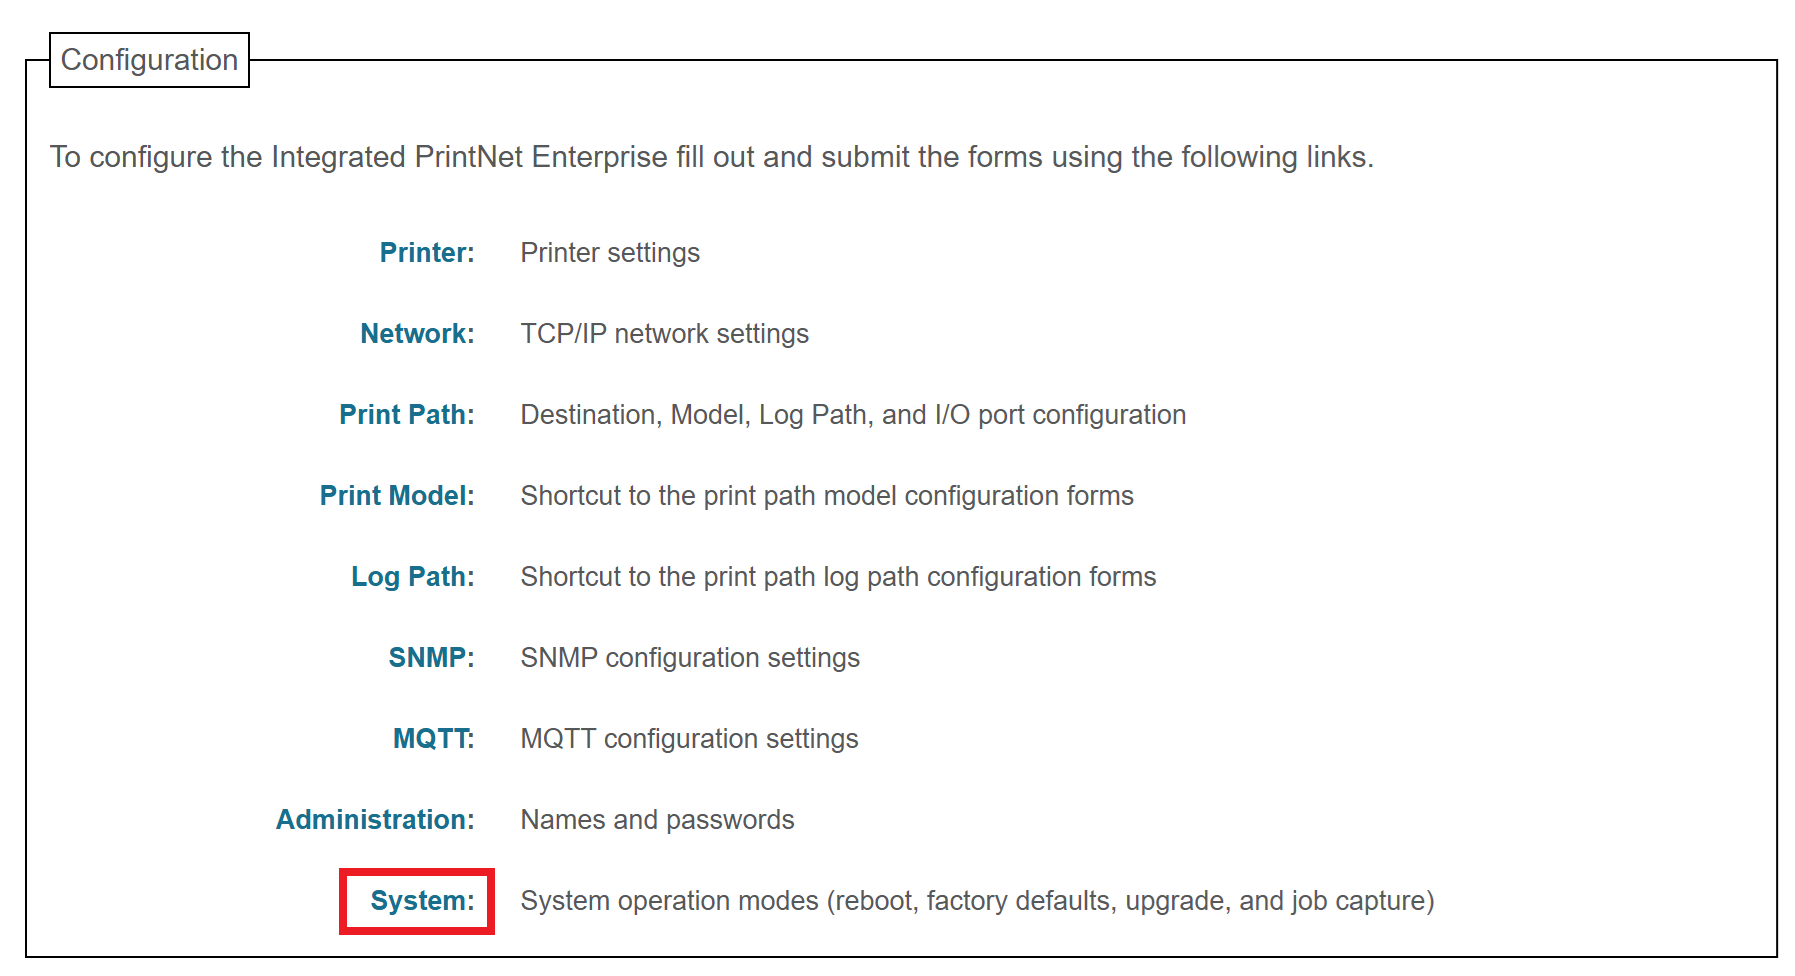You may be prompted for a username and password at this point. The username is ****root**** and the password is ****Print123!**** or whatever you set it to in the previous step. If ****Print123!**** doesn't work, try leaving the password field blank.
Next, click the ****Upgrade**** button in the System menu: 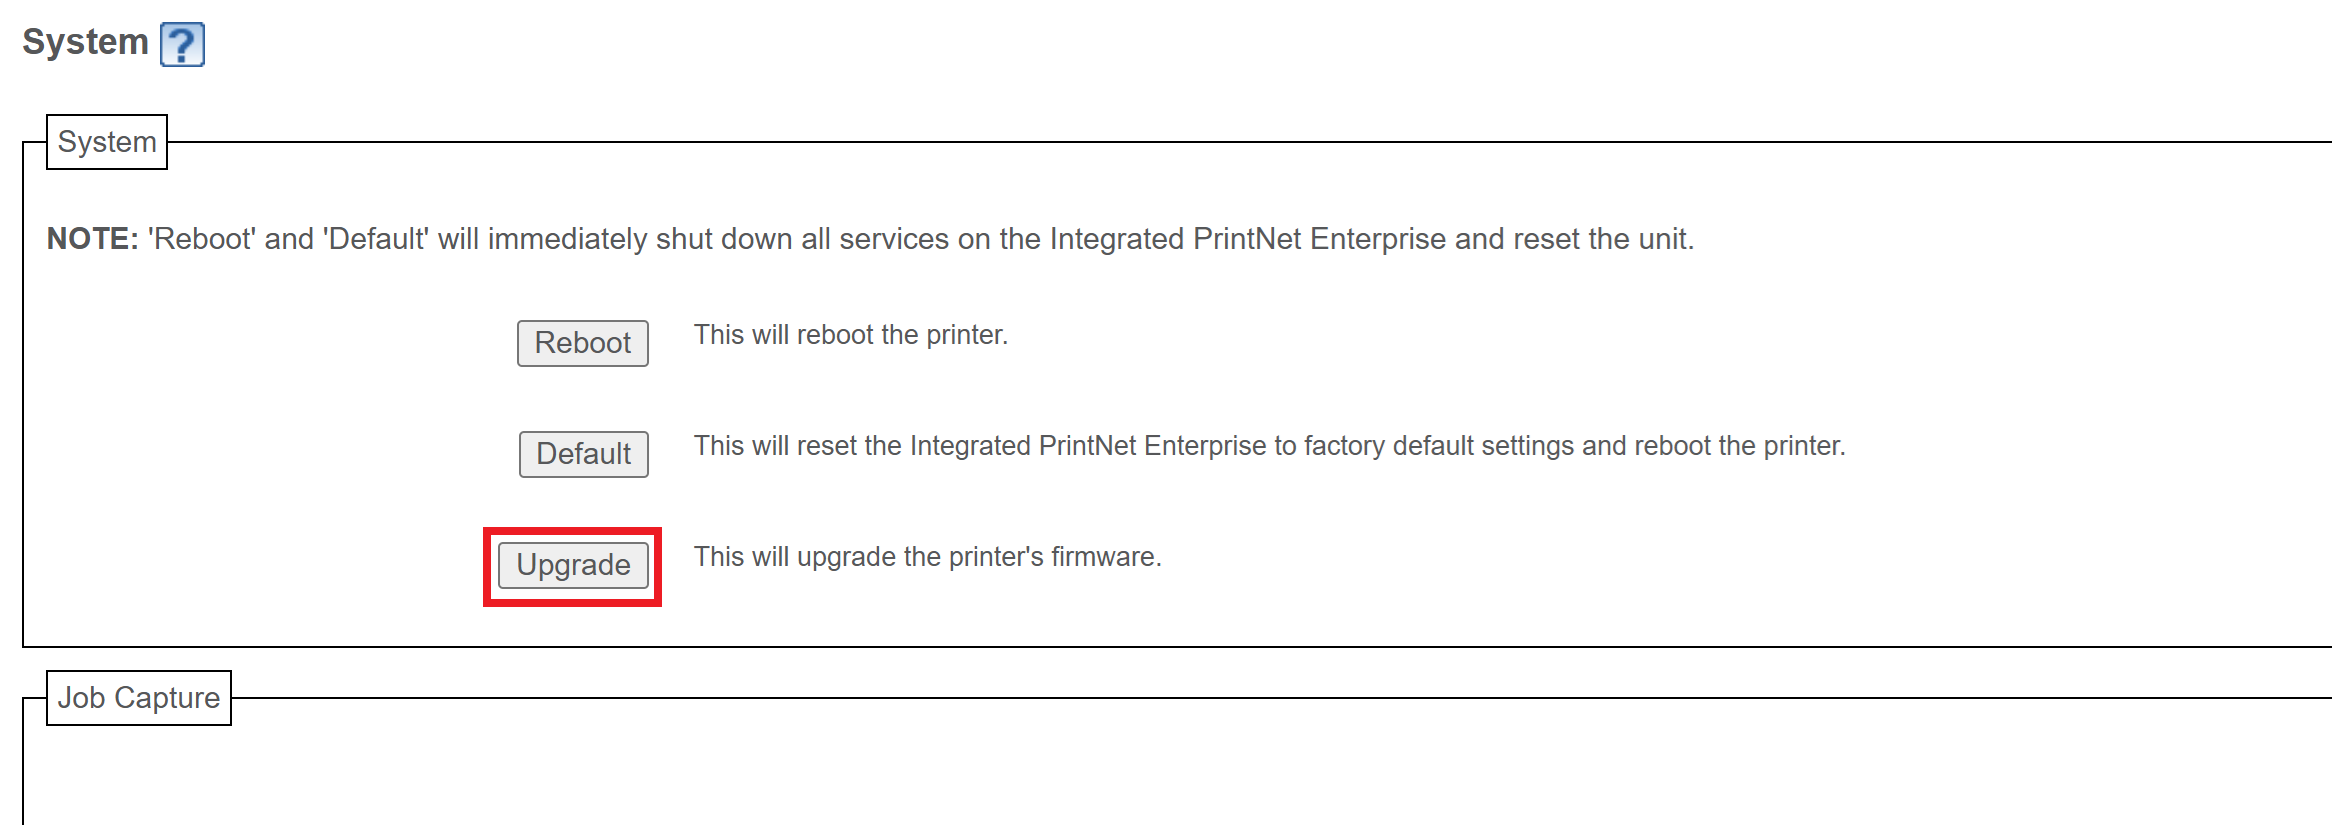 Click ****Choose File****, then choose the ****.prg**** firmware file you downloaded earlier. After selecting the file, you'll see its name listed next to the button. 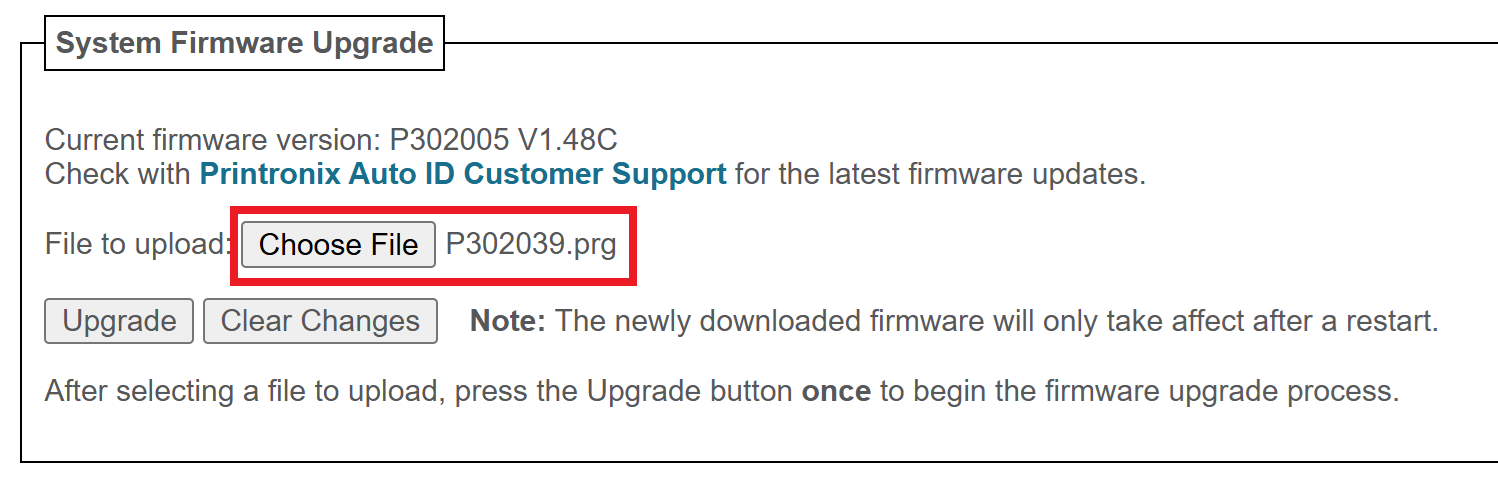 Click the ****Upgrade**** button. You'll be asked to confirm the operation: click ****OK****. 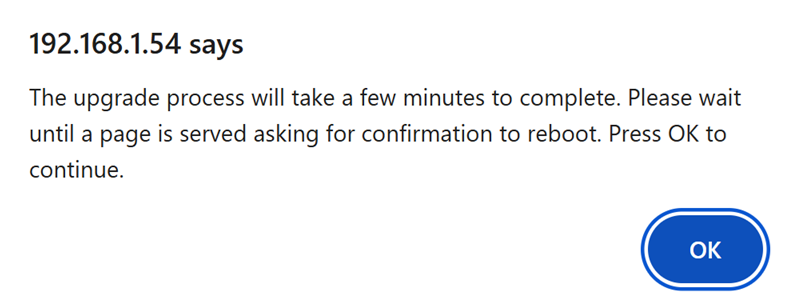 The firmware will now be downloaded to the printer. You should see a message on the printer stating that the Download is in progress: [](https://kb.simplerfid.com/uploads/images/gallery/2025-07/ZNPimage.png) When the printer has downloaded the firmware, the web page will prompt you to perform a restart. Click ****Yes****.  After a few minutes, the printer will reboot itself and apply the update. During this time, the web page will be unresponsive. After ****~2-3 minutes****, the upgrade will be complete. ### Step 6: Restore your previous printer config Refresh the web page so you're back at the Configuration page.If you see a page asking you to set a password, we recommend setting it to ****Print123!**** to remain consistent with other guides. If you set the password to something else, make sure you store the password somewhere it can be retrieved later.
Click the ****Printer**** link at the top of the Configuration list.  Click the ****Configuration Management**** link near the top of the page:  Click the ****Choose file**** button, and select the ****Printer.ptx**** configuration file we created earlier. Then, click the ****Download**** button. 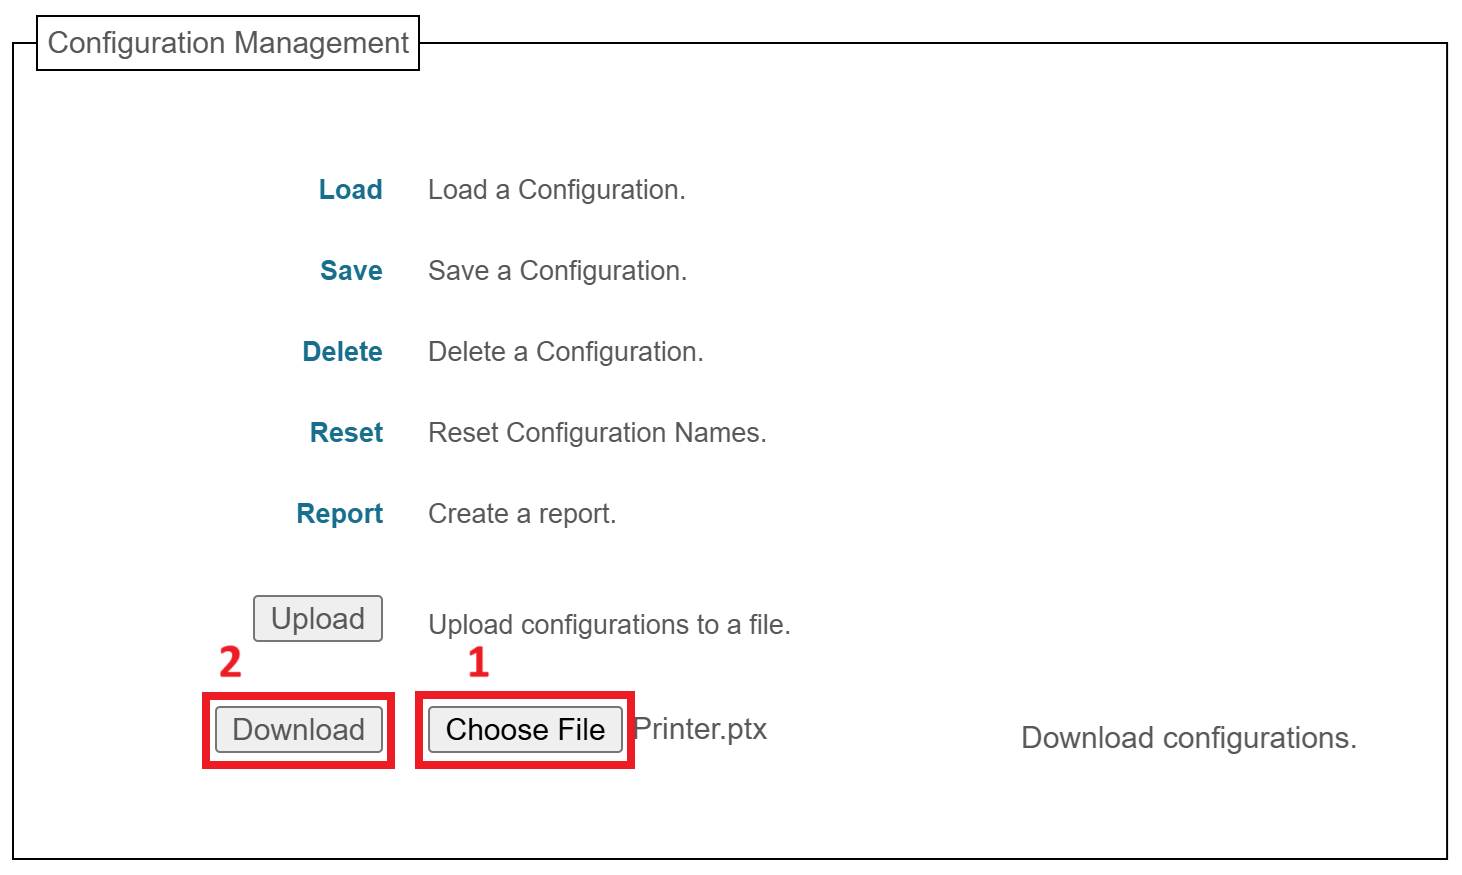 You'll see a message confirming that the configuration has been downloaded:  Wait for the page to be redirected, or refresh the page manually if it doesn't redirect within 15 seconds. Click the ****Load**** link at the top of the list. 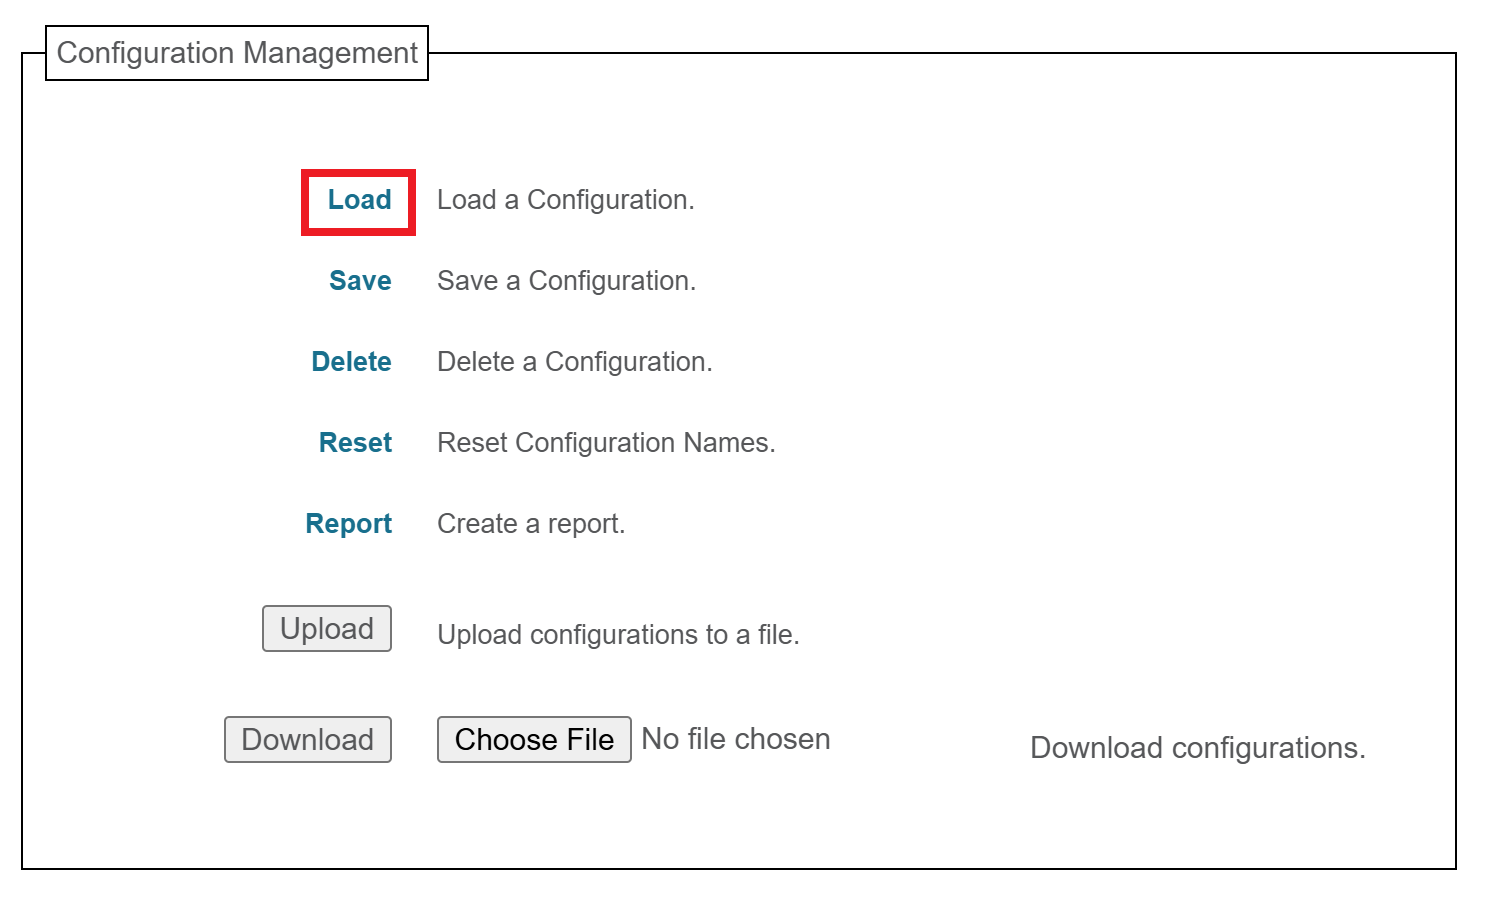 Make sure ****1**** is selected in the ****Load Config:**** dropdown, then click ****Submit****. 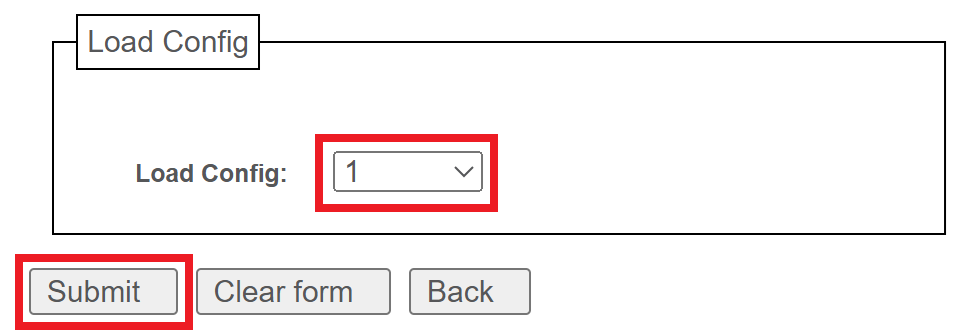 Your printer is now fully updated and configured; you can close the web page and use your printer as normal.If you have some issues configuring the printer, you can manually configure it: [Configuring Your Printronix Printer after a reset](https://kb.simplerfid.com/books/printer-set-up/page/configuring-your-printronix-printer-after-a-reset)
# Printronix: Updating Firmware via Flash DriveThis upgrade method will replace your printer's configuration with default values from Simple RFID, so you may need to adjust some settings after the upgrade to restore ideal print performance. If you'd like to preserve your current settings, [****update the firmware via the webpage****](https://kb.simplerfid.com/books/printers/page/printronix-update-firmware-via-webpage)****.****
****Make sure there is no important data stored on the flash drive before using this method. Formatting the drive will erase ALL data stored!****
### Requirements: - ****Flash Drive formatted with FAT32 and MBR partitioning**** - ****Printer set up with Power**** ### Step 1: Download the CCM Zip File Download the ZIP file from the link below which corresponds with your printer model: - ****T800 (T820, T830):**** [****T800 CCM 1.52E.zip****](https://dl.simplerfid.dev/T800%20CCM%201.52E.zip) - ****T6000e (T6204e, T6304e, T6604e):**** [****T6000e CCM 1.42E.zip****](https://dl.simplerfid.dev/T6000e%20CCM%201.42E.zip) ### Step 2: Extract the file onto your Flash Drive After downloading, open up file explorer to the file and Extract All from the zip file onto the Flash Drive. At this point the Flash Drive is ready. *****(Video instructions of this process can be found at the top of this article).***** ### Step 3: Turn off the Printer With the power cord still plugged in, switch the power off. [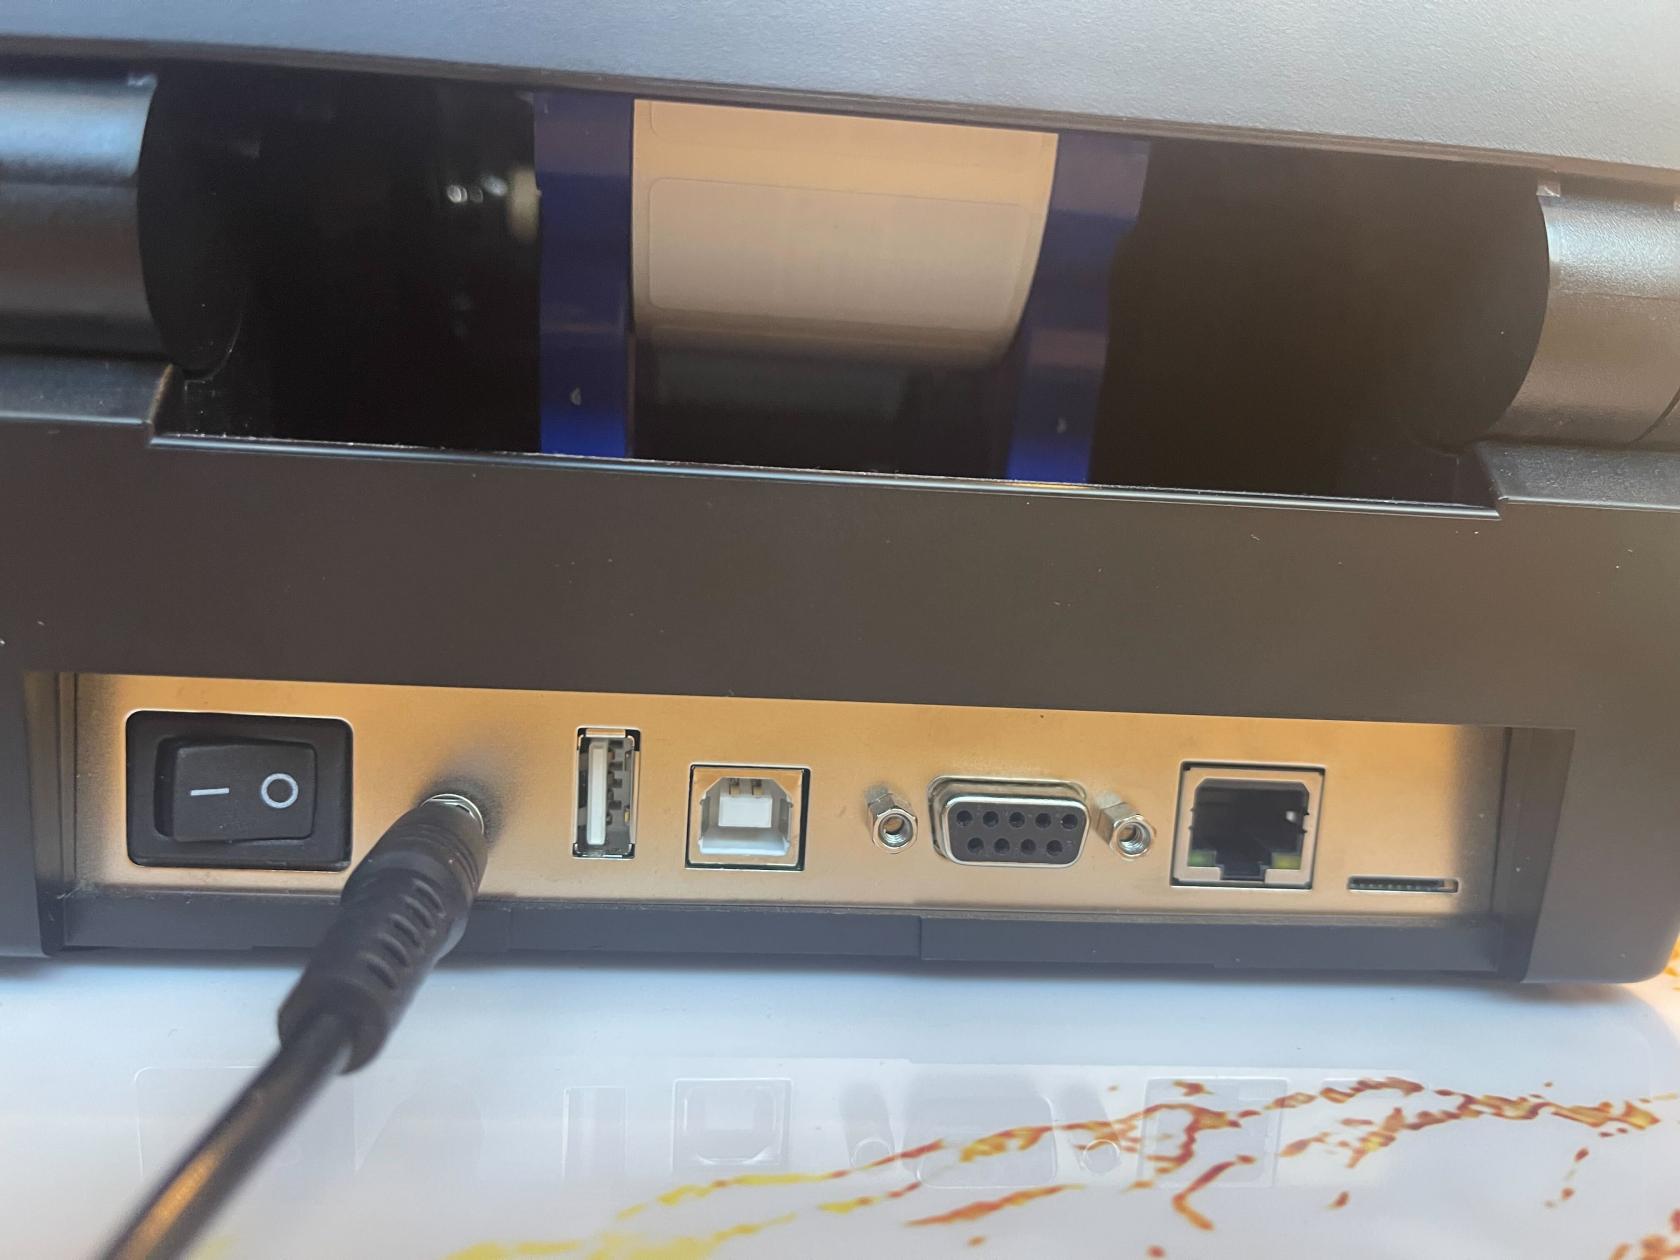](https://kb.simplerfid.com/uploads/images/gallery/2026-03/img-0155.jpg) ### Step 4: Plug the Flash Drive into your Printer \- Plug the Flash Drive into your Printer. [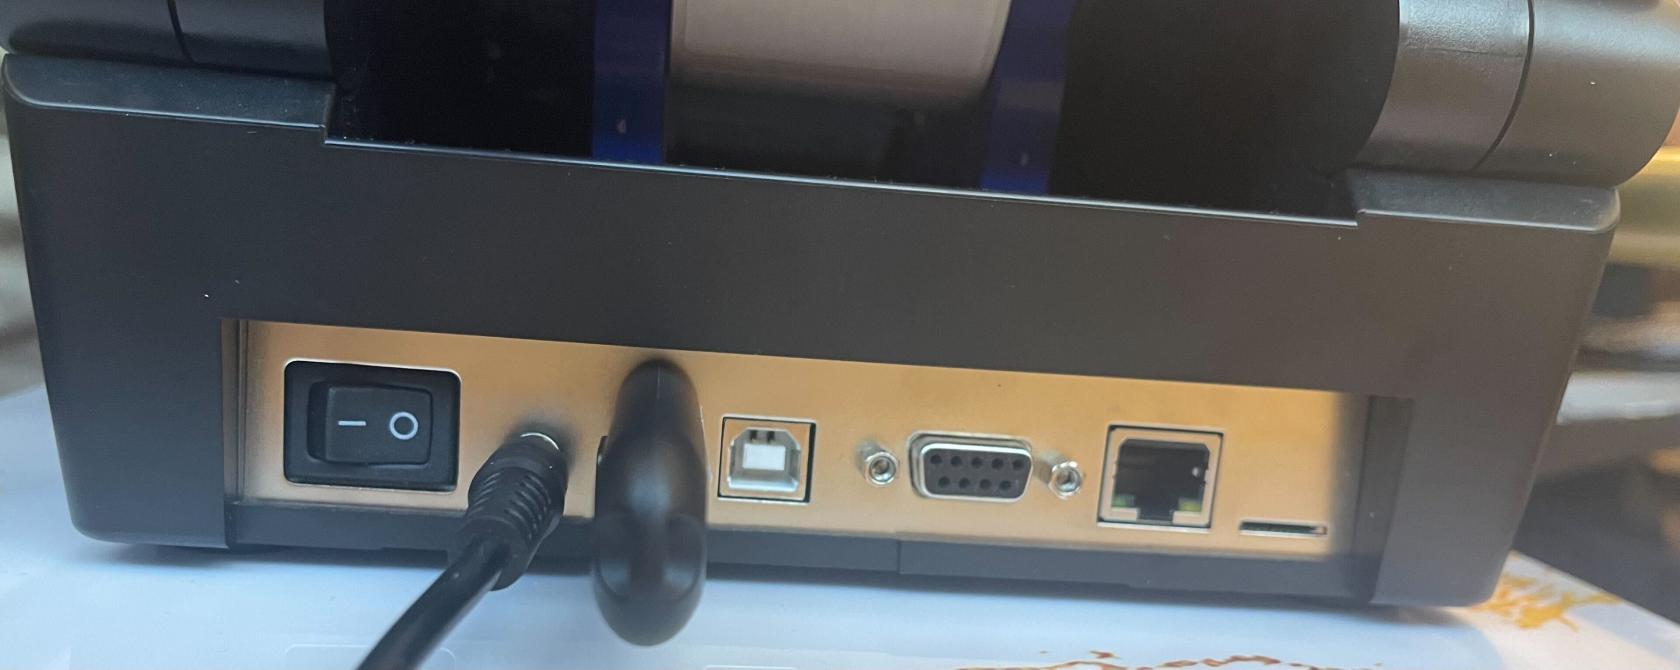](https://kb.simplerfid.com/uploads/images/gallery/2026-03/img-0156.jpg) ### Step 5: Power on and hold down the Up Arrow - While you flip the power switch on, hold down on the up arrow on the printer. Keep holding that down until you see *****"Config Module Detected"***** on the printer screen. ### Step 6: Wait for the Printer to Reboot - At this point you will have to wait for the printer to process the files and upgrade. Wait until you see the printer reboot (the printer may reboot multiple times) and a screen that says *****"Printer Config Installed"*****. ### Step 7: Unplug the Flash Drive and Turn off the Printer - Go ahead and turn off the printer and take the flash drive out. At this point the printer is configured and updated. Go ahead and plug in the rest of your connections and power on. *****(Remember to Calibrate before printing again).*****The printer will be in ****Ethernet**** mode after the upgrade. If you're using a USB connection, change the printer's Interface setting to ****USB**** (Pause the printer > Settings > Host I/O > Interface).