The following article is a part of a [Legacy Audit](https://kb.simplerfid.com/books/integrations/page/shopify-audit-compare) system that will eventually be fully replaced a [new Audit workflow](https://kb.simplerfid.com/books/auditing/page/audit-shopify) It describes the process of comparing and syncing your Simple RFID inventory to Shopify.
Legacy mode can be enabled or disabled by following the instructions here: [Audit Legacy Mode](https://kb.simplerfid.com/books/auditing/page/audit-legacy-mode)
#### ****Comparing**** On the Simple RFID app in Shopify, navigate to the ****Compare On Hand**** page [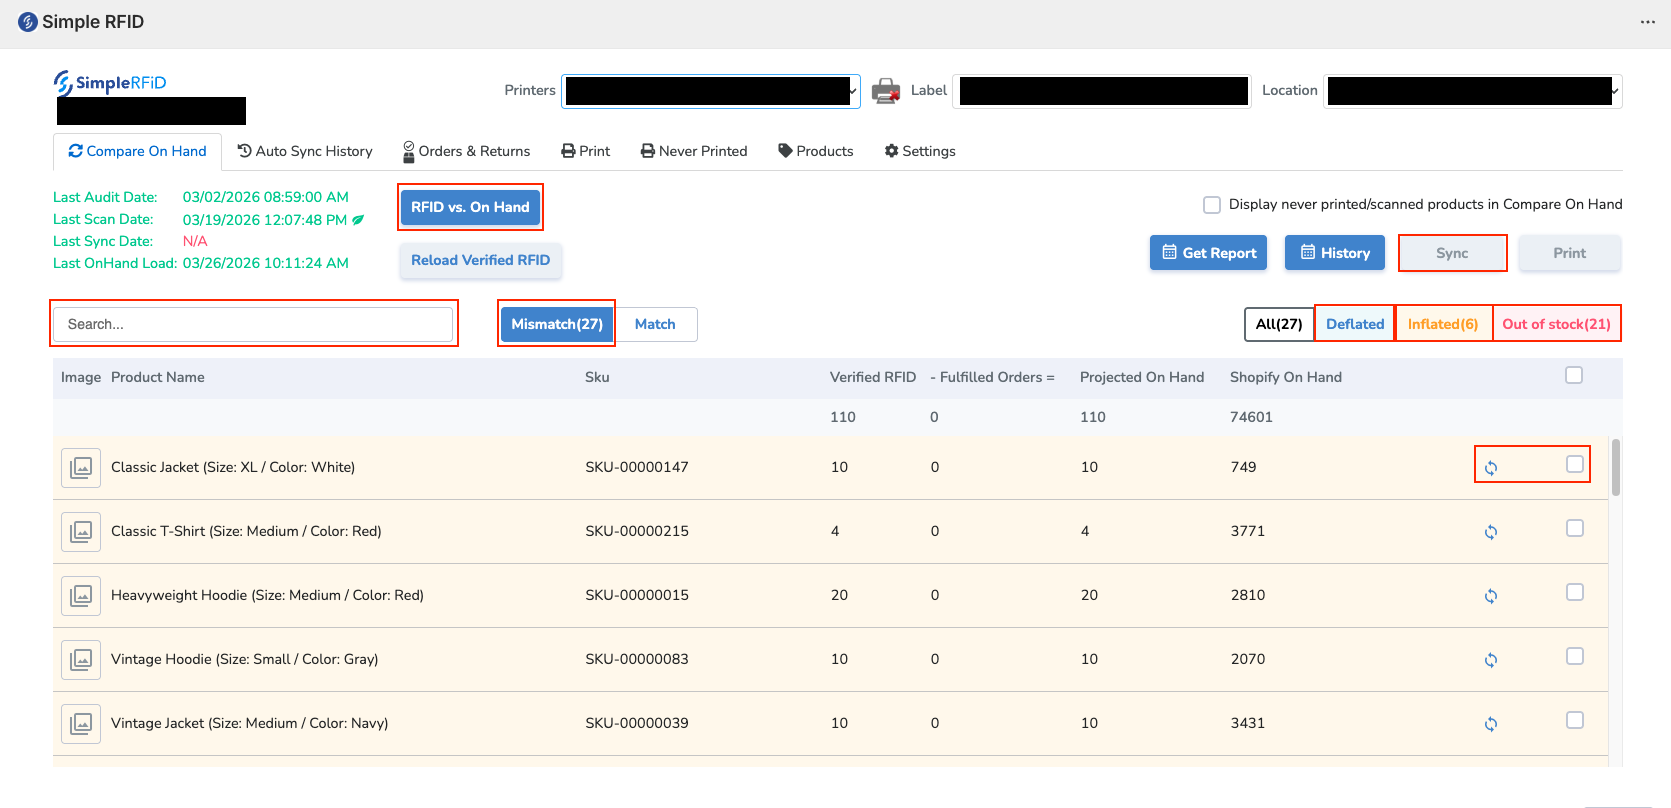](https://kb.simplerfid.com/uploads/images/gallery/2026-03/ADQbrave-screenshot-admin-shopify-com.png) To load your inventory, select ****RFID vs. On Hand****If you can't find a product, it may be due to the item never being printed and/or scanned. If this is the case, click the ****"Display never printed/scanned products in Compare On Hand"**** checkbox, and reload the page.
Once your inventory is loaded, you will see each product with a few different quantities: ##### ****Verified RFID**** The quantity in your Simple RFID inventory ##### ****Fulfilled Orders**** Shopify orders that were fulfilled since the last Simple RFID audit ##### ****Projected On Hand**** The number that will be compared to your current Shopify count ##### ****Shopify On Hand**** The quantity in Shopify --- The ****Mismatch**** section will show every product that is mismatched between Simple RFID and Shopify There are three possible types of mismatches: ##### ****Deflated**** ****Projected On Hand**** is higher than Shopify, possibly because items have been sold or transferred ##### ****Inflated**** ****Projected On Hand**** is lower than Shopify, possibly because tags haven't been printed or scanned ##### ****Out of stock**** ****Projected On Hand**** is zero, possibly because tags haven't been printed or scanned After verifying that a product has the correct quantity in the ****Projected On Hand****, you are ready to sync. #### ****Syncing**** On the far right of each product, there is a checkbox. Selecting this will add it to the sync list. To sync the products, click the ****Sync**** button on the top right. You can also sync a product individually by pressing the ****Sync**** button to the left of the checkbox --- You now know how to compare and sync products from Simple RFID to Shopify! # Shopify: Import orders ### Importing orders from Shopify to Simple RFID After creating an order, go to Simple RFID app on Shopify and click ****Orders & Returns****. [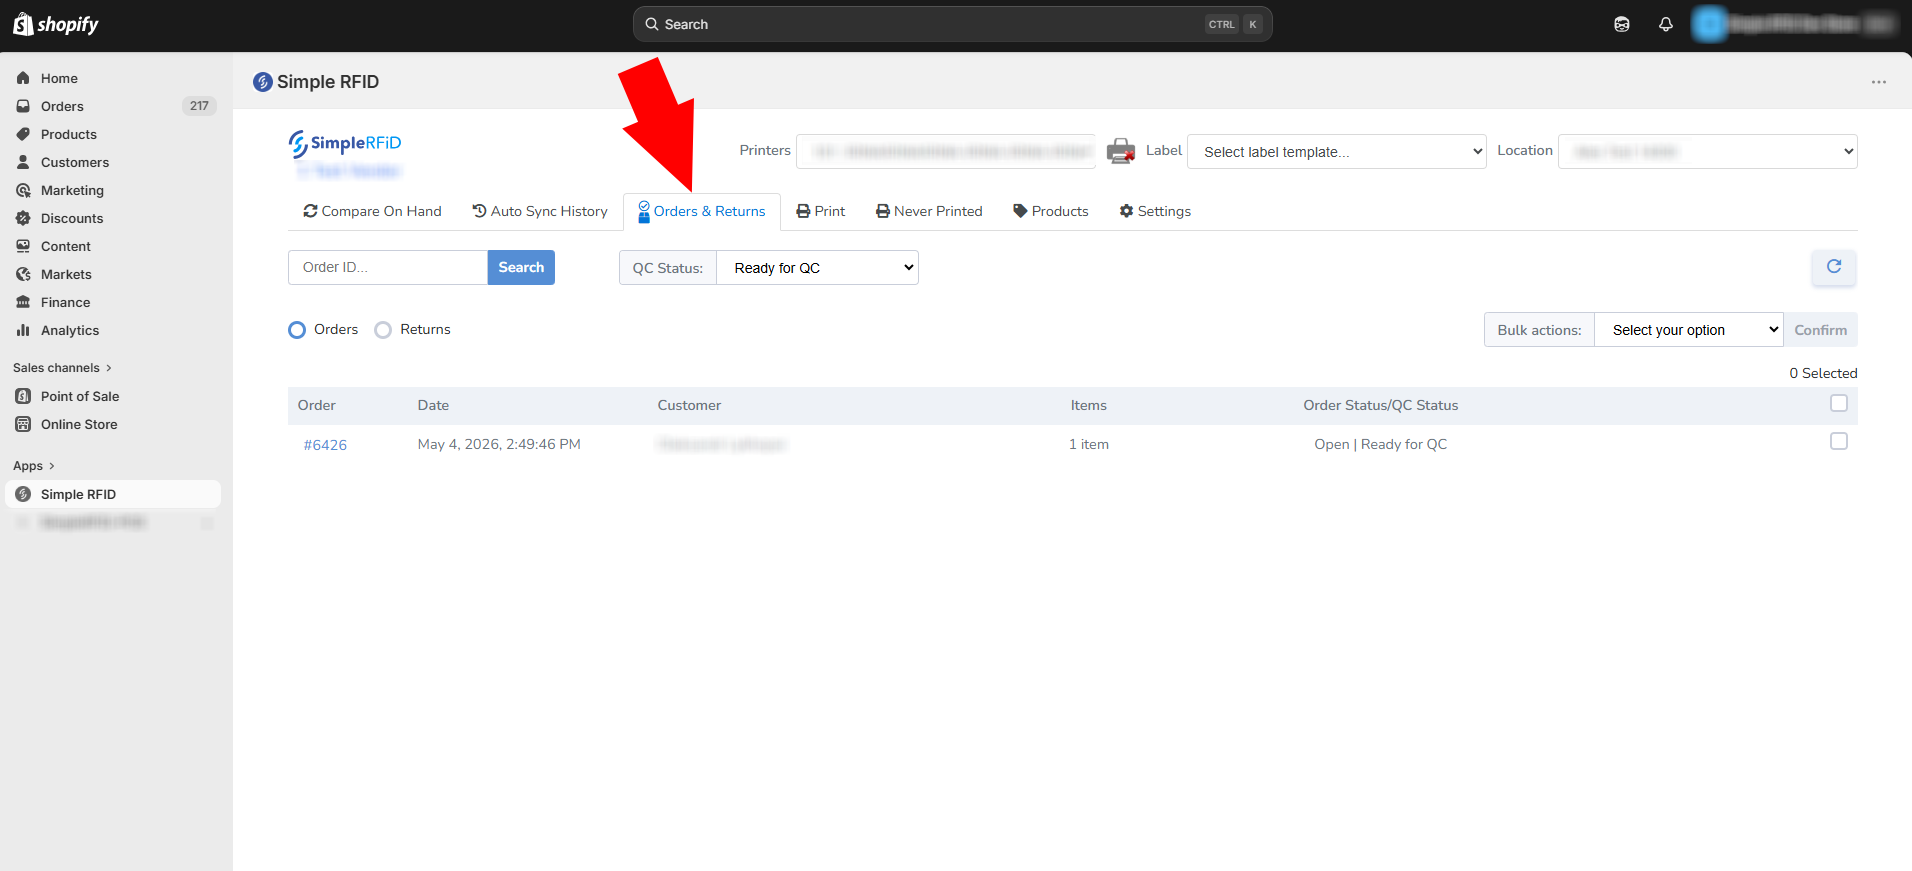](https://kb.simplerfid.com/uploads/images/gallery/2026-05/pujimage.png) Select orders that need to be imported. [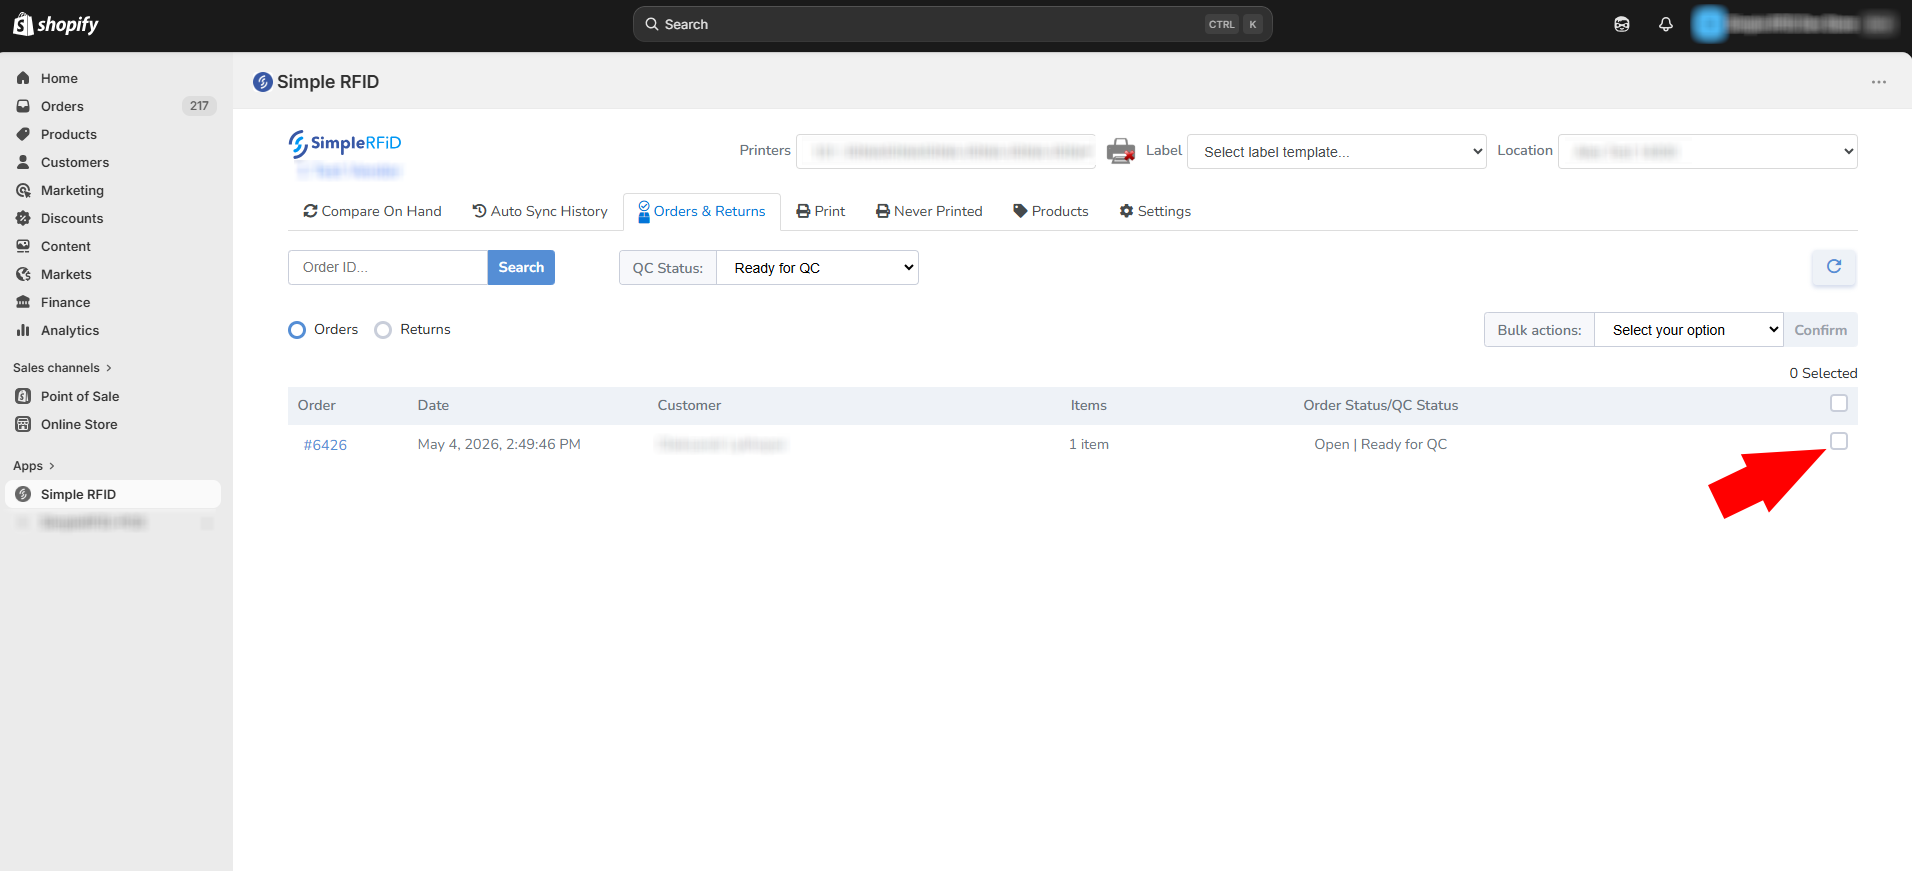](https://kb.simplerfid.com/uploads/images/gallery/2026-05/2kDimage.png) Select "Bulk Action" that is more suitable for your import process.****Submit for QC / Picksheet PDF**** will create a spreadsheet file that lists all the products included in the order.
[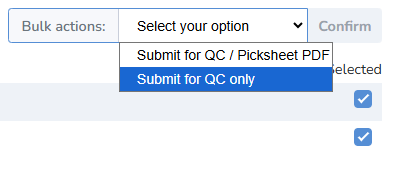](https://kb.simplerfid.com/uploads/images/gallery/2026-05/uR2image.png) Go to the [web portal](https://portal.simplerfid.com/) to see the new order under ****Orders**** tab. [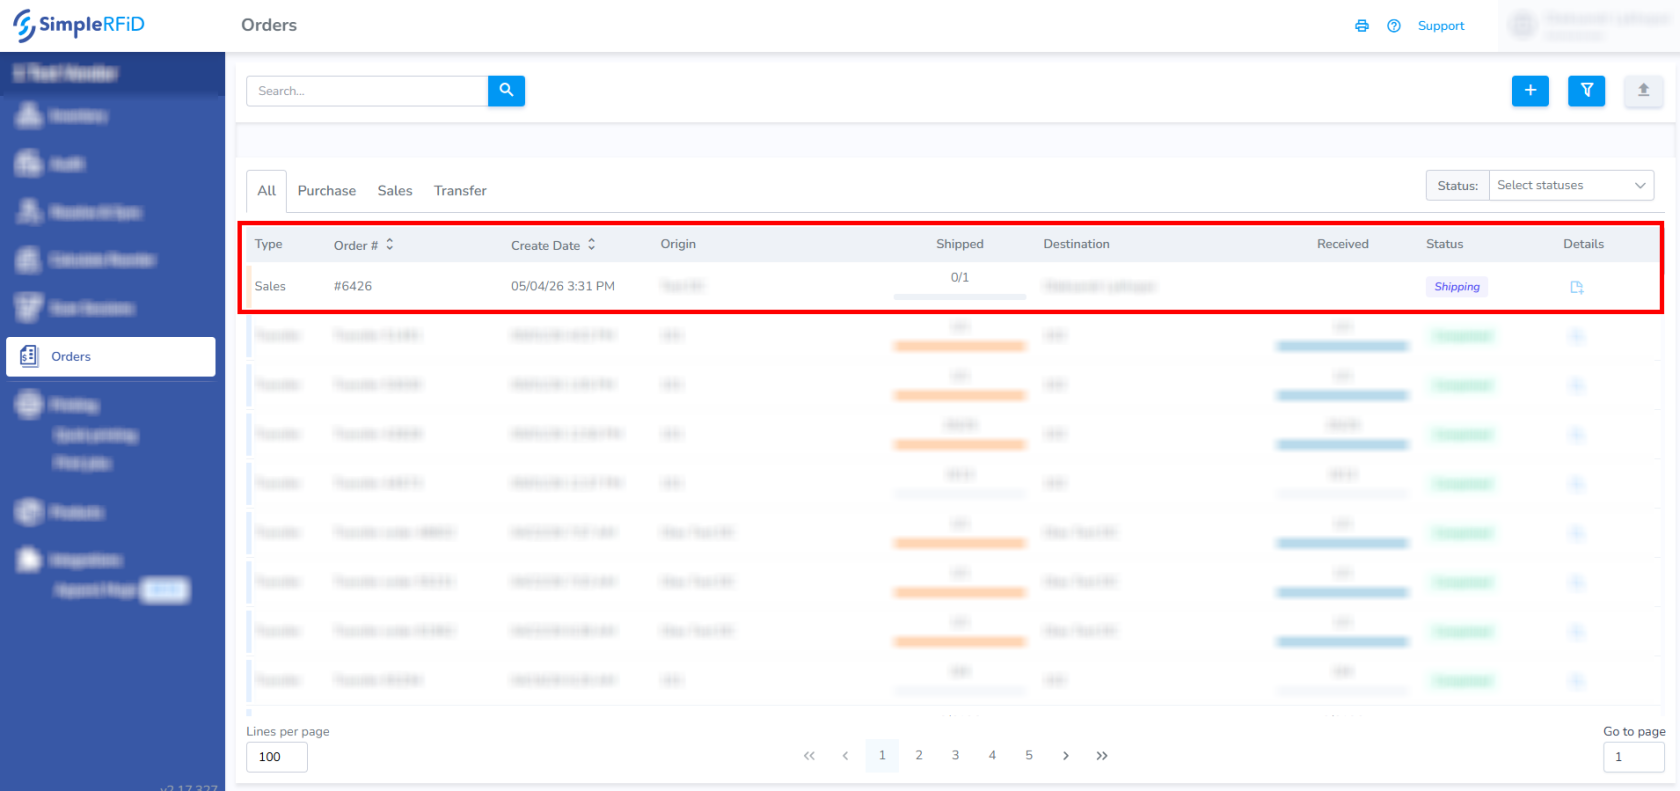](https://kb.simplerfid.com/uploads/images/gallery/2026-05/VuVimage.png) # Shopify: Audit & CompareThe following article is a part of a [Legacy RFID vs On Hand](https://kb.simplerfid.com/books/integrations/page/shopify-compare-sync) system that will eventually be fully replaced by the new [Audit & Compare](https://kb.simplerfid.com/books/auditing/page/audit-shopify) It is currently only available for customers who use our Shopify integration
Legacy mode can be enabled or disabled by following the instructions here: [Audit Legacy Mode](https://kb.simplerfid.com/books/auditing/page/audit-legacy-mode)
The most common question customers ask when scanning "When do I know when to stop?" To answer this question, we've introduced a new feature: ****Audit & Compare****. Currently in beta, this feature will pull your current On Hand quantities from Shopify for the selected location, and allow you to scan directly against those values and compare them in real time. Future updates will include functionality for other integrations, as well as direct spreadsheet uploads. --- ### Video Overview --- ### Instructions: 1. ****Install**** the latest beta version of the Simple RFID app on your mobile device. 2. On the dashboard, ****press**** *****Audit & Compare*****. 3. ****Press**** *****Audit & Compare with Shopify*****. If this option is not available, switch to a location that is connected with a Shopify location. 4. ****Press**** *****Start Audit*****. ****NOTE:**** You shouldn't make any changes to your Shopify inventory until the process is completed; otherwise you'll be working with outdated information during your scan. 5. When the Shopify On Hand quantities have finished loading, ****start**** your first scan. You'll see the Mismatched products count decrease as you scan tags, and the Matched products increase. 6. After your first pass, ****click**** Finish. Here, you'll see an overview of your first scan, including the percentage of your products that are Matched. 7. ****Press**** *****Control Scan***** to start your second pass. This will adjust the scanner settings to pick up any tags that may have been missed in the first pass. 8. ****Scan**** your inventory again until all of your products Match, or you stop picking up tags altogether. 9. Last, ****press**** *****Finish**** again to finish the Control scan. You'll see another summary of the total of your two scans. 10. Last, ****press**** *****Upload to Inventory***** and then *****Upload*****. This will replace your inventory counts with the scan you just completed.